


Ultimate Guide to DIY Camper Van Build [With Van Build Checklist]
Do you want to live in a van? Are you interested in learning how to DIY convert a camper van? We meticulously recorded every step of the DIY van build process. Any vehicle can be converted—a Ford Transit, a Ram ProMaster, or a Mercedes Sprinter. Whatever car you decide to convert, our detailed instructions should help you get there.
You may go to some of the most expensive places in the world on a tight backpacker's budget by using a converted van. But there are many other reasons to try out van living beside the ability to visit pricey locations. You won't ever have to be concerned about lodging, so you may go whenever and wherever you like. You can learn about van build must-haves, a step-by-step van build guide, and some mistakes to avoid in this post.

Top Considerations Before Van Build
Where to begin when trying to DIY a camper van on a budget? It's no secret that van life has been increasingly popular recently. The Internet is awash in pictures of stunning, expertly constructed vans furnished with exquisite woodworking and cutting-edge gadgets. It's simple to get carried away by the lovely van life photographs posted on social media. Still, it can be challenging to DIY build a van on a budget while maintaining cuteness, functionality, and coziness. The following three considerations will significantly affect your van build.
Which Van Type is Best for You?
Does Van conversion build? Sprinter? Toyota Transit? Promaster RAM? Bus Thrift? Camper Truck? There are a lot more alternatives than you might realize. The RAM Promaster is an attractive option for camper van conversions since it has squared rather than rounded corners in contrast to most of its rivals. However, Sprinters have one of the most extended wheelbases among all campervans on the market. Ford's Transit, in comparison, comes in a range of sizes, but its maximum wheelbase is 147.6 inches.
Are You Planning A Part-Time or Full-Time Van Life?
The essential query might be this one. You might not want to cut corners on several things if you intend to live in your RV full-time. On a summer road trip, you might be able to get by with an outdoor shower system for a few weeks, but if this van becomes your year-round residence and December arrives, things change.
What is Your Budget?
If you want to build your camper van for less money:
- Go with an older, used car.
- Before you buy, research the van.
- Look for any warning signs regarding vehicles from that year or any usual maintenance problems.
Older vans may have more mileage, but that should only sometimes be a turnoff. Older vans with proper maintenance can last up to 150,000 miles. A van's maintenance records will confirm that the previous owners took good care of and maintained the vehicle.
Van Build Must-Haves Checklist
Like living in an RV, tiny house, or yacht, van life is an alternative way of life. Outdoor enthusiasts, minimalists, and digital nomads are all fans of the van life trend. The van life movement is gaining momentum. There is much information on turning a vehicle into a camper van. Due to its rising popularity, knowing where to start or what's involved can sometimes take time and effort. You can start working if you follow this van build must-haves checklist!
1. Basic Van Build Tools
Some vehicles require more sophisticated equipment and materials because they are constructed with all the bells and whistles you could ever want. Others might be simpler, requiring the most fundamental tools and supplies.
- Tape Measure
- Drill
- Utility Knife
- Straight Edge
- Skilsaw
- Hole Saw Kit
- Kreg Jig
- Brad Nailer
2. Basic Van Build Must-Haves
The amount of preparation necessary will mostly rely on your van's condition when you buy it. You must remove everything from your van, whether it is brand-new or used, and clean it. Then, rebuild your van using the parts listed below.
- Ventilation
- Insulation
- Ceiling
- Walls
- Floor
3. Van Build Electrical System
The electrical system was, without a doubt, the DIY camper van's most challenging component. The objective was to create a simple, reliable, intuitive, and safe off-the-grid electricity solution. There are several aspects to understand while designing and constructing an electrical system, including solar power, alternator charging, shore power, 12 volts, 120 volts, inverters, battery banks, etc.
- AGM battery & 12V system
- Lighting
- Cooler/Heater Power
- Battery Bank
- Monitoring

4. Van Build Water System
It's worth the effort because running water and a hot shower distinguish "van camping" from "van life." The water system of a van is much easier to design than the electrical system. A water pump, fresh and gray water tanks, a sink, and basic plumbing supplies will all be sufficient.
- Fresh Water Tank
- Grey/Black Water Tank
- Sink
- Hot Water
- Plumbing Hardware
5. Van Build Kitchen System
The kitchen will see a lot of use from those who want to cook inside their vehicle. The following things are frequently seen in van kitchens, just like in a typical house kitchen. A propane system must be constructed if you wish to cook inside your van because it has more energy than a battery.
- Propane System
- Cooktop
- Paper Towel Rack
- Sink
- Mini Fridge
- Coffee Maker
- Plate, Bowl, and Cooking Stuffs
6. Van Build Interior System
Most camper van builders want a stunning and practical inside that assembles fast and efficiently, not a year-long endeavor fraught with frustration and seemingly insurmountable obstacles. The items below allow you to configure the interior system of your van.
- Bedding: Bed, Bag, Pillow, Quilt
- Toilet
- Storage: Bedroom, Garage, Overhead
- Workspace
7. Van Build Exterior System
An exterior system can enlarge your living area. One person can silently spin out the awning for pleasant shade and weather protection in a minute. Support legs can be lowered or fastened to the side of the van; the canopy angle is adjustable. The canopy is fade-resistant and flawless.
- Sliding
- Rear doors
- Awning
- Exterior Shower
- Bike Wash
>> Van Build Must-Haves Checklist PDF
The Step-by-Step Van Build Guide
Getting caught up in the idea that your DIY van project must include everything, from a bathroom to a kitchen sink to a 12V fridge, is simple. Just keep in mind that sometimes less is more. Configuring your van to accommodate everything in such a compact space can feel like a riddle, but it's all part of the joy of a DIY van build. If you follow this step-by-step instruction manual, building a van will be as simple as possible.
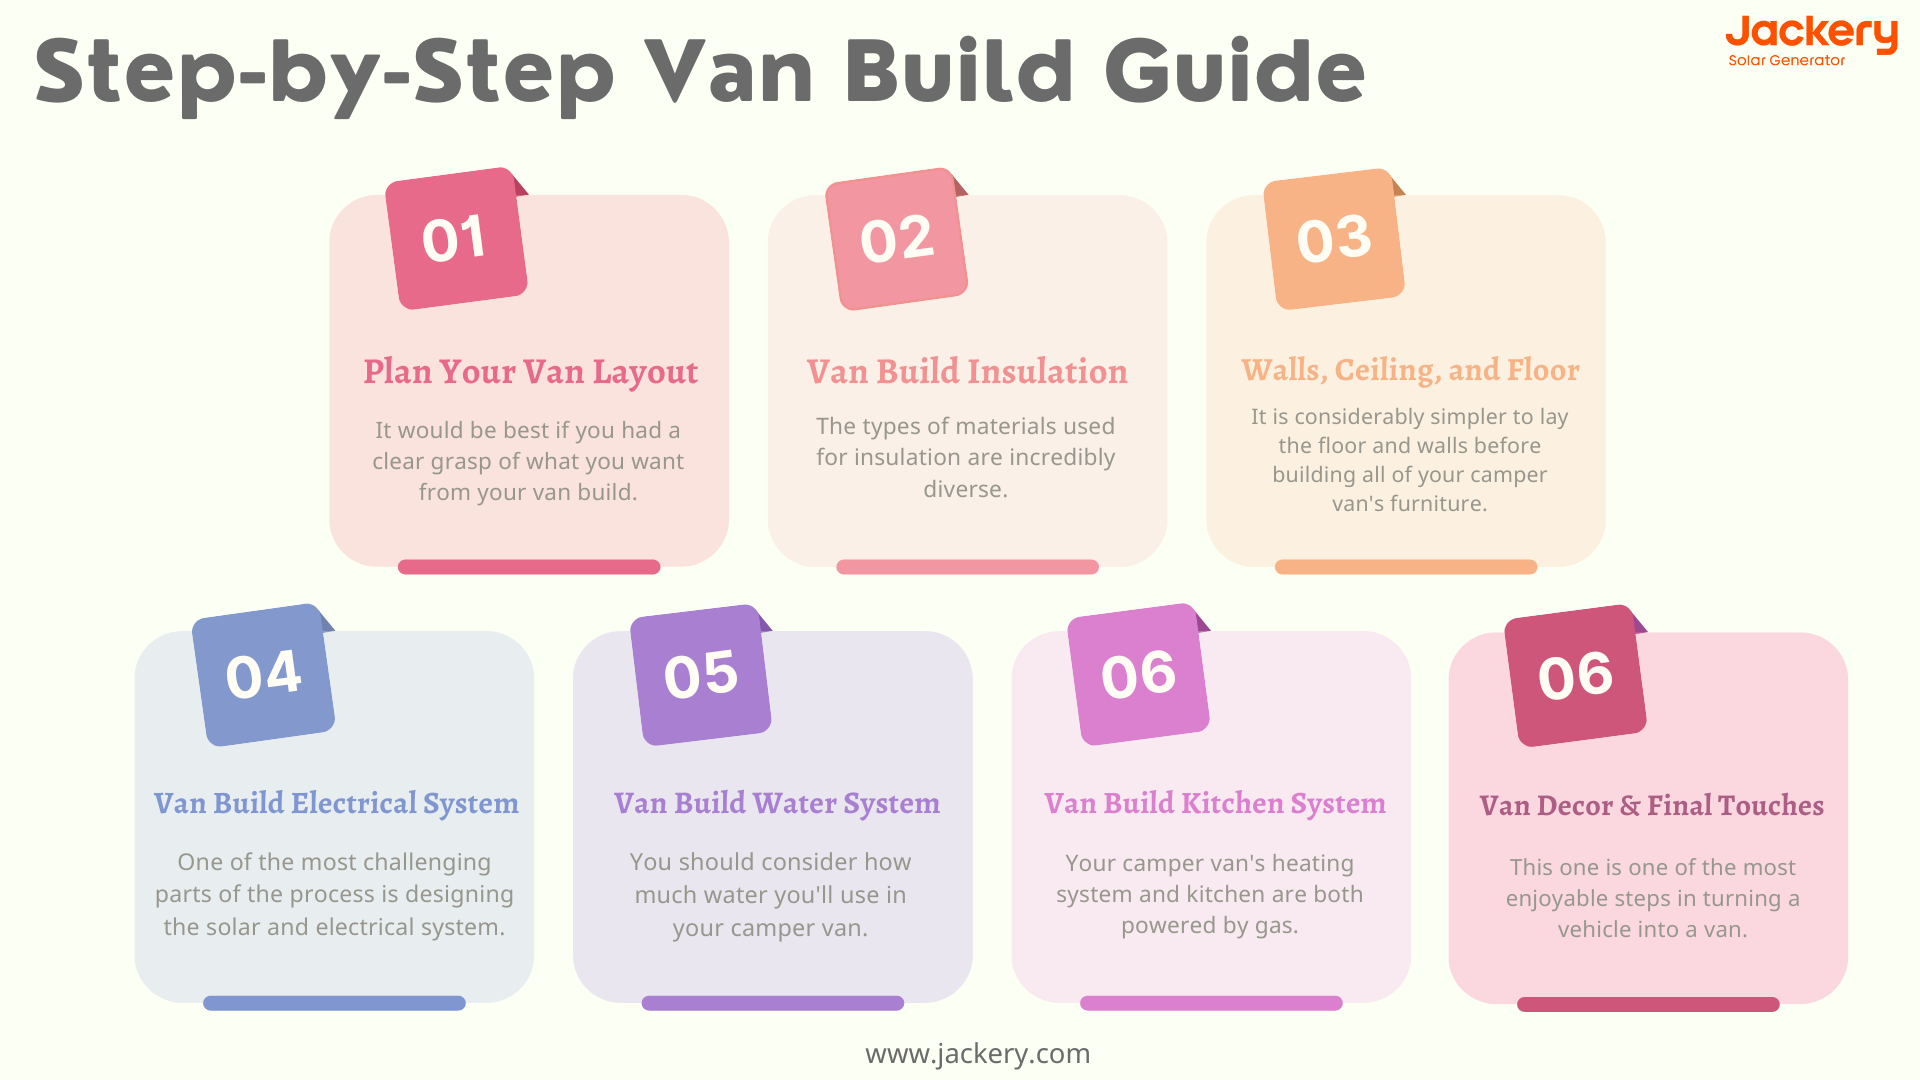
Step 1: Plan Your Camper Van Layout
It would be best if you had a clear grasp of what you want from your van build before you can start seriously designing it. It is different than the goal of planning your van layout to complete your entire project at once. The list's purpose is to help you visualize the effort necessary and provide inspiration to start.
It doesn't have to be a masterpiece as long as you grasp what those strange squiggles and squares imply. If you and your partner are in a van, you should each sketch out some ideas individually before comparing them to see what you have in common and where you would need to make some concessions. While there are countless design options, these standard floor plans for typical van layouts might help you get started.

Step 2: Van Build Insulation
The types of materials used for insulation are incredibly diverse. Your budget and the kind of weather you'll be traveling in are two important considerations when choosing the type and thickness of insulation for your camper van. Quality insulation is a wise investment if you want to use your camper van in bitterly cold climates.
It would help if you covered the floors of your camper van with insulation boards and then covered those insulation boards with plywood to insulate them. You can use expanding foam as a fixed or glue to attach the insulation boards. Although the expanding set dries significantly faster, glue is slightly neater.
Step 3: Walls, Ceiling, and Floor
Given that you can generally work with straight lines and avoid cutting furniture around, it is considerably simpler to lay the floor and walls before building all of your campervan's furniture. You can select from three primary varieties of flooring: hardwood, vinyl, and cork. Cork flooring is the most environmentally friendly and safe alternative for camper van flooring.
The materials you choose for your camper van's walls and ceiling will significantly impact how it looks, so make wise decisions! For camper van walls and ceilings, tongue and groove planks, plywood, and polished hardboard sheets are some of the most popular building materials. Tongue and groove planks, in comparison, are more challenging to install but look beautiful in a campervan. Pine is one of the most widely used options since it is inexpensive, light, and airy.
Step 4: Van Build Electrical System
One of the most challenging parts of the process is designing the solar and electrical system, where you'll need to do the most research. In the end, you must determine the size of the system required to accommodate your daily usage. It's time to buy the essential parts of your campervan's electrical system, such as a power bank, charger, solar generator, fuse box, and more, after determining how much power you need.
If you need a straightforward electrical system and want to charge your gadgets anywhere, the Jackery solar generator is the ideal option. I advise everyone who intends to go camping, work outside frequently, or go car camping to do this. Utilizing the Jackery portable solar panel will allow you to recharge this battery. The solar panel is fantastic because it folds up extremely little and is portable to the fullest extent. As a backup system, you can use a battery and solar panels. This is the best option if you only require a little electricity and are concerned about installing a whole solar and electrical system with wiring and all the extra parts.

Step 5: Van Build Water System
Like electricity, you should consider how much water you'll use in your camper van before installing the water system. Several significant variables, such as the shower in your vehicle, will determine how much water you use. In your car, how many people will there be? Choose a larger water tank if you anticipate using much water in the camper van.
Utilizing a filter system that can reuse shower water is another alternative for your water system. This shower system uses a 3.5-gallon water tank designated for the shower to function. Before returning through the faucet, the water circulates through five different filtration stations after reaching the drain.
Step 6: Van Build Kitchen System
Your camper van's heating system and kitchen are both powered by gas! Installing a refillable LPG canister inside the van, either underslung or in a sealed compartment, is one of the most common solutions. The LPG is inexpensive and simple to replenish. The gas must be connected to your appliances with copper pipes to be used.
The kitchen will see a lot of use from those who want to cook inside their vehicle. Van kitchens frequently have a sink, faucet, refrigerator, towel, and other appliances, just like a typical house kitchen. Your life will be more vibrant if your camper van kitchen is well-equipped.
Step 7: Van Decoration & Final Touches
This one is one of the most enjoyable steps in turning a vehicle into a camper. It's time to transform this van into a house now that all the hard labor has been finished. Ultimately, the finishing touches and décor tie a DIY van build together and give it its own identity. There are numerous methods to transform your van into a house, such as installing a lovely tile backsplash in the kitchen and utilizing vibrant materials and upholstery.
Top Mistakes to Avoid in Van Build
Numerous considerations must be taken once your camper van build gets underway. First and foremost, two factors that will be in your thoughts are the aesthetic and floor plan. These factors are significant, especially the floor plan. A van build, however, can be made or broken by several factors that might need to be noticed.
- Check your van before purchasing: Many van builders start with the best intentions only to run into issues with the base vehicle. Although it shouldn't be, buying a van can be the trickiest portion of the van project.
- Consider where to place your water system:Many people claim that the van's corner is wasted space and that there is only so much more you can put there than storage. Some mobile homes offer the option of external water supply filling.
- Add circulation fans:It's a common misperception that roof fans are only used to cool the van's interior. While breathing in some cold, fresh air on a cool evening can be pleasant, fans have a more crucial function.
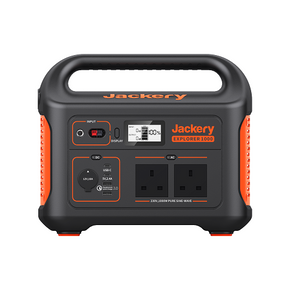
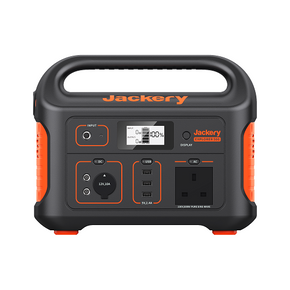
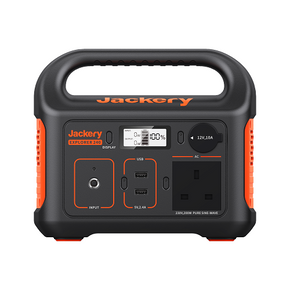
Van Build Solar Power with Jackery
Jackery solar generator is a renewable and rechargeable solar battery-powered generator. The solar power generator teams up with solar panels to collect solar energy, transform it into electricity, and charge appliances in your van life. Jackery solar generators are simple to use as a source of power. To turn sunlight into electricity, you must connect portable power stations to solar panels and place them in the sun.

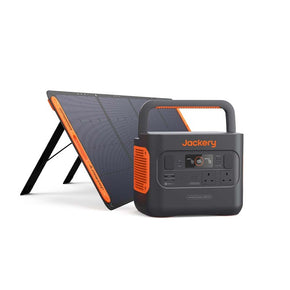
Jackery Solar Generator 2000 Pro
Jackery Solar Generator 2000 pro combines Explorer 2000 Pro and SolarSaga 200W panels to charge all your small and large electrical appliances. With a high battery capacity of 2160 Wh, The Jackery Solar Generator 2000 Pro can power most outdoor gear and devices, including cellphones, laptops, e-bikes, small coolers, etc. When using 6 SolarSaga 200W solar panels, you can fully charge the power bank in 2.5 hours, compared to just 2 hours when using an AC wall outlet.
|
Product |
Capacity |
Dimension |
Input&Output |
Charging Time |
Appliances |
|
Jackery Solar Generator 2000 pro |
2160Wh |
15.1 x 10.5 x 12.1in (38.4x26.90 x30.75 cm) |
4AC, 1 Carport, 3 USB, 1 USB-C, 1 QC3.0, 1 USB-A |
2.5 hours to recharge with Explorer 2000 Pro and 6x SolarSaga 200W solar panels |
Light(13W) 100H, TV(60W) 22H, Cooler(21W) 70H, Heating Blanket(40W) 68H, Coffee Maker(1000W) 2.2H, Electric Stove(1150W) 90Min |
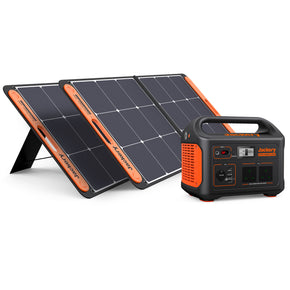
Jackery Solar Generator 1500 Pro
Jackery Solar Generator 1500 Pro combines Explorer 1500 Pro power station and SolarSaga solar panel. It has an extended 1534 Wh battery that can power 85% of the electrical equipment in your house. The power bank enables you to charge the battery from empty to 80% in about 4 hours, thanks to the enhanced MPPT technology.
|
Product |
Capacity |
Dimension |
Input&Output |
Charging Time |
Appliances |
|
Jackery Solar Generator 1500 Pro |
1512Wh |
14 x 10.4 x 12.7 in (35.6 x 26.4 x 32.3 cm) |
3AC, 1 USB-C, 1 QC3.0, 1 USB-A, 1 CARPORT |
4 hours to recharge with Explorer 1500 Pro and 1x SolarSaga 200W solar panel |
Mini Cooler (60W) 21H, Ice Shaver (700W) 120 Min, Toaster (650W) 130 Min, Microwave Oven (1000W) 68 Min, Electrical Grill (900W) 75 Min, Coffee Maker (500W) 130 Min |
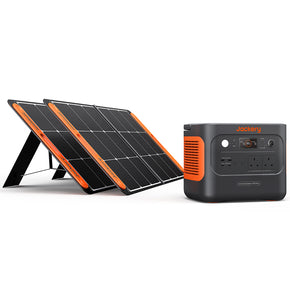
Jackery Solar Generator 1000 Pro
Jackery Solar Generator 1000 Pro is faster and can charge fully in 1.8 hours. The Jackery Solar Generator 1000 Pro is simple to carry and store due to its lightweight design and foldable handle. An appliance charger can receive steady power via a pure sine wave inverter. The solar power station also stands out for having a low self-discharge rate, which enables it to operate for 365 days at 80% battery capacity.
|
Product |
Capacity |
Dimension |
Input&Output |
Charging Time |
Appliances |
|
Jackery Solar Generator 1000 pro |
1002Wh |
13.39 x 10.32 x 10.06 in (34 x 26.2 x 25.5cm) |
3AC, 2 USB-C, 2 PD Ports, 2 USB-A, 1 DC Carport |
1.8H to recharge with Explorer 1000 Pro and 4x SolarSaga 200W Solar Panel |
Light(13W) 60H, TV(60W) 13H, Cooler(21W) 34H, Heating Blanket(40W) 35H, Coffee Maker(1000W) 4H, Electric Stove(1150W) 40Min |
Final Thoughts
The best thing about van life is that it doesn't require special skills or a large budget. If you have the necessary tools and information, you may quickly begin living in a van. Knowing all the options available for your camper can help you determine what you need versus what you want. Following this article's step-by-step van build guide, you can quickly get ready for your van project and get going. Additionally, Jackery is the best brand to equip your solar electrical system with power banks and solar panels. It is the industry leader in cutting-edge portable power and environmentally friendly outdoor energy solutions, making it the perfect backup power source for your van build!
