


One of the most intricate and intimidating tasks in your van conversion is the wiring and installation of the electrics. We have invested numerous hours studying campervan electrical systems to compose this guide.
This guide will discuss the planning and setting up of your campervan wiring diagram. We'll review the many parts, list essential tools for setup, discuss the importance of determining your power requirements and offer insightful advice to help you set it right.
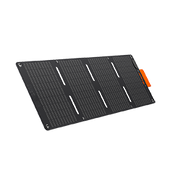
Also, invest in a Jackery Solar Generator to charge your campervan appliances with renewable energy. You can even bring it inside your van because it doesn't make any noise or give off any pollution.
|
Key Takeaways: |
|
Before creating your wiring diagram, assess the appliances you'll use and their power requirements to determine your system's specifications. Some tools for wiring diagrams are necessary, such as wire strippers, crimpers, and heat guns for efficient installation. Designing an organised wiring diagram requires taking wire sizes and routes and keeping safety features like circuit breakers in mind into consideration. If you want to try a solar system with a limited budget, we suggest you take a Jackery Solar Generator 2000 Plus or 1000 Plus in your campervan to charge appliances. To avoid some mistakes, plan your electrical system before mounting roof components and close battery placements to minimise cable lengths. |
Campervan Wiring Diagram in The UK
You don't need to search any more for a self-built campervan wiring diagram compatible with the UK. In the UK, this is one of the most common configurations. It is appropriate for a two-person RV trip with a daily power need of 2 kWh.

Explanation of 12V Electrical System
A 12-volt system is a type of electrical power configuration where the primary power source is a 12-volt battery. Because the 12V system is so efficient and effective at powering a wide range of gadgets, it is frequently chosen by campers, fishers, and explorers.
General Campervan Wiring Diagram Regulations
Overcurrent Protection: NEC (551.48) and BS 7671 (721.55) require fuses or MCBs to be used on all circuits. Employ a fuse box to arrange and safeguard the system's circuits for chargers, lights, and appliances. For example, a 20A fuse for a refrigerator circuit or a 10A for LED lights would guarantee that every circuit is protected against overload.
Stranded vs. Solid Wire: BS 7671 (721.521.1) and NEC (551.47) stress the significance of using stranded wire for all campervan installations because of the vehicle's mobility. Stranded wire is more pliable, strong, and vibration-resistant than solid core wire, which can break under pressure.
Wire Sizing and Voltage Drop: Proper wire size guarantees the least voltage loss, especially over lengthy cable runs. NEC (310.15) and BS 7671 state that the run length and current rating determine the wire size. Use six mm² or 10 AWG wires to prevent excessive voltage loss for high-load circuits, such as refrigerators or inverters.
Earthing: According to both regulations, all electrical systems must be earthed to the vehicle chassis for safety. A 4mm² or more extensive earth conductor is advised by BS 7671 (721.411) and NEC (551.46) to ensure that any fault current is safely diverted to the chassis and prevent shock risks.
How to Get Electricity in Your Campervan?
Three ways to get electricity in your van include solar, shore, and split charging.
Solar energy captures sunlight using solar panels installed on campervan rooftops or portable solar systems like Jackery Solar Generator. A split charger connects to the van's starter battery, enabling the charging of recreational batteries during transit. Shore power enables connection to the mains at a campsite for charging purposes.
Most van conversions possess two electrical systems:
- A 12Vdirect current system
- A 110V / 230Valternating current system
Most campervan appliances operate on the DC system, including the fan, refrigerator, lighting, and heater. An AC system is required to install plug sockets in your vehicle for charging devices such as a laptop. An inverter is necessary for an AC system, as it transforms 12V into 110V or 230V.
Campervan electrical systems operate on 12V, including the refrigerator, fan, heater, lighting, water pump, and USB chargers. The graph below gives a detailed analysis of some prevalent electrical appliances.

Solar Power
Let us examine the solar power segment of the comprehensive campervan wiring diagram. The following are the components of a solar electrical system.
- Solar Panels
The power generated by solar panels charges your batteries. Several varieties have differing prices and efficiency rates, including mono-crystalline, polycrystalline, and thin-film. Consider cost, weight limits, and available roof space when choosing solar panels.
- Batteries
Your solar panels produce electricity stored in batteries to power your appliances. Several options are available, each with pros and cons, including AGM, lithium-ion, and others. Lithium-ion batteries often have the most extended lifespan and highest performance but cost more.
- Inverter
An inverter converts your batteries' 12V DC electricity into 230V AC power, allowing you to utilise home equipment, including computers, TVs, and kitchen devices. Select an inverter that simultaneously manages the total power consumption of all the gadgets you want to use.
Sensitive electronics are best served by pure sine wave inverters, which generate a cleaner power output comparable to mains energy.
- Multiplus and Electric Hookup
When connected to an electric hookup, the Multiplus, an inverter and charger combination, uses your batteries to create AC power and charges them. You may charge your batteries with an electric hookup when solar energy is insufficient or unavailable. These connections to external power sources are usually found at campgrounds.
- Wiring, Fuses, and Safety Considerations
Your electrical system's efficiency and safety depend on proper wiring and fuse selection. Use the correct wire size and fuse rating for each component to avoid overheating and possible fire concerns.
Since the purpose of a fuse is to safeguard the cable, it is crucial to place it close to the power source. If you have any doubts regarding any element of the installation procedure, get expert advice and adhere to the manufacturer's specifications.
Shore Power
The subsequent section of the campervan wiring diagram pertains to shore electricity. Shore power enables us to connect to the mains supply for charging purposes (e.g., at a campsite). I have deemed shore electricity indispensable for my van journeys, particularly during winter, as I frequently utilise campsites.
Warning: Alternating current electricity is hazardous and potentially lethal! If you are uncertain, it is advisable to see a specialist. We advise employing a specialist to validate your system.
Initially, we must install a shore power inlet on the side of the van. This enables us to input AC 110V / 230V power into the van from the outside. We should utilise a 3-core wire (live, neutral, and ground) instead of merely employing positive and negative 12V wiring.
We installed a 3-core wire from the shore power intake to a double-pole consumer unit. A consumer unit is a distribution board with a residual current device (RCD) and many circuit breakers.
From this point, we route the cable in two distinct routes;
- A 3-core cable is routed directly from the consumer unit to a plug socket (double pole or unswitched) to power items, such as a laptop, straight from the mains while connected at a campsite.
- We extend a 3-core connection from the consumer unit to an AC-to-DC battery charger, which then connects to our bus bars and leisure batteries. The battery charger transforms alternating current (AC) into 12V direct current (DC) for battery charging.
Split Charging
Split charging is an essential component of campervan electrical systems. Split charging links the starter battery of your campervan to a leisure battery. This indicates that the leisure batteries are simultaneously charged while operating your vehicle. There are two principal methods of split charging:
- Voltage-sensitive relay
- B2B battery charger (intelligent charger)
Fifty-five percent of vehicle conversions utilise split chargers (SCR/VSR) instead of B2B chargers. There is little doubt that the rising popularity of lithium batteries will soon lead to the dominance of B2B chargers. They are a far more efficient charger.
Essential Tools for Campervan Wiring Setup
The following are the essential tools for campervan wiring diagram setup:

Campervan Electrics Tool #1 - Large Wire Crimps
You'll need a big wire crimper tool for those hefty wires. The safest method of fastening an eyelet to the end of a thick wire, ranging from 6mm to 95mm, is using these, which cost around £30.
They are straightforward and highly recommended, particularly for heavy battery and inverter lines.
Campervan Electrics Tool #2 - Wire Stripper-Crimper
This is the most practical item in your toolbox for campervan electrical work. For £15, you can get a wire stripper-crimper tool that lets you swiftly crimp tiny wires together and automatically trims wire ends so they are ready for soldering or connections. It may be thought of as the electrical equivalent of the Swiss Army Knife.
Campervan Electrics Tool #3 - Wire Snips
It takes a lot of force to cut through copper cable—it may be difficult. If you want to cut any wire at a correct and plain thickness, wire snips are a far better option than regular household scissors, and they can be purchased for less than £10. The likelihood of you sliding and injuring yourself with your knife will be decreased if you have the right equipment for the job.
Campervan Electrics Tool #4 - Heat Gun
Heat shrink needs to be warmed up to be secured to wire connections; a little heat gun will achieve this. These are helpful in other parts of the construction, such as sound deadening or keeping your fingers warm during the winter.
Campervan Electrics Tool #5 - Soldering Iron Kit
Those who have never worked with electronics in school may initially find them intimidating. A soldering iron set (around £30) is an excellent piece of equipment to learn how to use for delicate electrical work and strong wire connections on your van construction.
This enables you to permanently connect two wires, which is necessary for many locations in your converted campervan.
Campervan Electrics Tool #6 - Mini Screwdriver Kit
Some of the electrical components you'll be working with include a lot of tiny screws. This implies that to reach these screws, you'll need a little screwdriver set. A small kit is frequently required because most standard screwdrivers are too big to fit (see watch and phone repair kits, for example).
Campervan Electrics Tool #7 - Static Bracelet
These are worth the mere fiver. Static bracelets reduce static charge accumulation, as their name implies. This is an excellent way to ensure safety when handling electronics.
Wearing this offers additional protection to prevent electrical harm to your freshly purchased 12v devices. It is advised not to wear watches or other wearable electronics when wiring up your campervan electrics.
How to Create A Campervan Wiring Diagram?
One of the most crucial things to consider when turning a vehicle into a campervan is your wiring diagram. A comprehensive and functional wiring diagram for all your travels will guarantee that your campervan is secure, dependable, and cosy.
There are a few things you need to do to begin building your campervan wiring diagram:

Step 1: Plan Your Electrical System
Before any wiring is done, it's critical to fully understand the appliances and gadgets you intend to install in your campervan. This covers everything, including TVs, refrigerators, lighting, and fans. Once you decide which electrical components to utilise, determine how much power each needs.
Step 2: Choose The Right Battery
Selecting the proper battery may make all the difference in terms of long-lasting and effective appliance power. Lithium-ion batteries often have a longer lifespan than other traditional solutions like lead-acid batteries. Use a more extensive battery bank to operate an air conditioner or high-demand equipment.
Step 3: Determine Your Wiring Layout
The next step is to determine the suitable location to run the cables throughout the car, considering all applicable earthing points and the appropriate size cable required for each piece of electrical equipment under various load requirements.
Step 4: Add Safety Features
Safety must always come first when designing an electrical system for a mobile lifestyle. Circuit breakers are necessary whenever high-current devices are installed within sightlines accessible inside panel boards, much like in a traditional home - circuit breakers trip at predetermined current levels to prevent damage or overloading circuits.
Step 5: Grounding Your Wiring Setup
When using inverter-style AC-powered equipment, grounding techniques can assist in avoiding fires caused by short circuits and provide stability. However, conventional design cables that plug straight into 12V DC connectors might not need to be grounded.
Planning a fantastic campervan design often requires having access to excellent materials about electrical systems design and calculating electrical loads.
The secret to designing a campervan wiring diagram that works is preparation, caution, and knowledge of the particular parts you wish to place in your vehicle. If you do some preliminary planning and study, your van will undoubtedly fulfil all of your requirements for travelling with an RV!
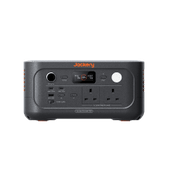
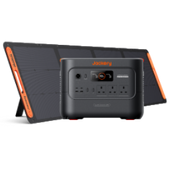
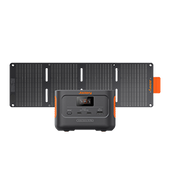
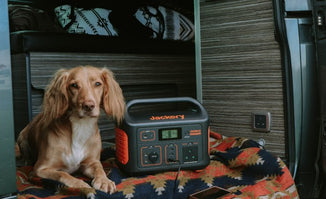
Jackery Solar Generators for Campervans
Invest in a portable solar system if designing a campervan wiring diagram is hard. The Jackery Solar Generator can be a backup power source for a campervan, making your off-road life much more accessible than ever.
Jackery is a renowned manufacturer in the solar industry, focusing on producing top-notch solar equipment like solar generators, solar panels, and portable power stations. Jackery Solar Generators offer a reliable and uninterrupted power supply for your campervan appliances.

In conjunction with Jackery Solar Panels and a Portable Power Station, it facilitates the efficient conversion and storage of more sunlight for future use. By having numerous output ports, you can charge multiple appliances at the same time.
|
Home Appliances |
Working Hours |
|
|
Solar Generator 1000 Plus |
Solar Generator 2000 Plus |
|
|
Fridge (350W) |
3-12H |
4.7-29.1H |
|
Lighting (25W) |
42.5-170H |
65.3-408H |
|
TV (60W) |
17.7-70.8H |
27.2-170H |
|
Phone (10W) |
106.3-425H |
163-1020H |
|
Stove (750W) |
1.4-5.7H |
2.2-13.6H |
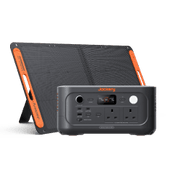
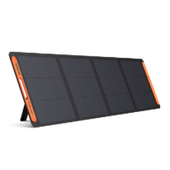
Jackery Solar Generator 2000 Plus
Jackery has unveiled the Solar Generator 2000 Plus, a cutting-edge portable power solution for campervans. Thanks to its substantial capacity and formidable power output, this device can sustain the operation of standard appliances for several weeks and fulfil all the power needs associated with outdoor adventure or professional activity.
The Jackery Solar Generator 2000 Plus allows adding extra battery packs, which boosts the capacity from 2 kWh to a remarkable 12 kWh, thus enhancing the solar charging capabilities significantly. With the ability to be expanded to 3000W, this solar product offers a 30% higher rated power than other 2 kWh solar goods available in the market.
The Explorer 2000 Plus is an industry's pioneering add-on battery pack that can be recharged using solar panels. This feature enhances versatility, improves charging efficiency, and reduces charging time. The LiFePO4 battery, with its sophisticated technology, guarantees a lifespan of 10 years, even with daily usage limited to once per day.

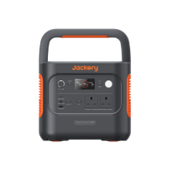
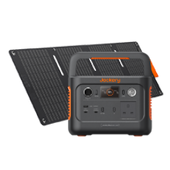
Jackery Solar Generator 1000 Plus
The Jackery Solar Generator 1000 Plus is the best portable power supply for campervans. It combines Jackery Explorer 1000 Plus with SolarSaga 100W solar panels to use solar energy effectively.
Featuring a 2000W full-power pure sine wave inverter and a stunning 1264Wh long-lasting LiFePO4 battery, the Explorer 1000 Plus offers abundant energy for almost all essential campervan devices. Remarkably, it can increase its capacity to 5 kWh by incorporating up to 3 additional battery packs.
It takes 100 Mins for a wall charge (from 0 - 100% of battery) and 2 hours of solar charging with 4 SolarSaga 200W solar panels. Additionally, the innovative ChargeShield technology and consistent power delivery avoid equipment damage.

Things to Consider for Campervan Wiring Diagram
You should pay attention to the mistakes you may make during designing and installing your campervan electrical system. Also, maintaining this system is far more critical.
Mistakes to Avoid
Installing roof decks, skylights and other roof-mounted components before defining your electrical system.
It makes sense to want to finish fulfilling projects like adding a roof rack or skylight first. Considerable visual advancements may significantly increase motivation! Nonetheless, you may have less space for solar panels if you install a roof rack or air vents without first figuring out your electrical setup.
You may have to make significant system concessions if your desired solar array cannot fit in your available space. If you can't use certain appliances or recharge as often as you'd want off-grid, you might need to adjust how you travel. Before installing anything on your roof, figuring out how many solar panels you'll need will save you many headaches later.
Mounting batteries far away from the rest of your system.
Storing batteries in the dead area beneath your front seats seems a great idea. But, this might be problematic if you want to place your system at the back of your vehicle and need help to fit the rest nearby. Long lengths of thick cable are expensive; therefore, you will also need to raise the gauge of your wire as you lengthen it.
Buying cheap, poor-quality electrical components.
All aspects of life are affected by the adage "buy cheap, buy twice," and electrical systems are no exception. Electrical components have a limit on how cheap they can be due to material prices. Inexpensive substitutes for well-known brands include subpar components, inadequate quality assurance, and a high probability of failing early.
Component failures may be harmful and expensive! In the long run, you will save much money and have priceless peace of mind by investing more in high-quality components from reliable manufacturers. If anything appears too good to be true while purchasing online, it most often is!
Tips for Maintaining Electrical System
Maintaining your electrical system regularly helps extend its lifespan and avert future problems. Keep your solar panels clean and occasionally check for wear and tear on your wiring and connections to improve their effectiveness. Keep an eye on your battery's general health and charge level, and take care of any issues as soon as you see them.
For troubleshooting recommendations, go to the manufacturer's materials and component manuals if you experience problems with your electrical system. Feel free to seek expert advice if the issue continues or you are unclear on how to proceed.
Tips for energy efficiency and conservation in a van conversion:
|
Tips |
Details |
|
Opt for energy-efficient appliances |
Opt for energy-efficient refrigerators and LED lights, among other low-power equipment. This will lower the total energy consumption of the electrical system in your van. |
|
Monitor and manage energy usage |
Use a battery meter to measure how much energy you use. You may make wise judgements to save energy when needed if you know how to use it. |
|
Insulate your van properly |
Proper insulation lessens the need for energy-intensive cooling and heating systems by keeping the van inside at a suitable temperature. |
|
Be mindful of your charging habits |
Instead of depending entirely on your battery bank at night; you should use your solar panels' daytime output to charge your electronics and appliances. |
Campervan Wiring Diagram FAQs
The following are the frequently asked questions about the campervan wiring diagram in the UK.
- How does camper wiring work?
All RVs are powered by two primary electrical systems: 12-volt and 110-volt. In summary, the 110-volt system is powered by the shore cord when connected to an external electrical service or generator, and the RV's 12-volt battery bank powers the 12-volt system.
- How do I connect my camper to my house power?
Once you have a connection for a three-prong plug, you may quickly proceed with an RV electrical hookup at home. To connect to a home's 15/20 amp system, you'll also want a 30/50 amp adaptor. Verify that everything in your RV and the breakers at your home are off.
- How do you get power in a campervan?
A portable power station is the complete answer to a campervan's electrical system. They have 12V and 230V power outlets and comprise a battery, an inverter, and a charge controller. Both portable solar panels and a mains plug outlet can charge them.
Final Thoughts
Creating a self-sufficient, adventure-ready home on wheels may seem impossible. Still, with careful planning, the correct parts, and a safety-first mentality, you can easily design and install a 12V campervan wiring diagram.
With the help of our in-depth guide, you'll be equipped with all the information and resources you need to embrace van life with assurance and a compelling, dependable electrical system. So fasten your seatbelts and get ready to travel, fuelled by your ideal 12V electrical setup for all your van-life fantasies!


