


Learning how to build a raft is a valuable and fun skill, whether you're going on an expedition by the river, arranging a school event, or working on a team-building project. With the right tools and knowledge, you can build a sturdy boat for fun, exploration, or friendly competition.
This comprehensive guide takes you through every stage of the procedure, from selecting the best raft style and acquiring the necessary tools to assembling your raft step by step and ensuring everyone's safety on the water.
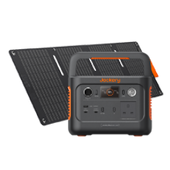
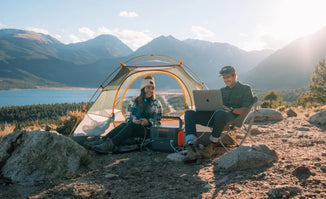
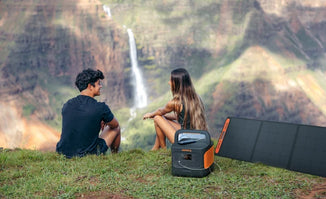
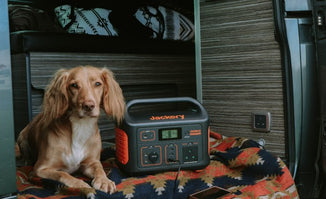
Additionally, a Jackery Solar Generator can serve as a portable solar power system to charge your DIY tools outdoors using solar energy, providing convenience and accessibility for building your raft even in areas without electricity.
|
Key Takeaways: |
|
● The first thing you need to do if you're learning how to build a raft for an adventure, outdoor education, or a DIY project is to decide what kind of raft you want to make. ● Log rafts are made of big, floating logs that are tied together using rope. They're traditional and strong, but they take a lot of work to create and move. ● Before you launch your raft into deeper water, test it in shallow water. ● You can make most rafts with just a few basic tools and things you have around the house, especially if you're making a barrel or timber-style raft. ● We highly recommend the Jackery Solar Generator 1000 Plus or 2000 Plus to power your DIY tools outdoors, offering higher capacity and portability. |
The Types of Rafts
The first thing you need to do if you're learning how to build a raft for an adventure, outdoor education, or a DIY project is to decide what kind of raft you want to make. The materials, the way it is built, and the reason for being there all affect your experience. The appropriate style of raft will keep you safe, let you do what you want, and be fun, whether you're paddling across a lake or competing in a team event.
A raft is a flat, floating platform that can hold people or cargo and float across water. It usually has flotation materials, a solid frame, and a deck for people to sit on. These items can be natural, such as logs, or artificial, like barrels and PVC tubing.
People often utilise rafts to cross rivers, establish teams, or travel in the wild. They are easy to assemble, but you need to consider the correct method. For any raft to function correctly, it must be stable, balanced, and constructed safely.

What to Look for in a Raft?
A good raft should put the following first:
Buoyancy: Provided by sealed barrels, logs, or inflatable tubes.
Structure: A frame that can hold weight and not fall apart.
Balance: Make sure the weight is evenly distributed so the boat doesn't tip over.
Propulsion: Usually paddles, but sometimes poles or makeshift oars.
Safety: Rope lashings, personal flotation devices, and simple rescue tools.
Barrel-based rafts are among the most stable and easiest to construct, particularly when a large group of people work together. Using rope lashings and wooden frames is a standard and reliable method. It's great for youth organisations, school activities, or casual occasions.
The Types of Rafts
Your intended use, environment, group size, and available materials determine the perfect raft for you.
1. Log Rafts
Log rafts are made of big, floating logs that are tied together using rope. They're traditional and strong, but they take a lot of work to create and move. They work well for river drifts or recreating historical events, but not for sharp turns or shallow water. They are tougher to steer because they are heavy, but they remain stable when floating.
2. Barrel Rafts
Plastic barrels are great for floating and are often used in raft-building competitions. They are held in place by rope under a hardwood deck, making them very modular and easy to repair. They're fantastic for groups, easy to put together, and highly stable, especially for short races, school groups, or family fun on calm waters.
3. Timber Frame with Buoyancy Aids
These rafts have a wooden platform on top of barrels, sealed drums, or containers that support it. The design is ideal for instances where a stronger deck is required, such as when carrying more people or gear. This hybrid configuration lets you be creative while being easy for beginners to use.
4. Inflatable or Pack Rafts
Inflatable rafts or pack rafts are light, easy to carry, and quick to set up, making them great for lone travellers or backpackers. They work well in calm water or on short, organised river trips. They don't require as much group participation as traditional raft building, but they are far more convenient.
5. Hybrid Rafts
You can create imaginative designs by combining items like barrels, logs, or inflatables. People typically utilise these setups for DIY projects or competitions when performance and flexibility are essential. Depending on your purpose and the materials you have, you can optimise for speed, stability, or looks.
Consider your goal, the materials available, and the surroundings when planning how to build a raft. Barrel rafts are great for casual group activities. Timber or hybrid rafts are more rigid and more stable. If you prioritise speed and portability over teamwork, pack rafts are the ideal solution.
Things You'll Need for Building a Raft
After you've decided what kind of raft you want to make, it's time to get your supplies. The equipment and parts you need will depend on how you want to build your raft, the number of people who will be using it, and its intended location.
You can make most rafts with just a few basic tools and things you have around the house, especially if you're making a barrel or timber-style raft. Here's a helpful list of things you'll need to know to build a raft.

Basic Materials
No matter what kind of raft you have, you'll need a few basic parts to make sure it floats, stays together, and is safe:
Floatation Items
Plastic barrels (200L sealed drums are excellent)
Big logs or timber poles (for log rafts or frameworks)
Inflatable tubes or bladders (portable or hybrid rafts)
These things make up the base of your raft and help it float. Barrels are very popular since they are easy to find and work well. They need to be clean, waterproof, and tightly sealed.
Structural Materials
Wood beams or decking boards
Plywood sheets (not required for the decking surface)
The structure keeps your raft strong and spreads the weight evenly. To prevent bending or warping in water, the wood must be strong and straight. Use treated wood to reduce its likelihood of absorbing water and increase its lifespan.
Fasteners and Lashings
Rope (polypropylene or nylon is best)
Bungee cords, ratchet straps, or cable ties are suitable for quick builds or changes.
Carabiners or metal brackets (optional for strong connections)
Rope is necessary for tying down barrels, connecting wood and making a strong structure. Longer lengths give you more options, and pre-cut pieces might save you time.
Basic Tools
Even the most straightforward raft build will involve tear tools:
Saw (to cut wood to the correct size)
Drill or screwdriver without a cord (for bracing and decking)
Hammer or mallet (to hold the frame in place or drive in pegs)
Tape measure and marker (to help you make precise cuts and lash points)
Safety goggles and gloves, especially when cutting or drilling
Knife or scissors to cut rope or straps
Using a cordless drill and strong fasteners makes the build go faster and makes your raft stronger, especially if you're adding a wooden deck.
Optional Extras
You might also want to think about the following, depending on your route, area, or goals:
Paddles or improvised oars
Life jackets or buoyancy aids
Dry bags for your things
Flagpoles or other decorative items (excellent for team events or races)
Anchor or tow rope (if you're drifting or going with the flow)
Some teams even add camping chairs, banners, or themed accessories to enhance the experience and make it more comfortable or enjoyable. Just make sure they don't compromise balance or safety. Raft races are a great way to get creative, so don't be afraid to make your build unique.
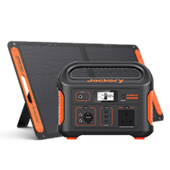
Building a raft implies you're likely working outdoors, possibly near a body of water, which rarely has convenient power outlets. Jackery Solar Generators are designed to be highly portable, making them ideal for remote job sites or temporary outdoor setups.
How to Build a Raft: Step-by-Step Guide
Building your raft is an excellent way to embark on an adventure and travel to a better fishing location. Preparing the logs can take some time, but once you reach the lashing stage, the rest of the operation will proceed smoothly. This is simple enough to complete on your own, but having a friend help you can make the process go much faster.

Collecting and Getting the Logs Ready
Step 1: Gather eight 8-foot (2.4-meter) logs that are about 12 inches (30 centimetres) thick. These will be the major floating logs that form the raft's body. Cottonwood, poplar, and spruce are excellent alternatives to wood. Do not use heavy, solid timbers like oak, as they will not float.
Find your logs in the forest or purchase them from a logger. If you're in a forest and can't recognise the trees, choose logs that feel lighter than the others.
Using a handsaw, cut down longer logs until they are approximately 8 feet (2.4 m) long. You can also use a hatchet to cut down saplings. Do not use logs that appear to be heavy. It means they're wet and won't float as well.
Step 2: Find two 9-foot (2.7-meter) logs that are approximately 6 inches (15 cm) thick. These will be the connecting logs that you'll place along the body of your raft. You need the extra length to secure the ropes to them. Use the same sort of wood you used for the main logs.
Step 3: Use a hatchet to remove the knots and bark. While removing the bark is not strictly required, removing the knots, stubs, and smaller branches is. If you do not accomplish this, the raft will not fit together as well. Use a hatchet to remove small knots, stubs, and branches from your logs. If you're camping, try keeping the bark and knots for fire.
Step 4: If you have time, cut notches into the logs. This is not strictly necessary, but it is strongly recommended because it will make the logs fit together more effectively. Use a hatchet to cut 2 in (5.1 cm) deep notches into both ends of each log. Make sure the notches span the width of the log and are approximately 1 to 1 1/2 feet (30 to 46 cm) from the ends.
Make sure the notches are on the same side of each log, similar to how you would build a log cabin. Alternatively, use a hatchet to flatten the whole side of each log.
Step 5: Varnish the logs as desired. This will help to make the wood waterproof and prevent it from decaying. Apply 3 to 5 thin coats of varnish with a brush, allowing each coat to dry to the touch before proceeding to the next. After you've applied the last coat, let the varnish dry and cure thoroughly. It may take many days.
You don't have to do this, but it will help your raft last longer, especially if you intend to use it more than once.
Creating the Frame
Step 6: Bring your logs to the river. Travel far enough from the beach for logs to float; around calf-deep should suffice. This not only makes it easier to build the logs, but it also eliminates the need to haul the completed raft across dry land.
Roll the logs towards the water. They can also be dragged by hand or pulled with a rope.
If the logs are too heavy for you to carry, ask a friend to help you get them into the water.
You do not need to bring all the logs into the water, but keep them close by so you can retrieve them quickly.
Step 7: Place two floater logs parallel to one another, about 8 feet (2.4 metres) apart. If you haven't already, bring two of your main floater logs into the water and set them side by side. Orient them horizontally so that they form the equals (=) sign.
Make the logs about 8 feet (2.4 metres) apart.
For this, you'll need logs that are 8 feet (2.4 metres) long and 10 to 12 inches (25 to 30 cm) thick.
Step 8: Set up thin linking logs between the two main logs. The final shape should be a rough square or rectangle. Place these logs approximately 12 inches (30 cm) from the ends of the floater logs. Move the floater logs closer or further apart until the connection logs' ends are about 6 inches (15 cm) long.
If you flatten one side of each log, ensure the flat sides touch. If you cut notches into the logs, ensure that they face each other so that they fit.
Step 9: Use a clove hitch knot to secure your rope to a connecting log. Begin with a connecting log and lay the end of your rope over it, directly adjacent to the left floater log. Wrap the short end of the rope around the connecting log.
Cross it over the rope's longer end to form a slant. Bring it under the connecting log, then pull it beneath the slanted rope. Pull the knot tighter. The short end of your rope should be long enough to wrap around the circumference of your connecting log twice or three times.
Step 10: Wrap the rope's working end around the floating wood, forming an X. Select the longer, working end of the rope. Wrap it once around the floating log and then drag it diagonally across the connected log. Wrap it around the floating log again, and then cross it across the connecting log to form an X. Pull the rope tightly so the logs do not slide around.
Step 11: Use an overhand knot to secure the rope to the connecting log. Wrap the rope loosely around the connecting log, ensuring that you are on the opposite side of the main log (away from the clove hitch knot). Pull the rope beneath the looped rope, then tug sharply to tighten the knot.
Step 12: Repeat the process with the bottom connecting log on the left side. Tie a new piece of rope to the end of the lowest connecting log with a clove hitch knot. Wrap it around the main log twice to form an X, and then wrap it around the connecting log once. Finish with an overhand knot. Don't attach the connecting logs to the right side of the frame just yet. You'll do it last.
Finishing the Raft
Step 13: Slide the next floater log into place. Take another 8-foot (2.4-meter) floater log and place it beneath the two connecting logs. Roll it to the left side of the frame.
Make sure the ends of this log match the ends of the first log.
Step 14: Wrap the rope around the main log and on each side of the connecting log. Wrap the rope around the top connecting log once. Next, wrap it around the main log and onto one side of the connecting log. Bring it beneath the main log, then wrap it around the main log again, this time to the opposite side of the connecting log.
You are not required to make an X with the ropes like you did for the frame, but you can if you wish.
Step 15: Wrap the rope around the connecting log, tying an overhand knot. This is precisely what you did while creating the frame. Wrap the rope once around the connecting log, then pull it under the wrapped rope to form an overhand knot.
This concludes your wrapping pattern.
Step 16: Tie more logs to the top connecting log until you get to the right side. Repeat the previous steps. Form an overhand knot around the connecting log. Add the next log, and then wrap or cross it twice around it. Wrap an overhand knot around the connecting log, then add another main log. You may encounter occasional gaps in the logs, which is normal.
The last log could be more or less than 6 inches (15 cm) from the end of the connecting log. This is acceptable.
Step 17: Finish up with a clove hitch knot. Wrap the rope around the ends of the connecting log. Cross it over the wrapped rope, then wrap it back under the log. Pull it under the crossing rope as you approach, then tighten. Use a hatchet or scissors to cut off any excess rope.
Step 18: Repeat the process with the bottom connecting log. This side will be a little more difficult because you'll need to shift the logs around more to wrap the rope around them. You may need to uncoil the rope and guide it through the crevices between the logs, much like threading a needle.
Please make sure the logs are straight when you bind them. You should slide them slightly to the left or right so that they are not skewed.

Things to Consider for Building a Raft
A few essential details on building a typical raft:
Maneuverability
A timber raft is not the most efficient mode of transportation for exploring rivers. It's heavy, and it will only get heavier as the logs absorb water over the next few days, weeks, or even months as they float down the river.
Rowing will be the most efficient technique for getting downstream and navigating. You'll need some excellent, strong oars to do this.
8-10ft oars would have been much more efficient in the long term. Paddling would be effective if there were two or more people on the raft, but it wouldn't be as helpful in navigating and tackling more challenging circumstances.
Oars
You have two choices. Option one: buy some; option two: manufacture your own. Making them will make you feel more involved in the journey. Once you've chosen your good wood, get a saw and begin chopping until it resembles an oar shape.
Deck Space
A raft that is 3 metres long and 1.5 metres broad is an ideal size for one person to manage, if necessary, and even more so for two to live comfortably on for an extended trip. A simple tarp tent that could be pulled back during the day and then rolled out in the evenings or during inclement weather can provide shelter from the elements.
There was a permanent seat in the rear third, consisting of logs running along the width of the timber raft [kept in place with rope]. For added comfort, some reclaimed timber boards were laid on top of the logs [secured with a few nails]. A throwable flotation pillow proved handy for added comfort and potential emergencies.
Maintaining Safety on the Water
Before you become too excited and rush into the water with your raft, make sure you can use rafts on the body of water you intend to cruise on. Ask your local authorities first; otherwise, you may find yourself over your head in more ways than one.
You should always carry a life jacket in case your raft fails and you wind up in the sea. Make sure everyone else on the raft is wearing one. Bringing a life preserver onboard is also a brilliant idea.
Wear clothes that are either waterproof or quick-drying, as your raft is not designed to be fully watertight.
This is especially necessary during the cooler months; being wet in winter is unpleasant, and it can even be dangerous if you don't have anything to keep yourself warm.
Now you should be ready to head out to sea. Building the raft is enjoyable, but the reward of gently drifting down the river like Huckleberry Finn is what makes the effort worthwhile. Go ahead and explore that river or lake you've always wanted to, but haven't had the resources to do so.
Tips: Dos and Don'ts
Without proper planning, even the most straightforward raft-building operation can fail. Whether you're building your first DIY raft or organising a group session, following these crucial dos and don'ts will help you stay safe and make the most of your time learning how to build rafts.
Dos:
Before you launch your raft into deeper water, test it in shallow water.
Before you begin construction, pre-cut and organise your ropes and timber.
Assign roles to your team to increase efficiency and safety.
Use suitable lashings, such as square, diagonal, and figure-eight knots, to ensure a strong framework.
Choose floating ropes, which are easier to retrieve in water.
Inspect for sharp edges or exposed fasteners that could cause injury or damage.
Pack additional rope, a basic repair kit, and waterproof bags for valuables.
Don'ts:
Avoid overloading your raft or placing too much weight on one side.
Do not use damaged flotation barrels or weakened ropes.
Even in calm water, don't proceed without personal flotation equipment.
Do not disregard the local forecast or water current conditions.
Do not rely solely on nails or screws to secure barrels or logs.
Do not rush—careful, deliberate assembly produces safer and more stable outcomes.

Following these suggestions will ensure that your raft not only floats but also functions safely and reliably. Small decisions in planning and preparation can make a big difference once you're on the water.
How Can Jackery Solar Generators Help Build a Raft?
You're not tethered to a wall outlet or an existing power grid. You can position your tools and workbench wherever it's most convenient for the construction process, even if it's far from a building with a Jackery Solar Generator.
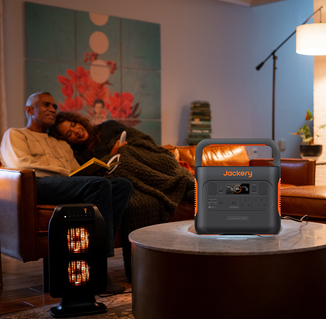
Unlike noisy gasoline generators, Jackery units operate silently. This is a huge advantage when working outdoors, allowing for a more peaceful environment, better communication, and less disturbance to any nearby wildlife or neighbours. For an "outdoor studio," this is crucial for maintaining a creative and focused atmosphere.
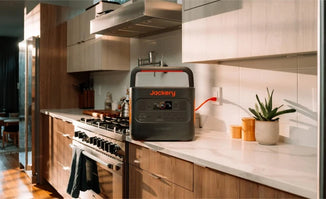
No exhaust fumes, no carbon monoxide. This makes them safe for use in relatively enclosed outdoor spaces (like under a tarp or canopy) and is environmentally friendly, which aligns well with building something like a raft that connects to nature.
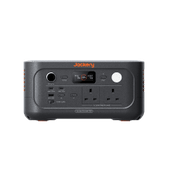
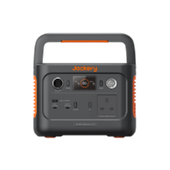
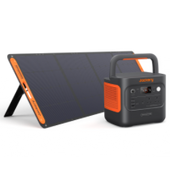
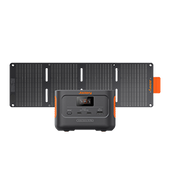
Jackery Solar Generator 1000 Plus
The Jackery Solar Generator 1000 Plus (combines Jackery Explorer 1000 Plus with SolarSaga 100W) is an excellent choice for building a raft, especially in an outdoor or remote studio setting. Its combination of power, portability, and clean energy generation makes it highly suitable for such a hands-on, off-grid project.

2000W AC Output (4000W Surge Peak): This is a significant amount of power. For raft building, you'll likely use various power tools. The Solar Generator 1000 Plus can run drills, jigsaws, sanders, heat guns and small air compressors. It typically features two AC outlets, two USB-A ports, two USB-C ports (including a 100W PD port for fast-charging laptops and larger devices), and a 12V car port. This means you can power multiple tools or charge various devices simultaneously.
Work Lights: As raft building can extend into the evening or take place in shaded areas, powering LED work lights or floodlights directly from the Jackery will illuminate your workspace, ensuring safety and precision.
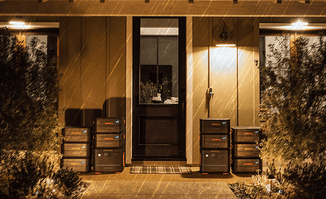
Expandable Capacity for Longer Projects: With 1264Wh base capacity, it is a good starting point for a day's work. If your raft-building project is extensive or takes several days, you can add up to three additional Jackery Battery Pack 1000 Plus units to increase the total capacity to 5kWh. This significantly increases your total power reserve, allowing you to work longer without needing to recharge the central unit.
No Noise, No Fumes: Building a raft outdoors or in an "outdoor studio" implies a desire for a peaceful environment. Unlike a gasoline generator, the Jackery operates silently and produces no noxious fumes. This is better for your health, allows you to concentrate on your work, and minimises disturbance to nature and your neighbours.
|
Jackery Solar Generator 1000 Plus Running Time |
|
|
Circular Saw (1000W) |
1H |
|
Hand Drill (700W) |
1.4H |
|
Heat Gun (1000W) |
1H |
|
Angle Grinder (800W) |
1.3H |
|
Small Air Compressor (500W) |
2H |
(*The working hours are only for reference; the actual working hours depend on your usage.)
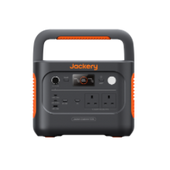
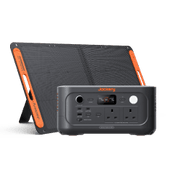
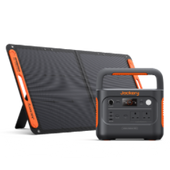
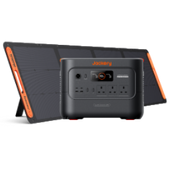
Jackery Solar Generator 2000 Plus
The Jackery Solar Generator 2000 Plus (combo of Jackery Explorer 2000 Plus portable power station with SolarSaga 200W solar panel) is an excellent choice for powering tools and equipment when building a raft, especially if you're working in a remote or off-grid location where traditional power isn't available.

3000W Continuous Output (6000W Surge Peak): This is the most critical feature for raft building. Many common power tools used in construction, such as circular saws, drills, sanders, and even some smaller mitre saws, have high wattage demands. For example, a circular saw typically uses 1000W-2000W power; the 2000 Plus can run a 1000W circular saw for 1.7 hours on its base unit.
The high surge capacity (6000W) is essential for tools that have a high "startup" wattage, which can be significantly higher than their running wattage. The Jackery 2000 Plus can handle these brief power spikes, preventing the system from shutting down.
Expandable Capacity: The base Jackery 2000 Plus has a 2042.8Wh capacity, with LiFePO4 battery cells. However, its most significant advantage for a project like building a raft is its expandability. You can connect up to five additional battery packs (Jackery Battery Pack 2000 Plus), increasing the total capacity from 2kWh to a massive 12kWh.
Solar Recharging: Pairing the 2000 Plus with Jackery's SolarSaga solar panels (e.g., 200W panels) allows you to recharge the unit using sunlight, making it truly off-grid capable. With multiple panels (e.g., six 200W panels), you can achieve a full solar charge in as little as 2.4 hours, which is incredibly fast for a unit of this size. This means you can recharge while you work or during breaks, extending your workday.
Portability and Durability: Although the 2000 Plus is heavier than the 1000 Plus (approximately 61.5 lbs / 27.9 kg), it features a handle and built-in wheels, making it easier to move around your construction site. This is particularly helpful if the raft-building location isn't easily accessible by vehicle.
|
Jackery Solar Generator 2000 Plus Running Time |
|
|
Circular Saw (1000W) |
1.6H |
|
Hand Drill (700W) |
2.3H |
|
Heat Gun (1000W) |
1.6H |
|
Angle Grinder (800W) |
2H |
|
Small Air Compressor (500W) |
3.2H |
(*The working hours are only for reference; the actual working hours depend on your usage.)
FAQs
The following are the frequently asked questions about the raft building:
1. Can you build your raft?
Yes, you can make your raft. You can make rafts out of logs, barrels, or even plastic bottles. The technique can be easy or challenging, depending on how large and complex you want the raft to be. Some manuals explain how to make a simple raft from logs and rope. Some other recommendations suggest using plastic bottles to keep things afloat.
2. How to build a raft for six people?
You will need to create a floating base from materials such as barrels or logs to build a raft that can accommodate six people. Then, you will need to create a strong frame to keep the base together and make a platform. Please ensure the raft is stable, can float well, and has a deck, a means of transportation, and a means of steering.
3. What materials are needed to build a raft?
You typically need logs, barrels, or plastic bottles that float, along with ropes or twine, to keep everything together and make a raft. You could also use pallets, PVC pipes, or even Styrofoam blocks to create a more complex raft.
Final Thoughts
Building your raft is more than just a craft; it's a creative, hands-on activity that helps you grow confidence, work as a team, and make memories that will last a lifetime. You can have fun with the process and the adventure that follows later if you follow the appropriate methods and safety rules.
The work you put into building the raft makes the trip much more enjoyable, whether you're floating calmly over a lake or competing against others in a local raft race. You now have everything you need to start building your raft, thanks to the techniques, materials, and advice given here. Go out there, make something, and have fun in the water.


