


Car detailing extends much beyond a simple wash. While removing slimy dirt and filth, detailing restores and preserves every facet of your car, improving its appearance, look, and performance. This book covers everything from wheel cleaning and paint decontamination to polishing, waxing, and finishing touches that reveal your car's true sheen.
You can achieve professional-level results at home by using the right equipment and following a step-by-step, organised procedure. Whether you're maintaining your daily driving or getting ready for a car show, detailing protects your investment, increases safety, and keeps your vehicle looking its best.
|
Key Takeaway |
|
What is Car Detailing and Why Does it Matter?
It might be challenging to use the phrases "car detailing" and "car washing" interchangeably, although there are significant distinctions between the two. There are certain parallels between auto detailing and vehicle washing, but auto detailing is much more than just cleaning your automobile inside and
detailing a vehicle. The first step is to wash and vacuum the car. Then, using more specialised equipment and automobile detailing materials, auto detailers give your vehicle a thorough cleaning. This could include dismantling auxiliary parts to gain access to previously unseen gaps and crevices.
Finally, after a thorough cleaning, automotive detailers will use a specialised soenhance to improve the car's appearance and protect and preserve it from dirt, grime, and other contaminants. As a consequence, a cleaned automobile might appear and smell like a new one, even if it's been a decade!
Why It Matters?
A clean automobile exterior and interior are vital for a variety of practical and cosmetic reasons, including paint protection, preserving resale value, preventing corrosion and rust, and improving visibility. Maintaining a clean automobile exterior and interior is essential, more than just looking good; it's also about safeguarding your investment, guaranteeing safety, and improving overall vehicle health. Regular car washing and detailing help keep your car looking and functioning well.
Fundamental Concepts and Equipment for Car Detailing
To get the finest results, you'll need a pressure washer with a snow foam lance, three buckets with grit guards, separate wash mitts for your wheels and bodywork, a wheel brush, a pair of soft and firm detailing brushes, a drying towel, and a pile of microfiber cloths.
When applying cleaning solutions to your car's exterior, be sure not to let them dry on your wheels or bodywork. Avoid washing in direct sunlight, and if necessary, rinse the vehicle often to keep it damp.
You may wash and reuse microfibre cloths and towels, but you should discard any cloths used for decontamination, as metals may become trapped in the fibres.
How to Detail a Car: Step-by-Step Guide
When beginning anything, it may be challenging to know where to start, let alone what to detail. Car detailing might be, with there being many and their own sets of procedures and theories, but we're here to help you get started. Basics that seem too comprehensive to be basic, but we can guarantee you that this is as basic as a suitable detail gets.

Step 1: Wheels
You must begin with the wheels, because that is the dirtiest part of the vehicle. You will need to do a thorough wash with a high-quality wheel cleaner. To access hard-to-reach areas, you will want brushes, a wash mitt, and a detailing bucket distinct from those you would use on the paintwork.
Step 2: Pre-Cleaner
Utilise a pre-cleaner at all times. One that has been engineered to eliminate bugs and difficult-to-remove dirt. It is recommended that you spray this on the lower portions of the vehicle, as well as any spots that have gotten splattered with bugs.
Step 3: Before
Before the car wash stage that involves physical contact, snow foam is used to break down dirt and remove any loose particles from the vehicle. It is possible to reduce the likelihood of leaving marks on the paint finish by removing as much debris as possible before contact washing. The majority of occurrences arise during the ash,tep, thus it is essential to do this.
Step 4: Two-Bucket Method Contact Wash
Was it ever in your wildest dreams that it would be the fourth stage before you even started? To further reduce the risk of marring, minor scratches, or swirls, it is essential to use a high-quality vehicle.
The deep pile of the shampoo allows any particles to be absorbed into the mitt rather than being squeezed and dragged over the surface. Separate the two buckets by filling one with wash solution and the other with plain water. When applying the wash solution to the vehicle, make sure to wash it from the top down, focusing on tiny parts at a time.
Before applying the new wash solution to the vehicle, rinse the mitt in the water bucket. Using this strategy guarantees you will never contaminate your wash solution and always use clean water when washing your vehicle.
Step 5: Decontamination
To begin, you'll need to spray an iron dissolver. Our fallout remover solution is ideal at this point, as it will dissolve any ferrous pollution, such as industrial fallout and rail dust, that has welded itself to the paintwork. Next, use a solvent, tar and glue remover to soften any tar that has been attached to the paint.
A key step here is to re-wash the car, or at least the regions treated with the solvent, since solvents melt Clay bars and interfere with the next phase. Detailing clay is fantastic; wipe the block over the paintwork with a slip or clay lubricant, and it will do the job for you, efficiently removing any lingering contaminants, such as tree sap or overspray, in its path.
Following the previous two phases, the clay bar should not have too much to pick up. Remember to apply a lubricant, such as Glide clay lubricant, to any clay bar! Then wash and rinse again.
Step 6: Drying
Begin at the top of the car and work your way downward. Tackling it panel by panel will ensure that every region is streak-free. It is critical to work fast (to eliminate wet stains) while being thorough so that no drying streaks are left behind. If you have any remaining wet stains, a fast detailer is an excellent solution to move them up.

Step 7: Polishing
You may polish by hand or using a machine. Polishing by hand will provide a nice finish, but not as excellent as using a machine polisher. We offer goods to both users. We recommend that you avoid using a machine polisher on your automobile if you have no prior expertise.
Our main recommendation is to practice on a different panel initially. These are simple to get at scrap yards. Better that than burning through your vehicle's paint and having to repaint a whole panel or possibly the entire automobile.
Step 8: Glaze
It is recommended that you apply paint glaze between polishing, waxing, and sealing the surface. The deeper and more metallic tones are particularly well-suited to this effect.
Step 9: Wax and Seal
Although each of these processes is just as crucial as the others, waxing or sealing is at the very top of the list of things that absolutely must be done. The application of a coat of auto wax or sealer will safeguard all of the hard work that you have put in from step one all the way through all eight steps. Please take a look at our article explaining the different types of car wax to apply to your paint.
Step 10: Tyre Dressings and Trim
After you have finished cleaning your tires and trims, the next step is to begin the preening process. It is possible to get solutions that can restore the original color of plastics, as well as items that will enhance the appearance of your tires without causing them to become too oily.
Step 11: Glass
The concept of glass is often overlooked by individuals. The inclusion of a high-quality glass cleaner, such as Crystal, is an essential component of any auto cleaning kit. This cleaner may be used to remove fingerprints, mild scratches, or even light scratches.
Step 12: Clean the Surfaces of Any Missing Parts
In general, a professional fast detailer will clean the remover faces of any missing parts or trim dressing left behind, as well as remove any possible residue from waxing or sealing.
Additionally, they will remove any fingerprints you may have left behind while you were driving. Your finishing touches are sometimes disreverent, though they may be the most crucial, particularly when it comes to achieving that goal we all so eagerly pursue.
What You Should and Should Not Do When Detailing Your Car?
There is no room for shortcuts when detailing a vehicle. It is the wash that is the starting point for paying attention to detail, using excellent materials, and using procedures that make all the difference.

You Shouldn't Use a Sponge
You should not put the sponge down and leave the room. When it comes to cleaning a vehicle, the shelves of supermarkets and high-street motor suppliers are groaning with items, including sponges, explicitly designed for cars.
Sponges, on the other hand, are among the worst things you can use to wash your vehicle because of their artificial, thick surface, which transfers dirt rather than lifting it, and may produce swirl marks in the paintwork. This is something that an auto maintenance field will tell you.
By applying the shampoo-filled sponge vehicle's bodywork washing in circular movements, the car may be captured inside and under the sponge. These grit particles, despite their tendency to be a leading cause, may lead to swirl marks. Swirl markings are similar to thin hairline scratches that damage the surface and pull attention away from the shine.
You would use a deep-pile carpet explicitly designed for this purpose.
These may be made of cotton, lambswool, or soft microfiber material, and what is present is absorbed into the material, further away from the help, helping to reduce the amount that occurs. Frequently rinse, and there is a technique for doing so.
You Should Wash Your Car Using the Two-Bucket
technique, as the name suggests, which employs two buckets: one with shampoo and one with plain water for rinsing. Soak the wash mitt in the shampoo bucket and start washing. When returning for the next load, first soak the mitt in the rinse water to remove any dirt and debris. As an extra precaution, grit guards placed low in the buckets will catch any grit and grime at the bottom.
You shouldn't use a single bucket for rinsing; dirt and grit may enter the wash bucket, contaminating the water. Any grit in the bucket can end up in the automobile.
You Should Always Use Good Quality Car Shampoo
Use high-quality shampoo. This will have a smooth, soapy sensation, and additional lubricants can help pull pollutants away from the paint and into the mitt, where they can be washed away.
You shouldn't be cheap. There are various vehicle shampoos on the market that claim performance, but not all are perfect. Some detergents, particularly home washing-up solutions, may remove previously applied wax. Leave it on the kitchen windowsill!
You Should Use A Good Car Washing Technique
When shampooing, be gentle and remember to rinse the mitt often. A helpful idea is to use warm (not hot) water, particularly in cold weather. If nothing else, it helps protect your hands from freezing! Finally, rinse the shampoo out from the top down with fresh, clean indirect water.
You shouldn't spray pressurised water directly onto the bodywork; this may damage the paint by causing scratches from embedded grit.
You Should Prevent Cross-Contamination
Do not use the paintwork wash mitt and shampoo on the wheels. The whole is dirtier than the paintwork; someone may wish to use different media for them to avoid cross-contamination.
You Should Help Break Down The Built-Up Dirt
Use a decent purpose-designed wheel cleaner and a wheel brush to remove road filth and grit. Don't forget the tyres; apply a tyre treatment to make the rubber look brand new. After all, automobile detailing is all about the tiny details.
You Should Remember the Hidden Areas
Remember to clean not just the external bodywork, but also the door jambs, sills, and underbelly. Boot and door seals are not always perfect and might let water in.
You Should Prevent Water Spots
Do use a clean drying towel. The finest are built using a sandwich approach. The exterior layers, front and back, are made of 'Diamond Weave' microfibre, with a very absorbent inner layer. This makes the material very soft and absorbent.
You shouldn't allow an air-dry to air-dry. Watermarks may detract from a vehicle's appearance, making all of your efforts in vain. Ideally, utilise forced air to remove as much water as possible, particularly from small locations such as grills and badges. You may also use drying cloths. Remember that quality counts, since harsh, cheap towelling may also affect swirl marks!
How Often Should I Detail My Car?
After going through all of that, you may not want to do it again anytime soon. The good news is that these products last a long time, and you only need to repeat the procedure 2-3 times a year, with brief washes in between if your vehicle becomes filthy.
However, if you take pride in your vehicle, plan to attend auto shows, and want to keep it looking good year-round, you may supplement this procedure with a complete wash and dry every two weeks. It is not necessary to repeat the entire detailing procedure more than 3 times per year.

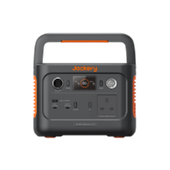
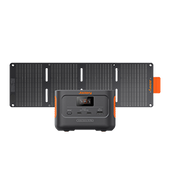
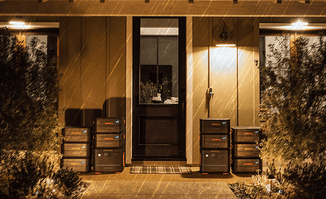
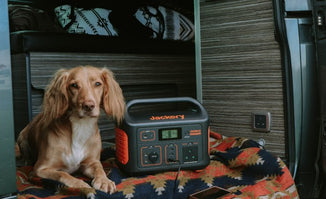
How Jackery Can Help with Car Detailing?
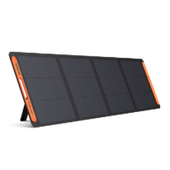
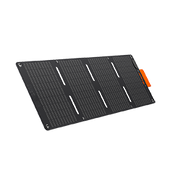
A Jackery Portable Power Station is an incredibly valuable tool for mobile car detailing professionals and enthusiasts because it provides reliable, silent, and emission-free power, allowing them to work virtually anywhere without needing to plug into a client's home or business.
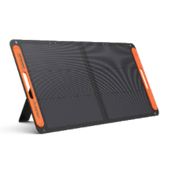
Mobile detailing requires robust tools that often exceed the capacity of a standard car inverter. Jackery models, like the Jackery Explorer 2000 v2 or 3000 v2 (with a 3000W output), are robust enough to run the most power-hungry detailing equipment, like a pressure washer, vacuum cleaner, steam cleaner or air compres
high-wattageh wattage and pure sine wave inverter in Jackerensuresls ensure that these tools start up and run smoothly without risking damage to the equipment or the vehicle's electrical system. Jackery units operate very quietly (often below 30dB), which is crucial when working in quiet residential neighbourhoods, office parking lots, or enclosed garages. This makes the detailing experience far less
stressful. The client's available power outlets do not limit the number of outlets. You can detail a vehicle in a remote parking lot, a driveway without an exterior outlet, or a property that can't handle high-load tools.
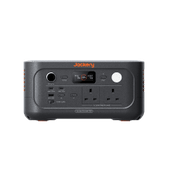
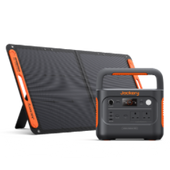
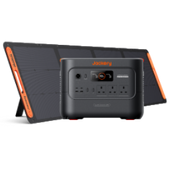
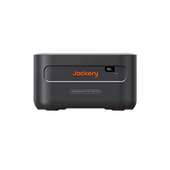
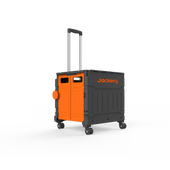
Jackery Explorer 3000 v2
The Jackery Explorer 3000 v2 Portable Power Station is an excellent choice for professional mobile car detailing, offering a significant upgrade in power and capacity compared to smaller models. It addresses all the power needs of a full-service mobile detailer, including running high-demand equipment simultaneously, which is critical for efficiency.

Capacity: Approximately 3072Wh (Watt-hours). This large capacity means you can run multiple tools for extended periods, easily covering an entire day of detailing work or multiple large vehicle jobs before needing a recharge.
AC Output: A substantial 3000W continuous output with a 6000W surge capability. This is the most crucial factor for detailing. Detailing equipment such as pressure washers, shop vacuums, and carpet extractors requires a quick burst of extra power (a surge) when the motor first starts. The 6000W surge capacity of the 3000 v2 ensures these tools start reliably without tripping the power station.
Running Multiple Tools: The 3000W continuous output allows you to comfortably run a powerful tool (like a 1500W pressure washer) and a secondary tool (like a 1000W shop vacuum) simultaneously, significantly speeding up the washing and cleanup phases of a detail. It can run a professional-grade electric pressure washer, which is essential for pre-rinsing and effective use of a foam cannon, and professional on-site washing.
Self-Sufficiency: A professional detailer is no longer reliant on the client providing an accessible, functioning power outlet. You become a fully self-contained unit. It offers an emission-free and near-silent alternative to loud, fume-emitting gas generators, making the detailing process much more pleasant for the client and detailer.
|
Working Hours for Explorer 3000 v2 |
|
|
Pressure Washer (1000-2000W) |
1.2-2.5 Hrs |
|
Vacuum Cleaner (800-1400W) |
1.8-3.1 Hrs |
|
Rotary (500-1200W) |
2-5 Hrs |
|
Steam Cleaner (1000-1500W) |
1.6-2.5 Hrs |
|
Air Compressor (500-1500W) |
1.6-55 Hrs |
(*The working hours are only for reference; the actual running time is based on the actual usage.)
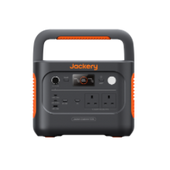
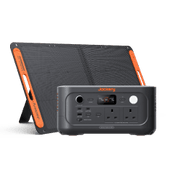
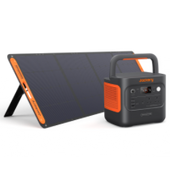
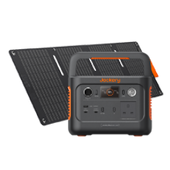
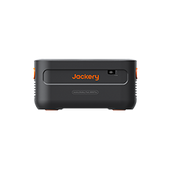
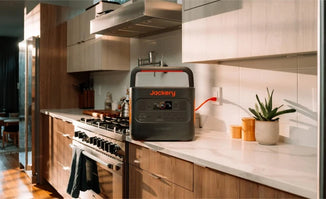
Jackery Explorer 2000 v2
The Jackery Explorer 2000 v2 is an excellent power solution for professional or dedicated amateur car detailing, especially for mobile detailers or when working in areas without easy access to a wall outlet. Its high capacity, high power output, and portability make it ideal for running the heavy-duty electrical tools required for comprehensive car care.

Powering Heavy-Duty Detailing provides a 2200W continuous output (with a 4400W surge peak) and 2042Wh, which is essential for powering high-draw tools. Professional rotary and orbital polishers typically draw between 500W and 1200W. The Jackery can run these tools efficiently for an extended period.
Maximum Mobility and Convenience: Weighing about 39.5 lbs (17.9 kg), the Explorer 2000 v2 is highly portable and easily transported in a vehicle to any job site—from a driveway to a parking lot. You can detail cars outdoors, on location, or in with insufficient electrical outlets, providing a profession wherever you are.
Multiple Ports: It features multiple AC outlets (typically three), USB-C ports (including a 100W PD port), and a 12V DC car port, allowing you to run your primary detailing tool (e.g., polisher) while simultaneously charging small devices (e.g., phone, tablet) or powering a detailing light.
Quiet, Clean Operation: It operates at a very low noise level (less than 30dB in silent charging mode). This is crucial for detailers working in residential areas, apartments, or quiet commercial areas where a loud gas generator would be disruptive. Being emissions-free, it can be used safely indoors or in enclosed garages without concerns about carbon monoxide or exhaust fumes, making it safer for both the detailer and the client's property.
|
Working Hours for Explorer 2000 v2 |
|
|
Pressure Washer (1000-2000W) |
0.8-1.6Hrs |
|
Vacuum Cleaner (800-1400W) |
1.2-2Hrs |
|
Rotary (500-1200W) |
1.4-3.3Hrs |
|
Steam Cleaner (1000-1500W) |
1.1-1.6Hrs |
|
Air Compressor (500-1500W) |
1.1-3.3Hrs |
(*The working hours are only for reference; the actual running time is based on the actual usage.)
FAQs
The following are the frequently asked questions about how to detail a car:
1. How do I detail my car myself?
To detail the care, move, clear out the debris, and remove the floor mats. Next, wash the exterior from top to bottom, beginning with the wheels and ending with the body. After washing and rinsing, use a clay bar to remove any ingrained impurities, then apply wax for protection.
Vacuum the inside thoroughly, dust surfaces from top to bottom, and clean various materials such as fabric or leather with suitable cleansers. Finally, use a glass cleaner to leave all windows streak-free.
2. How much to detail a car in the UK?
Car detailing rates widely vary, depending on the service quality, ranging from roughly £50-£150 for a simple valet to £500-£800 or more for cleaning, paint correction, and ceramic coating.
A complete exterior and interior detail costs roughly £87 on average for a medium-sized vehicle. Still, it may range from £120 to £180 for a more comprehensive treatment, depending on the vehicle's size and the treatments necessary.
3. How long does it take to detail a car inside and out fully?
The time necessary to detail an automobile may vary depending on the detailing services you choose. A simple inside detail may take two hours, whilst a thorough exterior detail might take up to two days.
4. What is 3-step detailing?
The primary assumption of a three-step work is to compound painted surfaces, then polish/glaze them, and then wax or seal them. While this is usually a valid restoration process, it should not be done too often, as the compounding step will ultimately thin the clear coat too much.
Final Thoughts
Detailing a car is a satisfying experience that requires care, expertise, and attention to detail. By following the proper steps—from wheels and pre-cleaning to polishing, waxing, and finishing touches—you not only preserve your car but also improve its visual appeal.
The difference between a basic wash and a full detail is evident in terms of durability, safety, and pride of ownership. While detailing the needs takes effort, the results speak for themselves: a clean, shiny, well-kept surface. Incorporating detailing into your maintenance regimen keeps your automobile safe, visually appealing, and ready to amaze, whether on the road or at a show.


