



























You’ve reached a dark-sky location, set up your telescope and found your target. Now the mount, camera and dew heaters need enough power to keep working until the session ends. A flat battery could mean packing away while the sky is still clear.
An astrophotography power station lets you run several devices away from mains electricity. Choosing one starts with your equipment’s energy consumption, the length of your session and the connections each device requires.
This guide explains those calculations, the features worth checking and how the Jackery Explorer 1000 Plus v2 and Explorer 2000 Plus v2 fit different imaging energy requirements.
|
Key Takeaways: |
|
Why Portable Power Matters for Astrophotography
An imaging session can involve several devices working together for hours. Planning their power supply helps you make use of a clear night, particularly when your chosen location has no mains connection.
Keep Tracking, Cooling and Image Capture Running
A loss of power can stop the mount tracking, interrupt an exposure or disconnect the imaging controller. Depending on which device loses power, you may need to reconnect equipment, check alignment or restart the imaging sequence before continuing.
A cooled camera also needs electricity to maintain its selected sensor temperature, while dew heaters help keep moisture off exposed optics. Both belong in your overnight energy budget alongside the mount and controller.
A suitably sized power station supports these devices throughout the planned session. It cannot improve focus, guiding or sky conditions, but it can help prevent insufficient battery capacity from cutting the night short.
Take Your Equipment Beyond the Garden
A portable power station for astrophotography is useful at vehicle-accessible dark-sky sites, campsites and observing locations without convenient sockets. Compatible outputs let you supply several devices from one central battery, making power levels easier to monitor.
However, capacity should match the equipment you take. A basic camera-and-tracker setup may only need spare camera batteries and a small compatible battery pack, especially for shorter outings.
Power Bank or Portable Power Station: Which Do You Need?
Searching for the best power bank for astrophotography brings up everything from pocket-sized USB batteries to larger units with mains sockets. The right choice depends on the connections your equipment needs and the energy required for your session.
|
Power option |
Suitable applications |
What to check |
Main limitation |
|
USB power bank |
Compatible cameras, phones and USB-powered trackers |
USB power profiles, continuous output and capacity in Wh |
Often unsuitable for a complete 12V imaging rig without appropriate conversion |
|
Dedicated astronomy battery |
Compatible mounts and DC accessories |
Regulated voltage, current and connectors |
May offer fewer options for laptops and mixed equipment |
|
Portable power station |
Setups combining AC, DC and USB equipment |
Battery capacity and individual output limits |
Greater weight and cost |
For a lightweight camera-and-tracker setup, a compatible USB power bank may be sufficient. Adding a cooled camera, dew heaters and a laptop makes a portable power station worth considering, although every output still needs to match the connected equipment.
Compare battery energy in watt-hours (Wh). A milliamp-hour figure alone is incomplete because it depends on voltage:
Wh = mAh × nominal battery voltage ÷ 1,000
For example, 20,000mAh at 3.7V equals 74Wh of nominal stored energy, before conversion losses. Use the battery’s stated nominal voltage, not its USB output voltage.
DIY battery systems offer customisation but require suitable electrical knowledge and protection. Fuel generators are another option, although noise, exhaust and site restrictions can make them less convenient for overnight observing.
How Much Power Does Astrophotography Equipment Use?
Your astrophotography equipment draws different amounts of power throughout the night. A useful energy budget accounts for every powered device, its average consumption and how long it operates. This gives you a starting point for battery sizing before allowing for conversion losses and reserve capacity.

Build a Device-by-Device Power Budget
The table below uses illustrative planning assumptions, not measured specifications for named products. Replace these figures with measurements from your own setup where possible.
Energy consumption is calculated by multiplying average power in watts by operating time in hours. For example, a camera averaging 20W over eight hours requires 160Wh.
|
Astrophotography equipment |
Assumed average consumption |
Operating time |
Energy required |
|
Equatorial mount while tracking |
8W |
8 hours |
64Wh |
|
Cooled imaging camera |
20W |
8 hours |
160Wh |
|
Guide camera |
2W |
8 hours |
16Wh |
|
Imaging controller, excluding connected devices |
5W |
8 hours |
40Wh |
|
Two dew heaters combined |
20W |
8 hours |
160Wh |
|
Focuser and filter wheel, averaged over the session |
1W |
8 hours |
8Wh |
|
Powered hub and accessories |
4W |
8 hours |
32Wh |
|
Total example |
60W |
8 hours |
480Wh |
In this example, camera cooling and dew prevention account for much of the energy demand. However, 480Wh is the equipment’s calculated energy requirement, not the recommended battery capacity. Setup time, power conversion and a reserve still need consideration.
Understand Why Consumption Changes
A mount generally draws less power while tracking than when slewing quickly to another target. Short periods of higher demand matter when checking output limits, even if they contribute relatively little to the night’s total energy consumption.
A cooled camera may draw more power while reaching its selected temperature than while maintaining it. Its ongoing demand depends on the temperature difference and operating conditions. Dew-heater consumption also changes with controller settings: stronger heating increases average demand.
Focusers and filter wheels operate intermittently. The table’s 1W allowance represents an average across the session, rather than their consumption while moving.
Similarly, a power adapter marked 12V, 5A can supply up to 60W; that rating does not mean the connected equipment continuously consumes 60W.
Account for Laptops and Avoid Double-Counting
Replacing the example’s 5W imaging controller with a laptop averaging an assumed 40W increases the total to:
60W − 5W + 40W = 95W
Over eight hours, that becomes 95W × 8 hours = 760Wh. Laptop demand varies with screen brightness, processing activity and battery charging.
When measuring a controller’s input, check whether that reading already includes connected cameras, heaters or USB accessories. Count either the combined input or the individual loads. Adding both would overestimate your battery requirement.
How to Estimate Battery Capacity and Runtime?
Once you know your setup’s average consumption, you can estimate the battery capacity needed for a session. The calculation should account for equipment energy, power-conversion losses and a reserve, rather than assuming every rated watt-hour reaches your devices.
Calculate the Energy Your Equipment Needs
Use this formula:
Equipment energy (Wh) = average power (W) × operating time (hours)
For several devices, calculate each device’s energy separately and add the results. This is particularly useful when equipment runs for different periods: a laptop used for two hours should not receive the same operating-time allowance as heaters running all night.
The previous section’s example averages 60W over eight hours:
- 60W × 8 hours = 480Wh
Allow Separately for Losses and Reserve
Some stored energy is consumed when supplying your equipment. A reserve provides additional headroom for unexpected demand or a longer session.
Required rated capacity = equipment energy ÷ (usable-energy factor × fraction available before reserve)
Using an illustrative 85% usable-energy factor and retaining a 20% reserve:
- 480Wh ÷ (0.85 × 0.80) ≈ 706Wh
Here, 85% is a calculation assumption, not measured Jackery efficiency. Keeping 20% reserve is a separate planning choice, leaving 80% available for the planned session. The resulting 706Wh is an estimated minimum under these assumptions.
Include the Whole Session
Add energy for alignment, initial cooling, test exposures, calibration frames, parking and shutdown. Eight hours of imaging may involve considerably more than eight hours with equipment switched on.
An active AC inverter also consumes energy, which can become significant with small loads. Temperature can affect available battery energy and equipment demand, but there is no single cold-weather adjustment suitable for every setup.
To estimate operating time while retaining the same reserve:
Runtime (hours) = rated capacity (Wh) × usable-energy factor × 0.80 ÷ average load (W)
For a better estimate, use an appropriate AC or DC energy meter to record consumption across a representative session. Measure at a clearly defined point and account for losses only once; a meter at the equipment supply does not necessarily capture the power station’s internal consumption.

What Size Astrophotography Power Station Do You Need?
The right battery size depends on what you run and how long you stay out. These scenarios translate the previous calculation into recognisable setups, using assumed average loads rather than measurements from specific equipment.
|
Illustrative setup |
Average load |
Duration |
Equipment energy |
Calculated minimum rated capacity* |
|
Camera and star tracker |
15W |
6 hours |
90Wh |
133Wh |
|
Compact imaging rig |
35W |
8 hours |
280Wh |
412Wh |
|
Cooled-camera setup |
60W |
8 hours |
480Wh |
706Wh |
|
Laptop-based setup |
95W |
10 hours |
950Wh |
1,398Wh |
Assumes 85% usable energy and a 20% reserve; excludes additional setup energy. Capacities are rounded up to whole watt-hours.
When a 1kWh-Class Battery Makes Sense
For the illustrated cooled-camera setup, a battery around 1kWh provides room above the calculated 706Wh minimum for preparation and additional operating time. Check that those extra demands fit within the remaining allowance rather than assuming the battery will cover any overnight session.
A lightweight tracker setup has a much smaller requirement. A compatible compact battery may meet its needs without the weight or expense of either featured Jackery model.
When Moving to Approximately 2kWh Is Worthwhile
The laptop-based example requires nearly 1.4kWh before adding setup energy. A battery around 2kWh offers more room for that complete session, additional accessories or time between charging opportunities.
Choose the next suitable capacity after budgeting for the whole outing. Extra capacity is useful when you will use it, but also adds carrying weight and cost.
How to Choose a Portable Power Station for Astrophotography?
Battery capacity is only part of the decision. A portable power station for astrophotography also needs compatible connections, suitable overnight controls and a weight you can comfortably carry alongside your telescope.

Check DC Voltage, Current and Connector Compatibility
Look for a regulated DC output that stays within your equipment’s permitted voltage range under load. Match connector dimensions and polarity, then check both individual port limits and the combined current allowance. Longer or undersized cables can cause voltage drops, so use appropriately rated leads without unnecessary length.
A high AC wattage rating does not establish compatibility with a telescope’s DC input. ZWO, for example, specifies separate ASIAIR Plus input requirements, individual output limits and a combined output allowance. Check the guidance for your exact controller version before connecting several accessories.
Match AC and USB Outputs to Your Equipment
For equipment using mains adapters, choose a UK model with 230V AC output and suitable three-pin sockets. Check that each adapter supplies the voltage, polarity and current capacity its device requires.
USB-C needs similar attention. The power station, cable and connected device must support the required charging profile. A connector that physically fits does not guarantee suitable power delivery, and some USB ports serve data functions only.
Check Overnight Operating Behaviour
Check whether low-load automatic shutdown could switch off an output while a tracker or controller is still running. Review output timers and confirm which settings can be adjusted or disabled on the exact model.
Display brightness and fan behaviour also matter during a quiet observing session. Establish whether essential controls work without internet access, particularly if settings depend on an app. Test the complete setup at home, including periods of low demand.
Compare Carrying Weight and Complete Cost
Consider the walk from your vehicle, not just whether the station fits in the boot. Compare the total cost of the battery, suitable cables, distribution accessories and any solar panels or expansion batteries you actually need.
When reading an astrophotography power station review, look for the reviewer’s equipment list, measured energy consumption and connection stability. Those details make an overnight result more useful than an unsupported claim that a battery “lasts all night”.
Recommended Jackery Portable Power Stations for Astrophotography
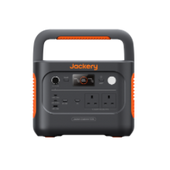
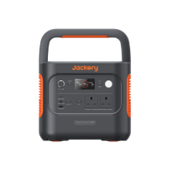
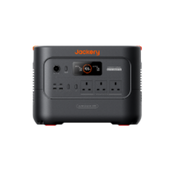
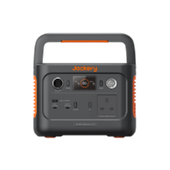
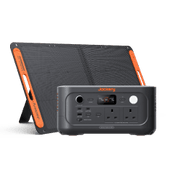
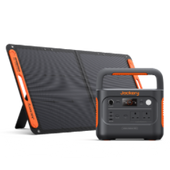
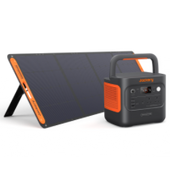
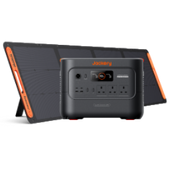
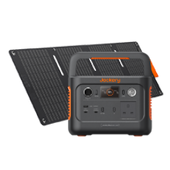
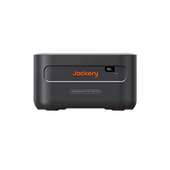
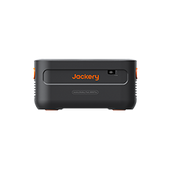
The Jackery Explorer 1000 Plus v2 and Explorer 2000 Plus v2 suit imaging setups that need more energy and connection options than a small USB battery provides. Choosing between them starts with your complete session’s energy requirement and the weight you are prepared to carry.
Both store electricity in rechargeable batteries. Their DC and USB outputs supply compatible devices, while an inverter converts stored energy into AC electricity for equipment using mains adapters. Mains charging or compatible solar and vehicle-charging equipment replenishes the battery between sessions.
|
Feature |
Explorer 1000 Plus v2 |
Explorer 2000 Plus v2 |
|
Built-in capacity |
1,024Wh |
2,048Wh |
|
Continuous AC output |
1,800W |
2,400W |
|
Surge output |
3,600W |
4,800W |
|
Weight |
10.8kg |
18.8kg |
|
Dimensions |
31.35 × 20.1 × 23.35cm |
36.6 × 25.5 × 27.2cm |
|
Expandable capacity |
Up to 11kWh |
Up to 12kWh |
|
Maximum solar input |
400W |
800W |
|
Stated full AC charging time |
1.25 hours |
1.5 hours |
Both feature LFP batteries rated for 6,000 cycles to 70% capacity, three AC outlets, two USB-C outputs with up to 140W charging, an 18W USB-A output, a 12V/10A car output, app monitoring and 10ms UPS switching. Charging times are manufacturer figures, rather than guaranteed times under every condition.
Explorer 1000 Plus v2: For a Single Rig with a Manageable Energy Budget
For the earlier 60W imaging setup, the Explorer 1000 Plus v2 offers a useful balance between stored energy and carrying weight. Applying our illustrative 85% usable-energy factor gives:
1,024Wh × 0.85 ≈ 870Wh of usable energy before reserve
Against the example’s 480Wh imaging requirement, that leaves around 216Wh for setup, shutdown and additional demand while preserving the reserve. These are calculations, not measured field-test results.

Its combination of outputs allows compatible camera equipment, a controller and USB accessories to share one power source. The AC sockets also accommodate suitable mains adapters when direct DC connections are unsuitable. For this relatively modest load, battery energy and connection compatibility matter more than the inverter’s maximum wattage.
At 23.8 lbs, it is worth considering for a setup close to the vehicle, although carrying it alongside a mount and telescope still requires planning. Compatible expansion batteries offer a route to longer sessions later, but add cost and weight. Start with the base unit if your measured energy budget fits; longer nights or heavier heater use reduce the available margin.
Explorer 2000 Plus v2: For Longer Sessions and Higher Energy Demand
The Explorer 2000 Plus v2 provides twice the built-in battery capacity. Using the same assumption:
2,048Wh × 0.85 ≈ 1,741Wh of usable energy before reserve
The earlier laptop-based example requires 950Wh over ten hours, leaving around 443Wh for preparation and other demands within that allowance.

This additional energy is useful when a laptop runs throughout the night, heaters need higher settings or charging opportunities are limited. Several shorter sessions may also fit, but their combined energy requirement must be calculated before assuming the battery will cover an entire trip.
The trade-off is its 41.45 lbs weight. Consider how far you must carry it and whether the extra capacity will regularly be used. Its higher solar-input ceiling offers more potential for daytime replenishment with a suitable array, but actual charging depends on sunlight and panel conditions.
How to Connect Either Jackery to Your Imaging Equipment
For compatible DC equipment, use appropriately rated leads and, where needed, a suitable distribution unit. Both models have a 12V/10A car output: choosing the larger battery does not increase that port’s current allowance. Check voltage, polarity, connectors and combined demand before connecting the rig.
USB-powered accessories can use suitable USB outputs, provided the required power profiles and cables match. Equipment needing a mains adapter can use the AC outlets with its correct adapter.
Besides, 10ms UPS switching concerns the transition from mains supply to battery operation. It does not guarantee that every controller, camera or mount will avoid restarting. Test the complete arrangement before relying on it during an imaging session.
Jackery Overnight Power Plan: Charge and Capacity Remaining
An overnight schedule shows how changing loads affect the energy left at dawn. This illustrative calculation—not a field test compares both Jackery models powering the same equipment through setup, eight hours of imaging and shutdown.
Both start fully charged, without expansion batteries or recharging during the session. The calculation assumes an 85% usable-energy factor throughout; actual performance will vary with output mode, temperature and equipment behaviour.
|
Time |
Actions and assumed load during the preceding period |
Total energy used |
1000 Plus v2: modelled charge |
Estimated usable energy remaining |
2000 Plus v2: modelled charge |
Estimated usable energy remaining |
|
19:00 |
Begin fully charged |
0Wh |
100% |
870Wh |
100% |
1,741Wh |
|
20:00 |
Setup, alignment and cooling: 40W for 1 hour |
40Wh |
95.4% |
830Wh |
97.7% |
1,701Wh |
|
23:00 |
Imaging: 60W for 3 hours |
220Wh |
74.7% |
650Wh |
87.4% |
1,521Wh |
|
02:00 |
Imaging with increased heater use: 70W for 3 hours |
430Wh |
50.6% |
440Wh |
75.3% |
1,311Wh |
|
04:00 |
Imaging: 60W for 2 hours |
550Wh |
36.8% |
320Wh |
68.4% |
1,191Wh |
|
04:30 |
Parking, saving data and shutdown: 30W for 30 minutes |
565Wh |
35.1% |
305Wh |
67.5% |
1,176Wh |
Usable energy remaining = rated capacity × 0.85 − cumulative energy delivered
The percentages show the fraction of each model’s initial usable-energy budget remaining. They are not predicted screen readings. Likewise, “remaining capacity” means estimated usable output energy, rather than nominal energy stored inside the battery. Figures are rounded.
Both models finish this example above the planned 20% reserve. However, that reserve is still included in the remaining-energy columns. Preserving it leaves approximately 131Wh on the 1000 Plus v2 and 828Wh on the 2000 Plus v2 for additional planned use under these assumptions.

Using and Recharging Your Astrophotography Power Station in UK Conditions
A suitable battery capacity is only part of preparing for a night outdoors. Damp ground, falling temperatures and limited daylight between sessions also affect where you place your astrophotography power station and how you replenish it.
Manage Dew, Moisture and Cable Movement
Place the station on a stable, dry, raised surface, protected from rain and dew while keeping ventilation openings clear. Do not assume it is waterproof or seal an operating unit inside a container.
Keep plugs and adapters dry, secure connections against accidental movement and route leads away from walking paths. Leave sufficient cable slack for the mount to slew and complete a meridian flip without pulling on sockets. Check the full movement before starting your imaging sequence.
Check Charging and Discharging Temperature Limits Separately
A battery may be permitted to supply power at temperatures where charging is restricted. An advertised operating-temperature range therefore does not automatically mean you can recharge throughout that range.
Consult the exact UK manual for your model for charging, discharging and storage limits. Do not assume either model includes battery self-heating. After a cold session, let the unit reach the permitted charging conditions and ensure it is dry before connecting a charger.
Recharge Between Clear Nights
Mains charging provides a straightforward way to replenish the battery when a suitable socket is available. Compatible vehicle charging can contribute during travel, but check the required accessories, available input and journey time.
Solar charging is a daytime option, although short UK winter days, cloud, shading and panel angle affect the energy collected. Maximum solar input is the station’s acceptance limit, not a promise of continuous charging power. Before another night out, check the actual charge level against your next session’s energy budget.
FAQs
The following are the frequently asked questions about the astrophotography power station:
What Is the Best Power Bank for Astrophotography?
The best power bank for astrophotography depends on your equipment’s connections and energy requirements. A compatible USB power bank may suit a camera and small tracker, while a cooled camera, mount and heaters may justify a portable power station. Choose sufficient usable capacity, suitable outputs and manageable weight rather than relying on the largest wattage rating.
Is a 1,000Wh Power Station Enough for a Full Night?
It can be. With an illustrative 85% usable-energy factor and a 20% reserve, a fully charged 1,000Wh station provides approximately 680Wh for planned use. That represents around 11.3 hours at a steady 60W, or 7.2 hours at 95W. Include setup and shutdown energy; temperature, changing loads and conversion losses affect actual runtime.
Can a Jackery Power a Telescope Mount and Cooled Camera Together?
Yes, provided the chosen model’s outputs meet both devices’ requirements and its battery has enough energy for the session. Check voltage, polarity, connectors and combined current, including slewing and initial cooling demand. Both featured Explorer Plus v2 models have a 12V/10A car output; use suitable distribution equipment or appropriate AC adapters rather than assuming any splitter will work.
Is DC More Efficient Than Using an AC Adapter?
Direct DC can reduce losses by avoiding the conversion from battery DC to AC and then back to DC through an adapter. However, efficiency depends on the station’s circuitry, load and any additional voltage converter. Use direct DC only when it matches the equipment’s electrical requirements. Measuring energy consumption with each suitable connection provides a more reliable comparison.
What Should an Astrophotography Power Station Review Actually Test?
A useful review should identify the complete rig, output connections, ambient temperature and session duration. It should measure energy consumption, check voltage stability during demanding operations and report any shutdowns or device resets. Look for tests of low-load behaviour, fan noise and controls without internet access, with measured results clearly separated from calculated runtime estimates.
Final Thoughts
Choosing an astrophotography power station starts with the energy your equipment needs from setup to shutdown. The Jackery Explorer 1000 Plus v2 is a suitable option when that complete session fits within its usable energy budget while leaving a reserve for unexpected demand.
The Explorer 2000 Plus v2 makes more sense when longer sessions, continuous laptop use or limited recharging opportunities justify the additional capacity and carrying weight. Consider how far you will carry it and whether you will regularly use that extra energy.
Before choosing a battery, list every device you intend to power, measure consumption over a representative session and check every required connection, including voltage, polarity and current limits.


![Guide to 10kW Solar Battery Price in the UK [2026 Update]](http://uk.jackery.com/cdn/shop/files/10kw_solar_battery_price_guide.webp?v=1780026743&width=90)


