


How you load your rucksack might make the difference between a fun and tiring hike. A well-packed rucksack makes it easier on your body, helps you keep your balance, and lets you get to things quickly when you need them most. Every hiker has to know how to choose the right rucksack size, distribute their weight, and decide what items to bring.
This page has all you need to know about day trips and longer trips, as well as valuable tips for keeping your pack light, safe, and ready for any weather. If you want to have a safer and more fun time hiking or climbing mountains, you need to know how to pack appropriately.
|
Key Takeaways: |
|
Basics of a Rucksack for Hiking
Before you start packing, make sure you have the correct rucksack for your excursion.
Rucksack Size and Capacity
For day hikes, pack 20-35 litres of lightweight, minimum gear.
Weekend trips need 40-60 litres (for sleeping bag, stove and additional clothes).
Expeditions: 65+ litres (for cold or multiday excursions).
Tip: Avoid overpacking! A larger backpack does not need you to fill every inch. Try to keep your load as light as feasible.
Fit and Features
Adjustable back systems accommodate varying torso lengths.
The Hip Belt should fit comfortably on your hips, transferring the majority of the weight off your shoulders.
Consider a mesh or suspended back system for better ventilation and reduced perspiration.
Access points on top, front, and sides make it easy to access your goods.
Hydration System: Many packs now have bladder sleeves and hose ports.
Why Good Packing Matters?
A well-packed backpack is more comfortable, saves energy, and eliminates the need to hunt around for items while walking. Packing such that the weight is closer to your centre of gravity offers two advantages:
It maximises the utilisation of your rucksack's padding and structure, distributing weight to your hips rather than your neck and shoulders, reducing discomfort.
Walking across rocky terrain becomes significantly simpler when your rucksack's weight is close to your body. Falling over backwards over steep or exposed land while carrying a big knapsack might result in catastrophic injury. And walking with an unstable knapsack and a tent hanging off the back is hard!

How to Pack a Rucksack: What to Consider?
We're going to go into much more depth than you've ever wanted to know about packing a rucksack. It's really not that complex once you understand the fundamentals, so here are the three most important things to consider.
Weight Distribution across Your Backpack
So you have all of your belongings in a tidy pile (read: scattered over the floor). What do you put inside the bag first? It's tempting to grab for the largest, heaviest thing and place it first. At least you know it will fit. Then you might keep adding smaller, lighter objects until you finally have your spork and toothbrush on top.
This strategy may be enough if you are not going far. You know, simply moving your life from your house to a vehicle, or from bus to train to home. But we know you're an energetic bunch. Most likely, you'll be lugging that pack on your back for numerous hours, if not days.
Instead, aim to load your rucksack so that the majority of the weight is in the centre to bottom of the backpack, as close to your back as possible when you're wearing the rucksack. The downside of putting the weight at the bottom of the bag is that it can make the backpack feel like it's moving away from you, especially when walking uphill. You'll feel a lot of weight on your shoulders, and if your luggage is heavy enough, you may feel as if someone is pushing you backwards. To reproduce this effect, imagine yanking on the bottom of a friend's rucksack.
Ideally, the bag's centre of gravity should be in the middle. Too high and you'll be off balance (especially with a 60-litre knapsack), and lean too far forward and you'll crash over! According to Goldilocks, the centre of gravity should be neither too high nor too low.
Ease of Access When Packing a Rucksack
Although weight is crucial, it must be balanced with practical factors. Practical concerns include: how simple will it be for me to get the medium-weight item I need during the day? You really have to learn how to relax and compromise.
You don't want to be the person who has to dump their whole bag onto the floor as soon as it starts pouring to find their waterproof pants. You don't want to be the person who arrives at camp as the sun sets and realises they can't find their headlamp.
So, instead of a single large compartment, most rucksacks feature small pockets on the lid and along the sides. Pockets may also be included in the waist straps. You should have plenty of opportunities to balance weight and accessibility of items, so there's no need to have that metal cup attached to the exterior of your backpack! Take it off so your trekking buddies don't feel like they're strolling with a Swiss alpine cow.

Become a Packing Pro
Then there are the little details that make all the difference. They don't need their own section, but these little suggestions can help you become a rucksack packing guru. Here are our top tips and insights about ancient art:
Tip 1: Most rucksacks, even adventure ones, aren't waterproof. The simplest way to keep your belongings dry is to buy a large dry bag and line the interior of your backpack with it. A rubble sack (not a garbage bag) is a considerably cheaper, equally effective alternative, and it's easy to repair with duct tape if a hole occurs.
Tip 2: Use clothing and soft materials to fill in the spaces between stiffer, larger objects. This prevents your suitcase from appearing lumpy and saves you room overall.
Tip 3: If you opt to use many tiny drybags to save space, be sure to push out as much air as possible before sealing them.
Tip 4: If you did everything correctly, your bag should stand up on its own without tipping over. This is more applicable to large adventure rucksacks, but it is an excellent test of balance.
How to Pack a Rucksack (A Step-by-Step Guide)
Whether you're hiking, travelling, or camping, getting the weight right when carrying a rucksack is critical to preventing fatigue and even damage. Here's a breakdown of how to properly pack a rucksack:
Before Packing a Bag, Arrange and Organise Your Belongings
Practice makes perfect. When packing a backpack, begin with the end in mind. Begin by categorising your bring-alongs. Not only will this simplify your approach to each packing step, but it will also highlight any items you are missing (or could do without).
Heavy Objects First: This includes tents, cooking equipment, food that must be prepared, and other solid objects that will affect the overall distribution of backpack weight.
Easy-To-Find Necessities: These are products that, although not taking up much space, must be easily accessible. Liquids, snackable meals, caps, and waterproofs are excellent examples of such goods.
Clothing Fillers: While a change of clothing or sleepwear is certainly essential when going for a sweaty walk, grouping garments that only serve a role after you sit down for the day can assist with both packing and overall backpack weight distribution.
Exterior Add-Ons: These are light but take up excessive space in a knapsack, making it difficult to include other necessities. They may be fastened to the rucksack's front straps. Tent poles, waterproof coverings, and, in some instances, sleeping bags are included if a larger quantity of clothing is required.

Step 1: Prepare a Rucksack Bedding
Once you've put each thing into its own category, you can begin laying out rucksack bedding. Because weight is such an essential factor in packing a backpack, start with the goods that are seldom used for hiking (or anything else you use your rucksack for) and only come into play while camping. These items include sleeping bags, sleepwear, and a pillow.
Place your pillow and sleepwear at the bottom of your backpack as a buffer between the heavier goods.
Once this is complete, position your sleeping bag vertically on top of the pillow and sleepwear, leaving enough room for the arriving goods.
Before you begin packing, make sure each of these items is as compact as possible, whether that means folding your sleepwear or tucking your sleeping bag in tightly. This will significantly help maximise space in the long term.
How to load clothing into your rucksack?
Fold t-shirts and trousers rather than rolling them. Fold horizontally twice to maximise space savings. Roll the socks into little bundles that approximate a ball form. Roll pants into little long tubes. If you're carrying a second pair of shoes, stow your socks and pants inside them.
Step 2: Spread The Weight Evenly
The heavier goods come next. This is the step in the 'how to pack a knapsack' process when proper posture and weighing are critical.
Pack your tent first. When packing a tent in a bag, aim to keep it as vertical as possible. The goal is to have it as central and as close to your back as possible, just above your hips, while you're walking.
If required, reposition your sleeping bag so that it is packed closely next to your tent bag, providing a balanced feel. As you arrange larger items, such as cooking equipment, keep them as centrally located as possible.
Keeping heavier items closer to your back helps distribute the weight more evenly across your body. If they wind up near the bottom of your backpack, you'll begin to feel as if it's dragging you down.
If they are placed too high or too far forward in your backpack, your body will be dragged rearward, putting more strain on your back and legs when walking. Similarly, placing these objects too firmly on either side of the bag may create a lopsided effect, making it impossible to walk in a straight line.
Step 3: Fill Any Space With Clothing
Although the larger objects have all been packed, there is still work to be done in this area. To maintain a proper balance with the heavier goods and prevent jumbling, fill the remaining spaces in the rucksack's central compartment with any folded clothing items (fleeces, thermals) that are not required for the walk. If your backpack is tiny or you need to bring additional garments, you may carry your sleeping bag by hand or connect it to one of the straps on the front.
Step 4: Put Your Most Crucial Objects within Arm's Reach
Now that you've established a decent backpack weight distribution and packed your heavier items, you'll have a solid basis for packing your necessities. Although it depends on the number of side pockets or compartments in your backpack, the bulk of your vital stuff will be stored at the top.
Backpacking may be unexpected, so before packing, make sure you can easily find everything you need. Essentials such as first-aid kits, flashlights, suncream, caps, gloves, and possibly squashable food must be economically packed to remain easily accessible and minimise misplacement due to mobility.
Most essential, make sure you leave room at the top of your backpack for your waterproofs so they're easily accessible when the skies open.
Step 5: Make Excellent Use Of Your Straps and Pockets
Your knapsack is complete, and it's time to make the most of its exterior features. The first is the previously mentioned extra pockets, typically found on each side of the bag. We didn't say water. Fixing a water bottle in one pocket or holster and waterproofs or other protective equipment in the other allows you to remain hydrated without pausing, while also maintaining a healthy balance throughout your backpack.
To make the most of the rucksack's straps, attach items like tent poles and camping mats, which would otherwise take up space in your pack while weighing little. Another clever way to utilise your rucksack's exterior is to place a protective, waterproof, or insulating liner across the front, keeping your possessions safe in adverse weather.
Step 6: The Last Test Before Departing
Before you begin your excursion, the last step in packing a rucksack is to double-check that the backpack's weight distribution is correct.
Begin by putting your backpack on the floor. If it falls to the left or right, the weight is not equally distributed and has to be adjusted. If it falls forward, it indicates it is overloaded and will drag you backwards when worn. Try to organise your possessions again so that each object remains in its proper spot.
Examine how your knapsack feels when carried after it can stand up on its own.
After you've hoisted it onto your back, take a stroll and tighten the straps as needed. Then you'll be prepared to depart.
What Size Should a Hiking Rucksack Be?
The hiking rucksack is a must-have companion for every excursion! But what size should it be? And what is the ideal quantity of litres? That depends on what you want to accomplish.

Day Trip: A modest hiking backpack, often known as a daypack, with 10 to 25 litres of storage capacity may hold all you need for the day.
Thru Hiking: A multiday backpack, often called a touring backpack, can hold 15 to 35 litres and is perfect for a long weekend trek.
Trekking or Alpine Touring: A medium-sized hiking backpack or climbing rucksack with a capacity of 30 to 45 litres provides enough storage for your goods. Nonetheless, it's compact.
Hiking Holidays: A traditional 40 to 70 litre hiking rucksack has enough storage capacity and various extra compartments. This rucksack can accommodate anything, from a sleeping blanket to a camping oven!
How Much Should Your Rucksack Weigh?
Your backpack should only weigh what you can easily carry; that's the easy answer, however! Ultralight hikers take pleasure in carrying a base weight of 4.5kg, which includes everything except food and drink.
As a rough rule of thumb, anything over 13kg for a fully laden knapsack is hefty for a multiday journey. A healthy goal weight is from 9 to 13kg.
For most of us, the goal is to keep our backpack as light as possible without sacrificing too many conveniences - these selections are often based on how we prepare our morning coffee!
Packing List: What Goes in The Hiking Rucksack?
Are you still standing in the woods while packing your hiking ruckpack? Then here's a life-saving packing checklist for you. You may change your day trek based on the season, as well as the kind, duration, and length, and always have the appropriate equipment with you.

Packing List for a Day Trip
Small hiking rucksack (10-25 litres)
GPS app or trekking map with compass
The wallet contains a passport, an insurance card, and cash.
If required, charge your emergency cell phone.
Water bottle 1-1.5 litres
Provisions, traditional snack or energy bar, almonds and dried fruit
First-aid kit with blister plasters and a bivouac bag or rescue blanket.
Hiking poles are especially fastened to the exterior of the bag.
Waste bag for the environment
Pocket Knife
Matches or lighters
Additional Equipment Depending On The Season And Weather
Rain cover, waterproof rain cover for the backpack.
Headlamp for excursions in spring and fall when it becomes dark early.
Sun cream with at least a sun protection factor of 30
Mosquito repellent or insect spray
Packing List For a Multiday Trip
What is the most important guideline to follow while planning a multiday tour? Leave out the extraneous! The goal here is to pack as light as possible. Mountain guides recommend carrying no more than 8 kilograms. For you, this means packing your backpack as you would for a day trip and simply bringing a few essentials. Especially those required for overnight visits. The hiking rucksack for a multiday trip includes:
Light hiking backpack 15 to 35 litres, including packing cubes.
Day-hiking equipment as a foundation (see above)
Microfiber travel towel, quick-drying.
Toiletry pack with toothbrush, shower gel, and cream
First-aid kit: diarrhoea, fever, and headache pills; personal medicine.
Change your pants, socks and garments
Pyjamas Sleeping bag
Slippers or Flip-flops
Chargers for electronics
You want to sleep in a tent and demonstrate your camping culinary abilities beneath the glittering starry sky? Then add some extra gear to your bag. Surprise your guests with an edible plant cuisine.
Packing List for a Hiking Holiday
Are you a true trekking aficionado who wants to broaden your horizons with an XL hiking vacation? Whether you're in Scotland's magical Highlands, Albania's rough mountain landscape, or one of Cape Verde's untamed volcanic islands, you should bring these friends in your hiking bag before you begin your journey. The hiking rucksack for a hiking holiday includes:
Trekking rucksack, 40-70 litres, with packing cubes.
Basic multiday trip equipment (as listed above)
Passport and passport cover
Visa, if necessary.
Driving license, international or national
Foreign health insurance, proof
Travel Documents
Reservations for cabins, hotels, or hostels, with instructions
Train tickets, rail passes, or airline tickets
Travel or hiking guides
Map, roadmap.
An EC or credit card that permits free withdrawals overseas.
Bank's emergency hotline, such as for card cancellations.
Foreign currency
Fanny packs with hidden compartments or breast pockets.

When There Is Still Space in Your Rucksack?
Admittedly, this is an uncommon event. But if it does, here are some suggestions for useful hiking knapsack accessories. These items will make your walk simpler, more comfortable, and even more enjoyable:
Camera and memory cards.
Binoculars
The watch is functional.
Small or heated seat cushion
Inflatable pillow
handkerchiefs and toilet paper
Tick card or tweezers.
Safety pins with a sewing kit
Spare shoelaces
Hand sanitiser
Travel Diary
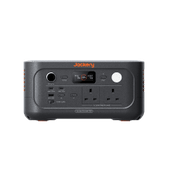
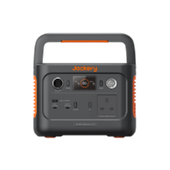
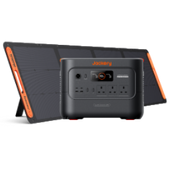
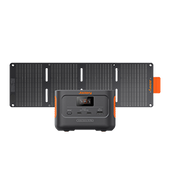
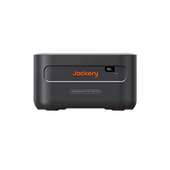
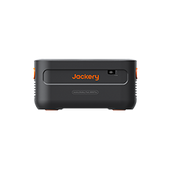
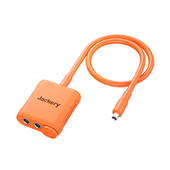
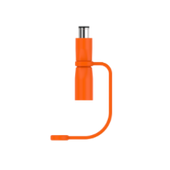
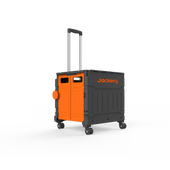
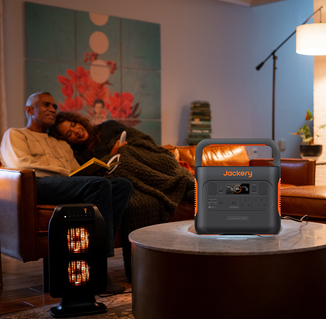
Jackery Explorer 100 Plus Portable Power Station
When planning a lengthy walk or multiday expedition, dependable electricity is as crucial as food and shelter. The Jackery Explorer 100 Plus power station is a small but powerful option for charging vital electronics on the road. It is lightweight and portable, and can recharge cellphones, GPS devices, lights, and even cameras many times, keeping you connected and secure on your expedition.
Its quiet, eco-friendly operation makes it ideal for camping without disrupting the environment. For hikers who depend on technology for navigation, communication, or photography, the Jackery Explorer 100 Plus is an essential addition to any pack.
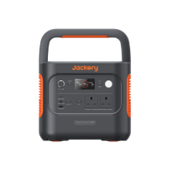
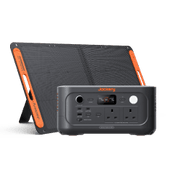
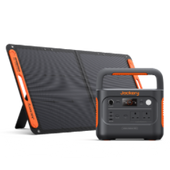
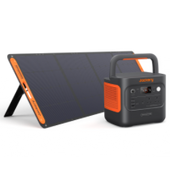
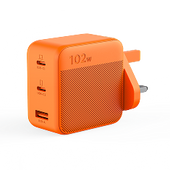
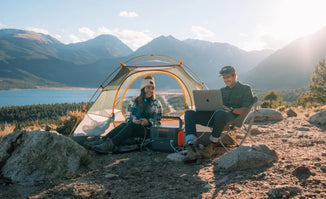
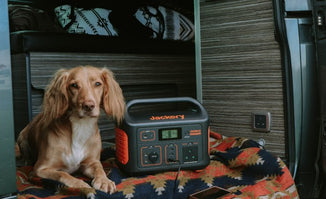
Jackery Portable Power Station for Hiking
Choosing a Jackery Portable Power Station for hiking can significantly enhance your outdoor experience by providing reliable, quiet, and convenient power. Jackery offers various models, including smaller ones (like the Explorer 300 Plus or 100 Plus) that are specifically designed to be lightweight enough to stash in a backpack. They are generally more portable than many competing power stations of similar capacity. Most models feature a sturdy, built-in handle that makes it easy to grab and transport from your car to your campsite or along the trail (for shorter distances, or with smaller units).
Jackery Portable Power Stations come equipped with a variety of ports, including AC outlets, USB-A, USB-C, and a car outlet, allowing you to charge everything from your phone, GPS, and headlamp to a laptop, camera batteries, and drone batteries.
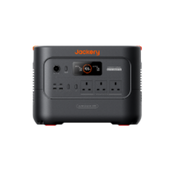
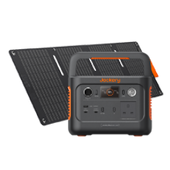
Jackery Explorer 100 Plus Portable Power Station
Choosing the Jackery Explorer 100 Plus for hiking, especially for day trips or short overnights, is based on a few key factors that cater specifically to the needs of outdoor enthusiasts.

Ultra-Portability and Lightweight Design: Weighing in at just 2.13 lbs (965 grams), it's light enough to carry in a backpack without adding significant bulk or strain, which is crucial for hiking where every ounce counts. Its small, compact form factor makes it easy to pack and store, fitting neatly alongside your other gear.
Reliable Power for Essential Electronics: The 99.2Wh capacity is ideal for keeping essential personal devices charged on short to medium hikes. It can charge a typical modern smartphone multiple times (e.g., an iPhone 17 about 6.2 times) and can power headlamps, GPS devices, and action cameras for extended periods. It provides a reliable power source for crucial safety and navigation devices, such as GPS units, satellite communication equipment, and smartphones, ensuring you can maintain communication and navigate accurately in the wilderness.
Durable and Long-Lasting Battery: It uses a robust and safer Lithium Iron Phosphate (LiFePO4) battery cell chemistry. The battery is rated for 2,000 charge cycles before its capacity reduces to 80%, providing long-term reliability for your outdoor adventures. It includes a Battery Management System (BMS) and multiple protection features (such as over-temperature, short-circuit, and over-voltage protection) for safe outdoor operation.
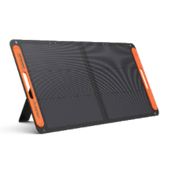
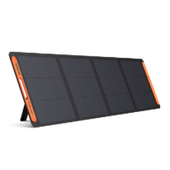
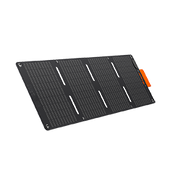
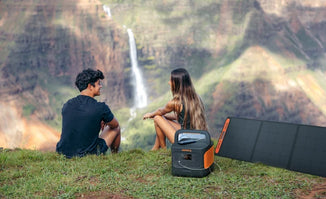
Flexible Recharging Options: It can be recharged with an optional Jackery SolarSaga solar panel (e.g., 40W Mini or 100W), enabling eco-friendly, off-grid power replenishment while on the trail. It also supports recharging via USB-C or a car adapter.
|
Features of Jackery Explorer 100 Plus |
|
|
Portability |
Approx. 2.13 lbs (965 g) |
|
Capacity |
99.2 Wh (or 31,000 mAh at 3.2V) |
|
Battery Type |
LiFePO4 (Lithium Iron Phosphate) 2000 cycles to 80%+ capacity |
|
Recharging Method |
Solar (up to 100W input), USB-C PD |
|
Output Ports |
2 x USB-C (100W Max total), 1 x USB-A (18W Max) |
|
Running Time |
GPS Device (5W): 15.8 Hrs Camping Light (5W): 15.8 Hrs Portable Fridge (60W): 1.3 Hrs Phone (20W): 6.2 Charges Smartwatch (5W): 15.8 Hrs |
FAQs
The following are the frequently asked questions about how to pack a rucksack for hiking:
1. How to pack your hiking rucksack?
To pack a hiking backpack, put lighter, bulkier items like a sleeping bag at the bottom for a firm foundation, and then carry heavier, more essential items (food, tent, cooking utensils) close to your back, around your shoulder blades, to keep your centre of gravity steady.
Keep commonly used goods (rain gear, food) in the top, outer, or hip belt pockets for convenient access. Use compression straps to bring the burden closer to your body, and line the pack with a waterproof bag to keep your things dry.
2. What is the 20% rule for backpacking?
A filled hiking pack should weigh no more than 20% of your body weight. (If you weigh 150 pounds, your rucksack should weigh no more than 30 pounds.) A filled day hiking bag should weigh no more than 10% of your body weight.
3. How to pack for 3 days in a backpack?
To pack a backpack for a three-day journey, first choose a backpack suitable for the duration and type of trip, and then organise your things to maximise storage and weight distribution. Pack heavier goods near the bottom and close to your back, while lighter, often used items may go on top or in conveniently accessible pockets.
4. How to pack a rucksack with clothes?
To save space and minimise creasing when packing garments in a knapsack, roll them rather than fold. Pack larger objects towards the bottom and closer to your back for improved weight distribution. Use compression or fill bags to reduce bulk further and keep objects dry.
Final Thoughts
Packing a rucksack is more than simply stuffing goods into a bag; it's about planning, comfort, and efficiency. A well-balanced pack not only helps you avoid tiredness, but it also keeps you organised and safe on the trail. From selecting the appropriate backpack size to making efficient use of compartments and straps, each step adds to a more enjoyable hiking experience.
Keep your basics within reach, distribute weight carefully, and strive to travel as light as possible without compromising safety. With careful planning and packing, you'll be prepared for anything the route throws at you, whether it's a day walk, a multiday journey or a full-fledged vacation experience.


