


Blisters are among the most common hiking injuries, and they can rapidly transform a pleasant trip into a miserable one. Whether you're exploring local UK trails or planning a long-distance adventure, learning how to avoid blisters when hiking is crucial.
This article explores the causes of blisters, how to prepare for your trip, the best techniques for curing blisters on the trail, and post-hike foot care procedures. We also examine the risks of untreated blisters and the essential items in your blister care kit. These hiking foot care tips from experts will help you stay pain-free and confident on any trail.
We also highly recommend the Jackery Portable Power Station, which is a portable power source made for powering electronics and devices while you're outside, like while you're hiking.
|
Key Takeaways: |
|
● The main causes of blisters include dampness, friction, and ill-fitting shoes that constantly brush against the skin. ● You may significantly lower your risk of blisters by wearing well-fitting, broken-in hiking footwear and socks that wick away moisture. ● Post-hike foot care promotes healing and helps prevent future issues. This includes cleaning, drying, moisturising, and examining the feet. ● To avoid blisters and enjoy every step of your hiking adventure, proper on-trail care and long-term foot maintenance are crucial. ● We highly recommend Jackery Explorer 100 Plus to power the electronics and devices on the go in case of emergency. |
How to Prevent Blisters When Hiking: Understanding the Causes and Solutions
Walking through gorgeous pathways in the Lake District or embarking on a long-distance walk in the Highlands can be remarkable experiences—but only if your feet are pleased. Blisters are one of the most common concerns among hikers, and they can make even the most enjoyable outdoor experience miserable.
The good news is that they're easily avoidable if you understand what causes them and how to take the proper safeguards. This guide will explore ways to prevent blisters while hiking, starting with the causes of these common foot issues.
What Are Hiking Blisters?
Blisters are fluid-filled bubbles that form on the upper layers of your skin, usually due to friction between your skin, stockings, and footwear. During a walk, repetitive rubbing produces heat, and if that heat builds up, layers of skin split and fill with fluid, resulting in a blister.
Why Does Friction Lead to Blisters?
Friction is the leading cause of hiking blisters. When your foot moves inside your shoe—especially if your socks or boots don't fit properly—the frequent rubbing causes shear stresses on the skin, harming the layers beneath. Common hotspots include the heel, toes, ball of the foot, and arch—areas where there is recurrent motion or pressure.
How do Moisture and Heat Increase Blister Risk?
Moisture and heat serve as friction accelerators. When your feet sweat or become wet from rain or stream crossings, the skin relaxes and becomes more sensitive to harm. As heat builds up from continuous walking, your feet may swell, creating pressure and rubbing inside your boots.
Are Some People More Prone to Hiking Blisters?
Yes. Everyone's feet are unique, and your gait, pressure areas, or even foot shape can make you more susceptible to blisters. Blisters are more prone to develop in areas of your foot that face more pressure or friction during a walk.
Can Poor Footwear or Sock Choice Cause Blisters?
One of the most prevalent causes of hiking blisters is ill-fitting footwear—either too tight or loose. Wearing cotton socks that trap moisture only makes the issue worse. The incorrect combination of boots and socks produces an ideal environment for friction, heat, and moisture, resulting in painful blisters.
How to Prevent Blisters When Hiking: Preparing for the Hike
Blister prevention begins well before you hit the trails. What you do before your trip, from selecting the appropriate footwear to preparing your feet, is just as crucial as how you manage things on the route. Here's how to avoid blisters while hiking by planning properly.

Tip 1: Choose the Right Hiking Boots
Shoes are your first line of defence against blisters. It is crucial that your hiking boots are well-fitted, broken in, and suitable for the terrain you plan to cover. Overly tight boots might cause pressure points, whereas loose boots allow your feet to move around, adding friction.
Many hikers make the mistake of wearing new boots on long hikes. Instead, take shorter trips to slowly break in your boots and let them mould to your feet. Before going for a lengthy walk, ensure there are no areas that are rubbing or hurting and address them accordingly.
Tip 2: Invest in High-Quality Hiking Socks
Don't forget how important good socks are. Avoid wearing cotton because it retains moisture, which can increase the likelihood of blisters. Instead, choose synthetic, merino wool, or moisture-wicking socks to keep your feet dry and prevent friction.
Many hikers propose wearing a thin liner sock below a thicker hiking sock to create a dual-layer arrangement that reduces direct skin contact.
Tip 3: Keep Your Feet Dry and Conditioned
Moisture is a leading cause of blisters. Dry your feet thoroughly before putting on socks, and use antiperspirant or footpowder to reduce sweat. If your feet are prone to blisters, apply petroleum jelly or blister prevention tape to the most sensitive regions before heading out.
Regular hikers also propose gradually toughening their feet by walking barefoot around the home or increasing their trekking distance over time to allow their skin to adjust.
Tip 4: Check Your Fit and Lacing
Proper boot lacing can help prevent foot mobility and relieve strain. Lacing techniques, such as the heel lock (also known as a lace lock), can help secure your heel and prevent it from shifting. If you notice any hotspots growing during your hike, pause and adjust the laces accordingly.
How to Treat the Blisters When Hiking
Despite your best efforts, blisters can still grow when hiking. What you do next is critical—early intervention and effective treatment can prevent a minor annoyance from becoming a serious issue. The procedures below are clear and practical for treating a blister while walking or trekking, as well as identifying signs of infection.
What to Do When You Feel a Hotspot?
A hotspot is often the first indicator that a blister is forming. It may feel like a heated, itchy, or sore area of skin, typically on the heel, toes, or ball of the foot. If you discover a hotspot, you should stop trekking immediately.
Take off your boots and socks, and let your feet chill down. If they are damp, ensure they are properly dried. Then, place a blister plaster, moleskin pad, or blister tape immediately over the hotspot. This forms a barrier, reducing friction and potentially preventing a blister from fully forming. Once protected, carefully re-lace your boots, taking care not to apply too much pressure or slip around the affected area.
How to Treat an Active Blister on the Trail?
If a blister has formed during trekking, leaving it alone is usually the best option. A blister is the body's approach to protecting damaged skin with a fluid cushion. You should not pop it unless it is huge, painful, or prone to explode under pressure.
Cover the blister with a hydrocolloid plaster or a sterile, nonstick dressing. These dressings not only protect the skin but also provide a moist environment that promotes speedier healing. If the blister is excessively painful and needs to be drained, use a sterile needle or blade.
Carefully puncture the blister's edge to allow the fluid to drain without removing the skin. After draining, wipe the area with antiseptic before applying a sterile dressing and securing it with medical tape to avoid further rubbing.
What to Do if the Blister Bursts?
If the blister bursts on its own or after draining, adequate cleanliness is even more crucial. To limit the risk of infection, gently clean the area with antiseptic wipes or a solution. Do not remove the skin flap, as it still provides some natural protection for the bare skin beneath.
Cover the exposed area with a sterile dressing or a blister plaster specifically made for open blisters. Make sure the dressing stays clean and dry, and change it regularly—at least once a day or anytime it becomes wet or soiled throughout the hike.
What Are the Symptoms of an Infected Blister?
In some circumstances, particularly if the blister has popped or has not been maintained clean, it may get infected. Symptoms to look for include increased redness and swelling surrounding the blister, murky fluid with pus, and skin that feels hot or unpleasant to touch. An infected blister may also have an unpleasant odour.
If the pain intensifies rather than improves, or if you become generally sick or feverish, this could indicate that the infection is spreading. At this point, you should stop trekking and seek medical assistance right once, especially if you're on a multi-day hike or are far from aid.
On-Trail Blister Care Essentials
When going on a walk, especially over long distances or uneven terrain, it's critical to bring a modest blister care kit to address problems before they worsen. At the very least, this should contain a variety of blister plasters or hydrocolloid dressings, which are intended to cushion and protect wounded skin while also aiding recovery. Antiseptic wipes or sprays are also essential for cleaning hotspots, open blisters, or burst regions safely and reducing the risk of infection.
If you're comfortable with sterile technique, bringing a sterile needle or blister lance for draining very painful blisters may be beneficial, but only with adequate care and sanitation. A spare pair of dry, breathable hiking socks is vital in case your feet get wet or sweaty, as moisture promotes blister formation. You should also include blister tape, moleskin pads, or foam dressings to help cushion pressure points or reinforce tender areas.
Finally, foot powder or antiperspirant spray can help reduce sweat and friction during the walk, keeping your feet dry and less prone to skin damage. With a well-stocked blister kit in your pack, you'll be better equipped to stay on the trail even if foot problems emerge.
After the Hike: Proper Foot Care for Long-Term Blister Prevention
Blister prevention does not end when your boots come off. After a lengthy walk, how you care for your feet can be the difference between feeling comfortable walking the next day and nursing an injury for weeks. Here's how to properly recuperate and avoid blisters in the long run.

Tip 1: Remove Your Boots and Inspect Your Feet
After your walk, take off your boots and socks to allow your feet to breathe and cool down. Examine your skin for hot spots, redness, or blisters that may be developing. If a blister has formed, clean it with antiseptic and apply a new bandage to prevent additional inflammation.
Tip 2: Wash and Dry Thoroughly
Once you've returned home or to camp, gently wash your feet with warm water and light soap. After cleaning, properly dry them—especially between the toes—to decrease moisture, which is a major cause of blisters.
Tip 3: Rest and Elevate Your Feet
After trekking, consider elevating your feet for a few minutes to help minimise swelling. Allowing your feet to rest promotes recuperation and reduces the likelihood of further aggravation. This step is especially beneficial during multi-day hikes or if your feet are aching or tired.
Tip 4: Moisturise to Prevent Dry, Cracked Skin
Keeping your feet moisturised can help avoid future blisters by increasing skin suppleness. Dry, cracked skin is more susceptible to friction, which is a leading cause of blisters. To keep your skin in good condition between hikes, apply a moderate, non-greasy moisturiser on a daily basis.
Tip 5: Clean and Air Out Your Hiking Gear
Foot care is much more than just your skin; it also includes your clothing. After each trek, properly air out your boots and wash and dry your socks before using them again. Socks that are moist or contain bacteria can increase the risk of blisters.
Tip 6: Reassess Your Footwear if Needed
If your boots produce discomfort or blisters, do not ignore them. It may be time to obtain new insoles, change your socks, or perhaps replace your boots entirely. Re-evaluating your gear can help prevent long-term problems and make future hikes more comfortable.
Possible Complications of Blisters
Blisters may appear to be a minor concern. Still, if left untreated or mishandled, they can progress into more serious conditions that impair your ability to walk or trek comfortably. Understanding the risks might help hikers take blisters seriously and respond immediately if they develop.

Infection: When a Simple Blister Becomes a Medical Concern
Infection is one of the most common complications of a blister, especially if the blister has ruptured or been emptied. A blister that becomes infected may appear red, hot, bloated, and filled with pus.
The area around it may become more uncomfortable and irritated. These are classic indicators of a bacterial infection and should be treated right away to avoid complications.
Cellulitis: When Infection Spreads Under the Skin
In more severe cases, an infected blister can lead to cellulitis, an infection of the deeper layers of the skin and underlying tissue. This illness is characterised by rapidly spreading redness, acute pain, and, in some cases, fever or chills.
It necessitates immediate antibiotic treatment and, if ignored, might lead to hospitalisation. Hikers should be extra cautious if they detect red streaks extending from the blister or other flu-like symptoms, as these could signal that the infection has entered the circulation.
Delayed Healing and Scarring
Even if there is no infection, a badly managed blister can cause you to miss out on hiking opportunities. Healing time rises when the skin is damaged or irritated on a regular basis, which can result in scabbing or permanent scarring. Exposing bare skin to greater friction, infection, or unclean circumstances on the trail heightens the danger. This is why it's critical to use proper dressings and avoid removing the blister flap early.
Impaired Mobility and Gait Issues
Large or painful blisters may require hikers to adjust their walking position, leading to secondary problems such as knee, hip, or back strain. Overcompensating to prevent pressure on one portion of the foot can frequently result in poor biomechanics, particularly during long hikes. Ignoring a painful blister may result in more than just hurting your feet; it can also lead to joint or tendon problems in the long run.
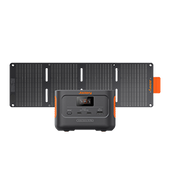
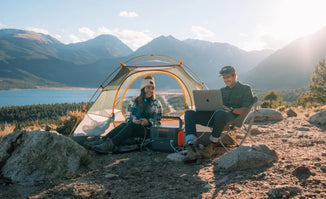
Jackery Portable Power Station for Hiking
While a Jackery Portable Power Station offers undeniable benefits for hiking, especially for longer trips or those with specific power needs, it's crucial to clarify that it doesn't directly prevent blisters during hiking. Blisters are typically caused by friction, moisture, and heat on the feet, often due to ill-fitting footwear, improper socks, or excessive sweating.

However, a Jackery can indirectly contribute to a more comfortable and potentially blister-free hiking experience by enabling certain conveniences that might otherwise be unavailable.
After a long day on the trails, a good foot massage can significantly reduce muscle fatigue and soreness. While not directly preventing blisters, relaxed and less fatigued feet are less prone to developing issues. A smaller Jackery Portable Power Station could easily power a compact, rechargeable foot massager at your campsite.
If you're hiking in wet conditions, keeping your feet dry is paramount to blister prevention. A Jackery can power small boot dryers or even charge heated socks (if you use them) to ensure your footwear and socks are dry and warm for the next day's hike. This is a direct way to combat the moisture factor in blister formation.
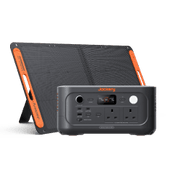
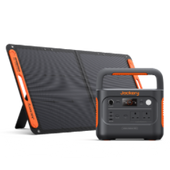
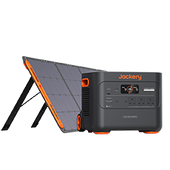
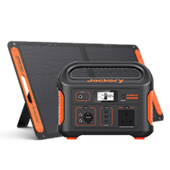
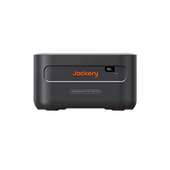
Jackery Explorer 100 Plus
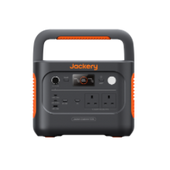
The Jackery Explorer 100 Plus is an excellent choice for hiking, but it's important to understand why and what its limitations are. It's not designed to power heavy-duty appliances but rather to be a highly portable and reliable source for your essential personal electronics.

Ultra-Portability and Lightweight Design: Weighing only around 2.1 pounds (965 grams), it's incredibly lightweight for a power station of its capacity. This is crucial for hikers where every ounce counts, making it easy to carry in a backpack without significantly adding to your load. Its small, palm-sized dimensions (approx. 4.96" x 3.41" x 3.43") mean it takes up minimal space in your pack.
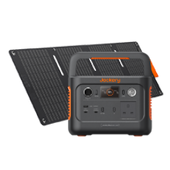
Airline-Friendly Travel: With a 99.2Wh capacity, it's under the 100Wh limit for carry-on luggage on commercial flights. This is crucial if you're flying from anywhere to the UK to start your hike. You can keep your primary power source with you, avoiding checked baggage restrictions and potential loss.
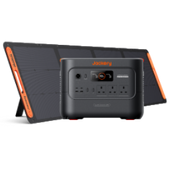
Multiple Ports: Modern thru-hiking gear increasingly uses USB-C for fast charging. The 100 Plus's 100W USB-C output can rapidly charge compatible smartphones, tablets, and even lightweight laptops, minimising downtime. With two USB-C and one USB-A port, you can charge multiple devices simultaneously, which is a huge convenience at the end of a long day on the trail.
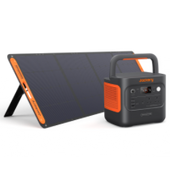
Versatile Recharging on the Go: While the UK weather is variable, the 100 Plus can be efficiently charged by a small, lightweight, foldable solar panel (e.g., Jackery SolarSaga 100W solar panel). You can strap it to your pack and passively charge while you hike or set it up during breaks or at camp. This extends your power autonomy away from the main sockets. When you hit a trail town or stay at a B&B, you can quickly recharge the unit via a wall outlet (using a 100W USB-C charger) in under 1.8 hours, minimising your time off the trail.
Durability for Trail Life: The long-lasting LiFePO4 battery (2000+ cycles to 80% capacity) means it will reliably perform throughout your entire thru-hike and for many adventures to come. Jackery products are built to withstand outdoor conditions, giving you confidence that they can handle the inevitable bumps and scrapes of trail life.
|
Jackery Explorer 100 Plus Running Time |
|
|
Electric Foot Massager (90W) |
0.9H |
|
Boot Dryer (15W) |
5.3H |
|
Heated Socks (18W) |
4.4H |
|
UV Steriliser (20W) |
4H |
|
Flashlight (5W) |
15.8H |
|
GPS Device (30W) |
2.6H |
(*The working hours are only for reference; the actual working hours depend on your usage.)
FAQs
The following are frequently asked questions about preventing blisters while hiking.
1. Why do I get blisters every time I hike?
Blisters grow when there is frequent friction between your skin and your footwear, especially if your boots or socks do not fit properly or are moist. Moisture from sweat or moist weather weakens the skin, making it more vulnerable. Additionally, uneven terrain or extended hikes can put pressure on specific areas of your foot, resulting in hot spots that can develop into blisters. To lessen this danger, ensure that your footwear fits properly and keeps your feet dry.
2. Should I put Vaseline on my feet before a hike?
Applying Vaseline or petroleum jelly might help minimise friction by producing a smooth, lubricated barrier between your skin and your socks or boots, thereby preventing blisters from developing. However, if misused, it can trap moisture, exacerbating the problem in hot or wet weather. Many hikers opt for specialised anti-chafing balms or powders that effectively manage moisture and friction. To evaluate how your skin reacts to Vaseline, go for short walks initially.
3. Why do hikers tape their feet?
Hikers tape their feet to protect areas prone to friction and pressure, such as the heels, toes, and arches, lowering the risk of blisters. Taping can provide an extra barrier between the skin and the footwear, stabilising sensitive areas and preventing hot spots from turning into painful blisters. Many people use kinesiology tape, medical tape, or specific blister prevention tape as part of their hiking foot care routine.
4. What is the best blister prevention tape for hiking?
The best blister prevention tapes are strong, flexible, and specifically engineered to reduce friction and cushion the skin. By absorbing moisture and reducing pressure, hydrocolloid blister plasters (such as Compeed or Elastoplast's blister patches) help preserve existing blisters and prevent new ones from forming. Sports tapes, such as KT Tape or leukotape, are popular for preventative taping due to their high adherence and breathability. Choose a tape appropriate for your skin sensitivity and trekking circumstances.
5. Does blister prevention tape work?
Yes, blister prevention tape is effective when applied appropriately because it decreases friction by forming a protective barrier over sensitive skin areas. This tape helps to uniformly distribute pressure and reduce rubbing inside your boots or socks.
However, its performance is dependent on appropriate application, tape quality, and the skin's cleanliness and dryness before taping. While not a guarantee, many hikers report a dramatic reduction in blisters after using prevention tape in conjunction with other foot care techniques.
Final Thoughts
Before putting on your hiking boots, take steps to prevent blisters. These steps will continue even after you get home. Taking simple steps, like choosing the right socks and shoes and caring for your feet after a walk, can help you avoid pain and damage that you don't need. Keep in mind that not treating a little blister could develop into a bigger issue. You can have fun and pain-free treks if you know what you're doing, plan ahead, and have the right gear. This article has advice for making your routines healthier and keeping your feet safe on every trip.