


Canal boat solar panels are gaining popularity among canal boat owners seeking energy independence and sustainability. You can harness the sun's energy to power your daily appliances, charge recreational batteries, and reduce your dependency on fuel-hungry motors or loud generators. Whether you're a weekend cruiser or a full-time liveaboard, solar power provides versatility, cost savings, and peace of mind.
This tutorial will guide you on everything you need to know about canal boat solar panels, from the various types available and charge controllers to installation procedures and selecting the proper size panel for your requirements, allowing you to make the most of clean, renewable energy. Besides, as an alternative power source for a canal boat, we highly recommend the Jackery Solar Generator for a reasonable budget.
|
Key Takeaways: |
|
How Do Canal Boat Solar Panels Work?
The approach for harnessing solar energy aboard is simple: a solar panel converts sunlight into power, which is then wired to your batteries and stored there until needed. Solar panels are used to charge batteries or banks rather than directly powering equipment. This configuration enables the panels to store the electricity they generate, providing a constant supply of power to the equipment even when the panels are not producing power.
While there is an initial cost, canal boat solar panels may quickly pay for themselves in terms of money saved and independence gained over the course of their service life. They are quiet, have no moving parts, and give free power for years with no maintenance.
Solar panels also have the advantage of being modular, allowing you to start small and expand as your power needs grow. Almost every boat may profit from solar energy. Boats can keep their batteries charged without the need for additional power, whether they are in a slip, moored, or on a trailer.

What Type of Cable Should I Use?
For solar panel arrays of up to 250 watts, use a cable with a cross-sectional area of 2.5 mm² or more. The cable should be multistranded and doubly insulated. For solar panels larger than this size, use a 4 mm square cable.
Types of Canal Boat Solar Panels
It's essential to select the appropriate type of solar panel for your canal boat, ensuring it operates optimally, occupies minimal space, and delivers reliable power throughout the year, even when disconnected from the grid. Each type of panel has its own set of characteristics that make it better for certain types of boats, roofs, and energy needs.
Monocrystalline Solar Panels
For canal boats in the UK, monocrystalline solar panels are the best choice because they last the longest and perform the most efficiently. They are made of single-crystal silicon cells, which means they are more efficient at converting sunlight into electricity than other types. This makes them great for roofs with little area. They look great on modern canal boats since they are sleek and black, and they work well even in moderate sunshine.
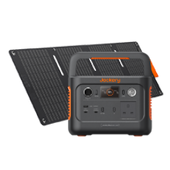
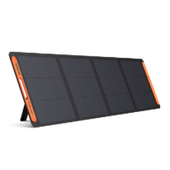
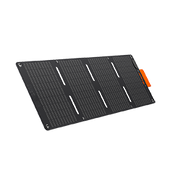
Monocrystalline panels are typically preferred by people who live on boats or rely on solar electricity to power their fridges, pumps, lights, and inverters, as they provide a lot of power per square metre. The Jackery Solar Panels, which utilise monocrystalline solar cells, such as the SolarSaga 100W and SolarSaga 200W, are designed for portability, high efficiency, and outdoor durability.

They cost more than other types, but their long life and steady performance make them worth the investment, especially for individuals who want to be energy-independent while travelling frequently.
Polycrystalline Solar Panels
Canal boat owners who desire consistent energy generation without incurring significant costs can utilise polycrystalline solar panels instead. These panels are manufactured by melting together many pieces of silicon.
This gives them a bluish colour and makes them less efficient than monocrystalline models. They require a little more roof space to produce the same amount of power, but they are still a good solution for individuals who use minimal energy or who enjoy boating on the weekends.
Polycrystalline panels are strong and stiff, and they work best when placed on flat, transparent surfaces. They are one of the most popular solar panel solutions for canal boats on the UK's interior waterways because they are a great mix of price and performance.
Thin-Film Solar Panels
Another flexible choice for canal boats is thin-film solar panels, which are ideal for areas where weight and ease of installation are crucial. These panels generate electricity using cutting-edge materials, such as amorphous silicon or CIGS (Copper, Indium, Gallium, Selenide).
They operate well in low light and can handle partial shadowing better than standard crystalline panels. This is a significant advantage on UK canals, where trees, bridges, and mooring shadows are prevalent. Because they are lightweight and don't require hefty brackets for installation, thin-film panels are ideal for canal boats that require a solar arrangement that doesn't obstruct their use.
Even though they usually create less electricity per square metre, they are becoming more and more popular with sailors who want constant energy all year long because they last longer and work well in indirect sunlight.
|
Type |
Advantages |
Disadvantages |
|
Monocrystalline |
Highest Efficiency (17–22%+), requiring less space. The most extended lifespan (25–40 years) and the lowest degradation rate. A sleek, all-black aesthetic is often preferred for residential use. |
Highest Cost due to complex, energy-intensive manufacturing. Efficiency is slightly lower in extremely hot conditions compared to thin-film solar cells. |
|
Polycrystalline |
Lower Cost than monocrystalline due to simpler manufacturing. Less material waste in production compared to monocrystalline. Good performance and durability. |
Lower Efficiency (15–17%) than monocrystalline, requiring more roof space. Less aesthetically pleasing due to blue/mottled colour and thicker frame. |
|
Thin-Film |
Lowest Cost option for materials and manufacturing. Better performance in high temperatures and low-light conditions. Aesthetically uniform and subtle appearance. |
Lowest Efficiency (7–15%) and much more space is required for the same output. Shorter lifespan (10–20 years) and degrades faster. |
Flexible Solar Panels
Flexible solar panels are ideal for canal boats with curved or uneven roofs, as rigid panels may not fit well. These panels are made of thin, lightweight, or semi-flexible materials that can bend a little to fit the shape of the cabin top of a canal boat.
Marine-grade glue is often used to attach them directly to the roof. This gives the finish a low profile that looks good and works well. Flexible panels are ideal for spaces with limited room or where standard brackets might obstruct mooring ropes, chimneys, or vents.
It is possible to walk on them if they are made for that purpose, although in really hot temperatures, performance may suffer because there is less airflow under the panel. Flexible solar panels remain a popular choice for many boaters due to their ease of installation, attractive appearance, and convenience, even though they aren't as efficient as crystalline types.
What Size Solar Panel Should You Buy for a Canal Boat?
Here are the most popular wattage options:
100 watts is perfect for trickle-charging your batteries.
200 watts is popular among most boats, as it provides considerably more power.
Over 400 watts is ideal for individuals living off the grid.
To observe a substantial change, add panels with wattages in the 200-600 range, particularly if you have all of the mod-cons on board.
However, it doesn't mean you should stop there. Many canal boats use more than one panel to increase efficiency; you may add numerous panels to get the most out of them. If you modify your canal boat solar panel system, make sure the panels utilise the same monocrystalline technology for maximum efficiency. Depending on your budget and available space, consider purchasing a twin or triple-panel system.
Canal boats run primarily on a 12V DC system. To run everyday household items (like laptops, TVs, coffee makers, or small power tools), you need an inverter. Jackery Solar Generator provides a clean, 240V AC pure sine wave output directly, allowing you to run sensitive electronics safely without needing to modify the boat's existing leisure system.
How Many Solar Panels Do You Need for a Canal Boat?
To achieve real off-grid power and reduce your reliance on the engine or generator, you need to determine the number of solar panels your canal boat requires. The best solar configuration for you will depend on your daily electricity needs, the amount of sunlight you receive, and the efficiency of your panels.
In the UK, most canal boat owners put between 200 and 600 watts of solar panels on their boats. However, determining exactly how much you need ensures your system provides steady power throughout the year.

Step 1: Figure out the Power Your Canal Boat Uses
First, figure out how many watt-hours (Wh) of power your canal boat uses each day. When planning a power system for a canal boat, knowing the wattage of your appliances is crucial for sizing your inverter and calculating battery capacity. Appliances typically fall into two categories: 12V DC (running directly from the batteries) and 240V AC (running from the batteries via an inverter, or from shore power). The peak wattage of an appliance determines how large your inverter needs to be.
|
Appliance |
System Voltage |
Typical Wattage Range (W) |
|
Electric Kettle |
240V AC |
1500-2500W |
|
Microwave |
240V AC |
600-1500W |
|
Toaster |
240V AC |
800-1700W |
|
Washing Machine |
240V AC |
1200-3000W |
|
Water Pump |
12V DC |
60-100W |
|
Fridge |
12V DC |
40-80W |
|
LED Cabin Lights |
12V DC |
5-15W |
Step 2: Find out the Number of Solar Panels Needed
Then, determine the number of solar panels required. If your fridge requires 40 watts of power and runs for 10 hours, it consumes 400 Wh. Count all of your appliances, such as your lights, pumps, laptops, phone chargers, and other equipment that run on 12 volts or an inverter. You utilise 2,400 Wh every day.
A 100-watt panel in the UK produces approximately 225 Wh per day on average, considering about 3 hours of peak sunlight and a system efficiency of 75%, which accounts for weather, battery losses, and shading. To get this number, divide your daily use by the panel's output:
Power Uses per Day ÷ Solar Panel Output = Number of Solar Panels
2,400 Wh ÷ 225 Wh = 10.6
In other words, you'd need about 10*100 W panels (or, more realistically, 3 350 W panels) to meet your energy needs. If you only use 1,200 Wh of energy a day, five 100-W panels would be enough. A 200 W system is usually sufficient for basic illumination and battery maintenance for individuals who use their boats part-time or who rely solely on solar power for trickle charging. On the other hand, liveaboard boaters usually do better with 400-600 W systems, which provide them more options in the winter and when it's cloudy.
When planning your solar arrangement, consider the amount of roof space available and the level of shade your boat receives from nearby trees, chimneys, or bridges. Rigid monocrystalline panels provide you with the maximum power in a small space, whereas flexible panels work best on roofs that are curved or low-profile.
How Much Do Canal Boat Solar Panels Cost in the UK?
The price of putting solar panels on a canal boat depends on the size of the system, the type of panel, and whether you hire a professional to do the work. Rigid panels that use 100 watts start at about £120 to £180, while flexible or marine-grade panels run from £180 to £300 per.
A good MPPT charge controller, which is necessary for extracting maximum power from your system, costs between £80 and £200, depending on its power-handling capacity. A basic DIY setup with wires, fuses, and mounting gear can cost as little as £350-£600 for 200 W of power. A complete liveaboard system with 400-600W of solar power, batteries, and professional installation typically costs £1,000 to £2,500.
The initial cost may seem excessive, but most canal boat solar systems typically pay for themselves within a few years by conserving fuel and reducing the need for generator use. High-efficiency monocrystalline panels and MPPT controllers are especially worth the expense, as they maximise solar gain even in the UK’s changeable weather. If you install it correctly, your canal boat can have reliable, quiet, and environmentally friendly electricity all year round.

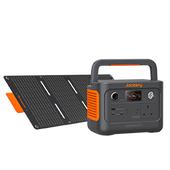
Alternative Canal Boat Power Source: Jackery Solar Generator
The Jackery Solar Generator (Portable Power Station paired with Jackery Solar Panels) is a popular choice for UK canal boaters—especially continuous cruisers or those with limited mooring access—due to its specific benefits tailored to the challenges of off-grid and canal boat living.
UK canal regulations strictly limit the running of noisy generators (often banned between 8 PM and 8 AM). Jackery units are completely silent, allowing you to run lights, charge devices, and power essentials through the night without disturbing your neighbours or breaching mooring rules. Unlike petrol or diesel portable generators, a Jackery system produces zero fumes or carbon monoxide (CO), making it safe to use and charge inside the boat, which is crucial in a small, enclosed space.
You don't need complicated wiring, separate inverter installation, or electrical expertise. The unit consists of a self-contained battery, a pure sine wave inverter, and a charge controller. You charge it up and plug in your standard UK appliances.
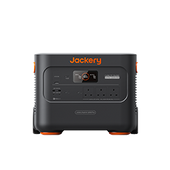
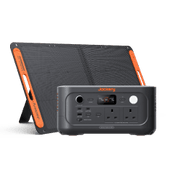
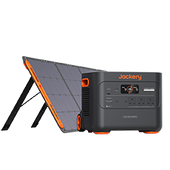
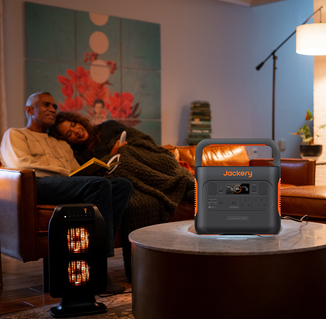
Jackery Solar Generator 3000 v2
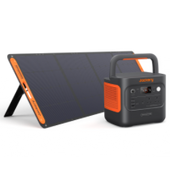
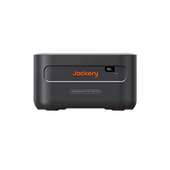
The Jackery Solar Generator 3000 v2 (which combines the Jackery Explorer 3000 v2 power station with SolarSaga 200W solar panel) is a substantial power station that offers features that address the limitations of power generation and storage specific to a canal boat or narrowboat in the UK.

High Power Output for "Home" Appliances: The most significant power challenge on a canal boat is running standard 240V AC appliances—especially those with a high momentary draw. The 3000 v2 provides a substantial amount of continuous power (3600W), sufficient to run high-draw UK appliances that would typically trip a smaller inverter or severely drain the boat's leisure batteries. The 7200W surge capacity handles the initial spike (inrush current) that appliances like microwaves, pumps, and refrigerators require when they first switch on, ensuring they start reliably.
3072Wh High Capacity: This large capacity allows you to run essential items for an extended period without needing to recharge. It can power a low-draw marine fridge (around 60W) for approximately 21 hours or run LED cabin lights for over 260 hours.
High Solar Input (1000W Max): The 3000 v2 accepts up to 1000W of solar input. This high rate is crucial for quickly generating power, particularly during the short, often cloudy daylight hours in the UK. With enough panels, you can recharge the entire unit in as little as 3.5 hours of optimal sunlight.
Fast AC Charging (AC+DC (54V) Charging): If you stop at a marina or hook up to shore power, the unit can recharge completely from a wall outlet in a remarkable 1.4 hours. This means minimal time spent tethered to the shore.
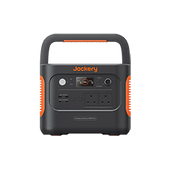
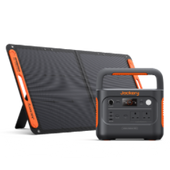
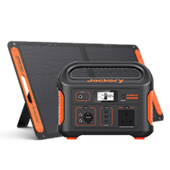
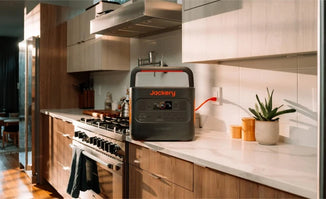
Jackery Solar Generator 2000 v2
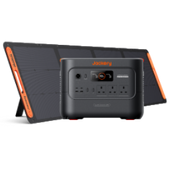
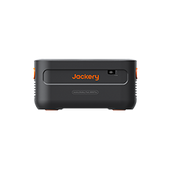
The Jackery Solar Generator 2000 v2 (which combines the Jackery Explorer 2000 v2 power station with SolarSaga 200W solar panel) is a compelling option for a canal boat, particularly for off-grid power needs, due to its balance of capacity, portability, and key features. With a 2042 Watt-hour (Wh) capacity, it can run essential boat appliances for extended periods.

Space-Saving Design: Canal boats and narrowboats are designed with minimal space. The Explorer 2000 v2 is 40% smaller and 34% lighter than its predecessor, making it significantly easier to store, move around a tight cabin, and tuck away when not in use. It is described as being about the size of a basketball.
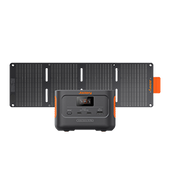
Portable Solar Panels (Solar Generator Bundle): The bundle includes foldable, high-efficiency solar panels (such as the SolarSaga 200W) that are easy to deploy on the boat's roof when moored or cruising, and then pack away securely when not needed or in adverse weather conditions.
Whisper-Quiet Operation: Noise is a significant concern on a canal, affecting both your living space and that of your neighbours on the water. The Jackery operates at a low decibel level (under 30dB in quiet charging mode), eliminating the noise and toxic fumes associated with traditional diesel or gasoline generators.
LiFePO4 Battery (LFP): The unit utilises a Lithium Iron Phosphate (LiFePO4) battery, which provides enhanced safety, thermal stability, and a significantly longer lifespan (up to 4000 cycles to 70%+ capacity, translating to an estimated lifespan of over 10 years). This is ideal for a long-term, mobile living setup.
How to Install Canal Boat Solar Panels?
How would you go about installing solar panels on a canal boat? If you have basic DIY skills and some free time, installing a solar panel will be a straightforward process. We will guide you through the installation step by step. First, let’s see where you can fit your solar panels.

Step 1: Make the Roof Clean
You don't want to install your new solar panels on a filthy roof. Before you start, please give it a thorough cleaning with warm, soapy water and let it dry completely. Once dry, you may choose to apply a solvent cleaning to remove any leftover dirt or grease.
Step 2: Establish Entrance Points
Determining where to place your canal boat solar panels is one thing; double-checking the practicalities is another. While it may be visually pleasing to have them in a specific location on the roof, connecting them to the internal solar charge panel or your battery may not be practical. It's a good idea to unbox your kit and evaluate where everything will go before adding many panels. Before proceeding, place the panel(s) on the roof and use a pen to mark the desired location.
Step 3: Mount the Solar Panel on Your Canal Boat
Once you're satisfied with the circuit and the exterior position of the solar panel(s), use glue to secure them to the canal boat. This is included with most kits, but otherwise, this product is excellent. If you're installing an adjustable solar panel, you'll need to secure the mounting mechanism in place. Flexible panels, on the other hand, can be attached directly to the roof.
Step 4: Drill the Entrance Points in the Roof and Thread the Cable through
This is frequently the most nerve-racking portion of the process, but if you take your time and drill in the correct location, you should have no problems. Have someone else walk inside the boat to check that everything is correctly aligned while you drill.
During this phase, it would also be beneficial to have them hold up a piece of lumber to the ceiling to prevent damage from the inside. Drill two adjacent holes wide enough to accommodate the wire included in your kit—one for the cable travelling from your solar panel to the boat's interior and one to complete the circuit from the battery back to the solar panel.
After the terrifying portion is over, thread the wire from the solar panel to the canal boat's cabin so it is ready to connect to the solar charge panel.
Step 5: Installing the Solar Charge Controller
You should not omit this step since the solar charge controller limits the current and prevents the battery from overcharging. However, it is an eyesore, so consider installing it inside a closet to keep it out of sight. Remember to keep it near the cable entrance point you created in Step 4, but don't attach anything just yet—you'll cut the single wire to make two in a moment.
Step 6: Cut the Cable and Route It to the Canal Boat's Battery
Carefully cut the wire from the solar panel, leaving enough slack to connect to the solar charge controller. The new longer part will connect the solar charge panel to the canal boat battery, completing the circuit. It would be helpful to route it neatly, ideally within trunking, to keep it out of the way.
Step 7: Install an Inline Fuse and Connect the Solar Panel to the Canal Boat's Battery
If your canal boat solar panel kit does not include a fuse, purchase one to ensure the circuit is safe and protected.
A battery connection harness with a fuse holder may be handy in this situation, as it simplifies the connection of the panel to your battery if you have never done it before. Once the fuse is fitted and the wire is correctly routed, you may proceed to connect it to your battery.
Bare the ends of the cable, reveal the individual wires, and connect them to the battery, maintaining proper polarity on both sides. However, don't connect it yet—you're simply preparing everything before turning on the circuit.
Step 8: Attach the Canal Boat's Battery to the Controller
Finally, the end is in sight: you can complete the circuit and finish installing the solar panel on your canal boat. Before connecting the terminals to the battery, go inside and connect the battery's wire to the solar charge controller. Next, reconnect everything and reinstall the battery.
Step 9: Attach the Solar Charge Controller to the Solar Panel
The second cable that connects the solar charge controller to the solar panel may now be threaded from the inside to the roof. Head outdoors and use a screwdriver to connect the solar panel to the controller. The controller should now be powered and fully working. This indicates your canal boat solar panel has been fitted!
How to Choose the Best Canal Boat Solar Panels?
The factors and standards for selecting solar panels for a canal boat (or narrowboat) are unique due to the limited, often walkable roof space and the frequent issue of shading.
Determining Power Requirements
The first and most critical step is conducting a detailed consumption audit to establish your daily energy needs in Amp-hours (Ah). For casual weekend cruisers, a basic system providing between 100 and 200 Watts is usually sufficient to maintain the battery charge and run essential lights. Liveaboards, however, should aim for a much higher capacity, typically starting at 400 to 600 Watts for comfortable summer living, increasing to 800 Watts or more for those seeking greater off-grid independence.
Panel Type and Construction Standards
The choice of panel construction is key, often boiling down to a trade-off between efficiency and roof walkability. Rigid, framed panels offer the highest efficiency, typically reaching 19% or more using monocrystalline cells, and boast a significantly longer lifespan, usually backed by a 25-year performance warranty.
They must be mounted using brackets to allow for cooling airflow, but this structure means they cannot be walked on safely. Conversely, flexible or semi-flexible panels are essential if you need to maintain a walkway along your roof.
System Components and Wiring Configuration
The solar array is only as good as its management system. The charge controller is the brain of the setup, and choosing an MPPT (Maximum Power Point Tracking) controller is a standard essential for canal boats. Regarding wiring, parallel wiring is the recommended standard for canal boats over series wiring.
Environmental and Operational Factors
Canal boat components are subject to a harsh, mobile environment, so all parts, including the panels, connectors, and wiring, should be of marine-grade quality to resist corrosion, moisture, and vibration. Given the nature of canals, shading tolerance is a major operational factor that must be mitigated through strategic panel placement and parallel wiring.
FAQs
The following are the frequently asked questions about the canal boat solar panels:
1. What is the 33% rule in solar panels?
For a conventional solar system without a battery, you may oversize your solar panels by up to 33% of the inverter's capacity. If you have a 10kW inverter, you may install a maximum of 13kW solar panels. However, when you add a DC-coupled battery, the regulations alter.
2. How many solar panels for a narrowboat?
If you live aboard a narrowboat year-round, put as many solar panels on the roof as possible. It will likely not be enough for the winter; you will need to use the engine/generator to complement it.
3. Can a 200-watt solar panel run a 12-volt refrigerator?
The 12V fridge consumes between 320Wh and 640Wh per day, since it cycles on and off during the day. Solar panels rated at 100W, 200W, or greater may successfully power these 12V refrigerators.
4. How long does it take for a 200-watt solar panel to charge a 100Ah battery?
Under ideal sunlight circumstances, a 200W solar panel will take 1.5 to 2 days to charge a 100Ah battery completely. Of course, many variables influence the precise charging time, including weather conditions, the solar panel's installation angle, and the kind of solar charge controller.
Final Thoughts
Installing solar panels on a canal boat is one of the most valuable additions for any narrowboat owner. They deliver affordable, quiet, and environmentally friendly electricity while lowering fuel expenses and increasing battery life. Whether you need a small panel for trickle charging or a larger multi-panel configuration for a complete off-grid lifestyle, solar power provides unparalleled versatility. Finally, solar panels not only increase onboard comfort but also encourage environmentally friendly sailing, making them a cost-effective investment in terms of convenience and long-term savings.