



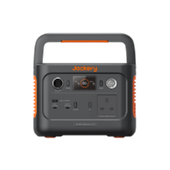


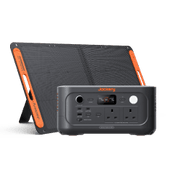
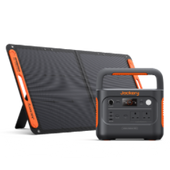
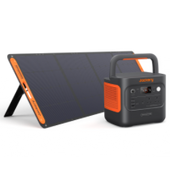
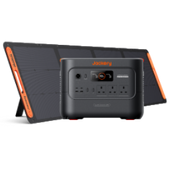
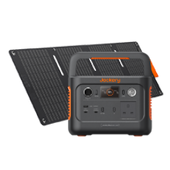


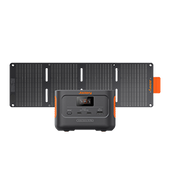
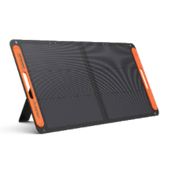
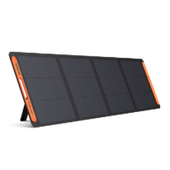
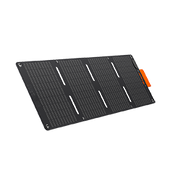
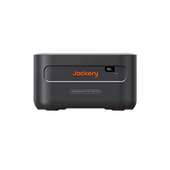
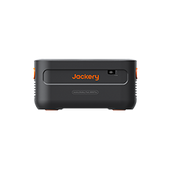







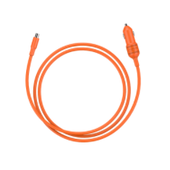


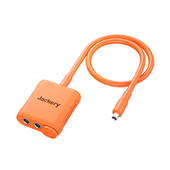
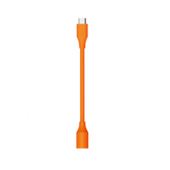
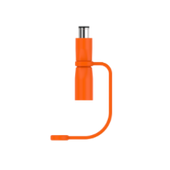





















A homeowner might expect a “plug-and-play” solar battery to work like a new router: place it, plug it in, open the app and let it run. Solar storage is not that simple. A battery may connect to solar panels, an approved AC route, a smart energy meter, an existing PV inverter, a backup outlet and a Wi-Fi network, each with different safety requirements.
UK rules are also moving: the government’s June 2026 plug-in solar consultation focused on systems without batteries connecting to a standard mains socket under defined safety requirements, so battery products should not be treated as automatically covered by that route. This guide explains the safe connection architecture without turning it into a risky DIY wiring tutorial.
|
Key Takeaways: |
|
How Do You Connect a Plug-and-Play Solar Battery? The Quick Answer
A plug-and-play solar battery may connect to your home network in several different ways, depending on the product design and the manufacturer’s approved configuration. It is not a single universal wiring method.
Common connection routes include solar panels through dedicated DC inputs, an approved AC socket for charging or controlled household output, an existing solar installation through AC coupling, a dedicated backup outlet for selected appliances, a smart energy meter for household load monitoring, and Wi-Fi or Ethernet for app control and monitoring.
The safety boundary is important. User installation should normally be limited to approved plugs, labelled solar connectors, battery-module connectors and digital setup described in the product manual. Any new circuit, consumer-unit connection, protective-device change or fixed backup wiring should be assessed and completed by a competent electrician.
|
Connection |
What it does |
Typical responsibility |
|
Solar panel to battery |
Charges the battery from solar |
User only where approved connectors are provided |
|
Battery to approved socket |
Charges or exchanges power with the home |
Product- and regulation-dependent |
|
Battery to consumer unit |
Integrates with fixed household wiring |
Qualified electrician |
|
Battery to existing PV system |
Stores surplus solar through AC coupling |
Installer assessment normally required |
|
Battery to backup socket |
Powers selected appliances during an outage |
User connection to designated output |
|
Battery to Wi-Fi or Ethernet |
Enables monitoring and control |
User |
|
Smart meter to battery controller |
Measures import, export and demand |
Product-dependent; may require electrician |
What Is a Plug-and-Play Solar Battery?
A plug-and-play solar battery is a preconfigured energy-storage product designed to make solar charging, battery storage and power management simpler than building a system from separate parts. It usually combines several components inside one controlled system:
- Lithium battery;
- Battery management system;
- Solar charge controller;
- Inverter;
- Grid-interface controls;
- Solar inputs;
- AC input and output;
- Monitoring and safety systems.
The phrase “plug and play” normally means the manufacturer has simplified part of the installation. It does NOT mean every step is DIY, or that normal electrical rules no longer matter.
It does not mean:
- Any solar panel can be connected;
- Any cable can be substituted;
- The battery can be wired into any household circuit;
- The home can be backfed through an improvised lead;
- The system automatically provides whole-home backup;
- Grid, DNO and safety requirements no longer apply.
For UK homes, this distinction is important because a battery that interacts with household electricity is more complex than a simple rechargeable device.
Plug-and-Play Battery vs Portable Power Station
A portable power station normally supplies appliances connected directly to its own outlets. For example, a laptop, fridge, light or tool may plug into the unit without any connection to fixed home wiring.
A home solar battery may exchange power with household circuits or respond automatically to household consumption. That creates extra questions around isolation, grid compliance, metering, protective devices and safe disconnection during a fault or power cut.
So although both products store electricity, they are not regulated or installed in exactly the same way.
Plug-and-Play Battery vs Plug-in Solar
Plug-in solar generates electricity from panels and feeds it towards household demand. A solar battery stores electricity and later discharges it.
The two functions may exist within one system, but they should not be treated as identical under UK regulations. A plug-in solar panel kit, a portable battery and a grid-interactive home battery may each have different connection routes, safety features and approval requirements.
Understand the Two Meanings of “Home Network”
The phrase home network can mean two different things in this topic. It may refer to the home’s electrical network, or it may mean the communication network used for monitoring and control. A safe installation needs both meanings to be understood separately.
The Electrical Network
The electrical network includes the consumer unit, final circuits, socket outlets, meter, incoming grid supply, solar inverter, battery inverter, backup circuits, earthing and protective devices.
Connecting a battery to this network can create bidirectional current. Electricity may flow from the grid into the battery during charging, then later flow from the battery towards household loads during discharge. This changes the way protective devices must be selected and installed.
The IET warns that unidirectional protective devices should not be used for power sources where current can flow in either direction. Applying a power source to the load terminals of a unidirectional RCCB or AFDD can damage internal electronics and leave residual-current protection inoperable.
That is why fixed wiring, consumer-unit work and backup circuit design should not be treated as simple plug-in tasks.
The Communication Network
The communication network may include Wi-Fi, Ethernet, Bluetooth, a smart meter or energy meter, current transformers, the manufacturer’s app and a home-energy management platform.
This digital layer helps the battery monitor import, export, demand, solar generation and battery state of charge. It may also support scheduling, firmware updates, smart charging and app-based control.
However, a communication connection does not replace a compliant electrical connection. Wi-Fi can help the system make better decisions, but it cannot correct unsuitable wiring, missing protection, incorrect earthing or an unsafe circuit connection.
Before Connecting Anything: Complete These Safety Checks
A plug-and-play solar battery may look simple, but it still handles high electrical loads, stored energy and, in some configurations, bidirectional power flow. Before connecting panels, sockets, meters or expansion modules, complete a basic safety check.

Confirm the Exact Product Configuration
Start with the product documents, not online assumptions. Check the:
- Battery model;
- Inverter model;
- Expansion modules;
- Solar panel type;
- Maximum PV voltage;
- Maximum PV current;
- AC charging limit;
- Grid output limit;
- Backup output;
- Approved accessories;
- Firmware requirements.
The safest setup is the one tested and approved for that specific product. Substituting panels, extension leads, connectors or batteries can change voltage, current, heat and protection requirements.
Inspect the Home’s Electrical Installation
A competent electrician may need to check the consumer unit, circuit rating, cable size, socket condition, RCD or RCBO type, earthing arrangement, existing solar or EV equipment, available circuit capacity, signs of overheating and previous DIY modifications.
This matters because batteries and solar PV can create bidirectional current. Electrical Safety First and the IET warn that incorrectly integrated power sources can affect protective devices, especially where current may flow in both directions. Some unidirectional protective devices may not operate as intended if power sources are connected on the wrong side.
Check Where the Battery Will Be Installed
The location should follow the product instructions and account for operating temperature, ventilation, clearance, moisture, flood risk, direct sunlight, mechanical impact, emergency access, distance from combustible materials and cable routing.
Avoid cramped cupboards, damp sheds, unstable surfaces and places where cables can be trapped, pulled or stepped on.
Check Grid-Connection Requirements
G98 and G99 govern the connection of generating equipment operating in parallel with public low-voltage networks. G98 applies to qualifying fully type-tested microgeneration, including electricity-storage equipment within its scope, while installations outside those limits may require G99 approval. The correct route depends on power rating, type testing, connection design and DNO requirements.
Obtain Property Permission
Renters and flat owners should check landlord approval, freeholder approval, lease restrictions, listed-building rules, conservation-area limits, shared balconies and communal wiring arrangements before installing external panels, visible cabling or fixed equipment.
The Main Ways a Solar Battery Can Connect to a UK Home
A solar battery can connect to a home in several ways. The right method depends on the product design, the UK rules that apply, the property’s wiring and whether the battery is being used for solar storage, household optimisation or backup power.

Method 1: Solar Panels Connected Directly to the Battery
- Energy flow:
Solar panels → battery’s MPPT inputs → battery → inverter → loads
In this setup, solar panels connect to the battery system through approved DC solar connectors. The battery’s built-in MPPT inputs manage solar charging, and the inverter then supplies power to the system’s supported outputs or household connection route.
Voltage, current, polarity and total array size must stay within the battery’s limits. If the battery has several MPPT channels, different channels may be used for panels facing different directions, such as one set facing south and another facing west. This can also help where some panels suffer partial shade.
Solar connectors should never be mixed simply because they appear physically compatible. Similar-looking connectors may have different ratings or tolerances. They should also not be disconnected under load unless the manual gives a safe procedure.
This method is best suited to new modular solar-and-storage installations, balcony panels, garden panels, outbuilding panels and systems designed as one compatible package.
Method 2: Battery Connected Through an Approved AC Plug
- Energy flow:
Household socket ↔ battery inverter ↔ battery
Some batteries may charge from the grid through an AC connection. Certain systems may also provide controlled power back towards household loads, depending on the approved design.
This is not the same as plugging in an ordinary appliance. Current may flow in both directions, so the socket, circuit, protective devices, cable and product configuration all need to be suitable. A user should not assume that developing plug-in solar rules also authorise socket-connected batteries.
The UK government’s June 2026 plug-in solar proposal is aimed at solar systems without batteries connecting to a standard mains socket under defined safety requirements.
Method 3: AC Coupling with an Existing Solar System
- Energy flow:
Existing PV inverter → household AC system → battery inverter → battery
With AC coupling, the existing solar inverter continues converting panel output into AC electricity. The battery inverter then senses surplus power on the AC side and charges the battery when solar generation is higher than household demand.
This can avoid replacing an existing rooftop PV inverter. Accurate metering is needed so the battery can distinguish surplus solar from normal grid import. Inverter compatibility, export settings, CT clamp location and DNO requirements should all be assessed before installation.
Method 4: Fixed Connection at the Consumer Unit
A fixed consumer-unit connection may support higher charging and discharging power, automatic household energy management, dedicated circuits, export limitation and integrated backup functions.
This is fixed electrical work. It should not be presented as a DIY procedure. The installer must consider cable sizing, earthing, RCD or RCBO selection, bidirectional current, isolation and labelling.
Method 5: Dedicated Backup Output
- Energy flow during an outage:
Battery → backup outlet or backup circuit → selected appliances
Some systems have a built-in backup socket. Others need an external changeover device or backup distribution arrangement.
A backup outlet does not automatically energise every socket in the home. Essential appliances must either plug directly into the designated output or be placed on an approved backup circuit. This might cover a router, lamp, fridge or small appliance, but high-power loads depend on the backup rating and battery capacity.
Safe Connection Sequence: What the Homeowner Can Expect
The connection process should be planned around the manufacturer’s approved configuration. This section gives a high-level overview only. It is not a substitute for the product manual, installer guidance or electrical assessment.

Step 1: Plan the Energy Flow
First, decide what the system is meant to do. A plug-and-play solar battery may charge only from solar, charge from both solar and the grid, supply household loads automatically, work with existing rooftop PV, power a designated backup socket or support fixed backup circuits. Each route has different safety, metering and connection requirements.
Step 2: Confirm Compatibility
Before any equipment is connected, the main components should be matched. Check panel voltage and current, connector type, battery-module model, meter model, inverter rating, firmware version, grid profile, cable lengths and approved accessories. Compatibility should be based on the product documentation, not on connector appearance or online assumptions.
Step 3: Position and Secure the Equipment
The battery should sit on a stable surface with the manufacturer’s required clearance. Cable routes should be dry, tidy and protected from accidental impact. Where equipment is placed outdoors or in an outbuilding, weather resistance, temperature limits and moisture protection matter. High-current cables should not be left tightly coiled, as trapped heat can become a safety issue.
Step 4: Connect Modular Battery Components
Where expansion modules are supported, users should follow the product’s labelled sequence for compatible battery modules and communication cables. This is not the place for improvised wiring or third-party battery combinations.
Step 5: Connect the Approved Solar Inputs
Solar panels may need to be isolated or covered as directed before connection. The array must stay within the battery’s input limits. Damaged or mismatched connectors should not be used. Polarity must not be reversed, and homemade adaptor leads should be avoided.
Step 6: Complete the AC Connection
The AC side may involve an approved user-connectable plug, a dedicated fixed circuit, a consumer-unit connection or AC coupling to an existing PV installation. The last three may require professional electrical work depending on system design, power rating and UK connection requirements.
Step 7: Install or Pair the Energy Meter
Some systems need a compatible energy meter to measure import, export and household demand. Correct meter direction is essential, otherwise the battery may charge or discharge at the wrong time.
Step 8: Connect the Digital Network
The system can then be paired with Wi-Fi, Ethernet or Bluetooth. Settings may include country or grid profile, import and export limits, reserve level, charging schedule, tariff plan and backup reserve.
Step 9: Commission and Test
Final checks should cover solar charging, grid charging, controlled discharge, meter direction, app readings, warning messages, backup operation and safe shutdown. Fixed installations should be tested and documented by the responsible installer.
Wiring Solar Panels to the Battery: What Must Match?
Wiring a solar battery starts with compatibility. The aim is not simply to make connectors fit; the panel array must stay within the battery’s electrical limits and use approved accessories. This section explains what needs to match without replacing the manufacturer’s wiring instructions or a qualified installer’s assessment.

Voltage
Solar panels have both open-circuit voltage and operating voltage. Open-circuit voltage is especially important because it is the highest voltage the panel can produce when not under load.
Series connections increase voltage. For example, connecting panels in series adds their voltages together. The total open-circuit voltage must remain below the battery inverter’s maximum PV input, with a margin for cold weather because solar panel voltage can rise in low temperatures. Excess voltage can damage equipment and may create unsafe conditions.
Current
Parallel connections increase current. The battery’s MPPT input has a maximum current limit, and the panel arrangement must stay within that limit. Cable and connector ratings also need to match the current flowing through them. Underrated cables or poor connections can overheat.
Polarity
Positive and negative connections must never be reversed. A connector fitting physically does not prove polarity is correct. Labels, approved test processes and the product manual should be followed before the system is energised.
MPPT Allocation
Panels with different orientations, tilt angles, shading conditions or electrical characteristics should generally not be placed on the same MPPT tracker unless the manufacturer permits it. Mixing a shaded balcony panel with an unshaded garden panel on the same tracker can reduce output and may cause unstable behaviour.
Separate MPPT channels are useful where panels face different directions, such as east and west, or where partial shading affects only part of the array.
Cable Routing
Solar cables should be suitable for outdoor use, UV exposure and moisture. They also need mechanical protection. Avoid sharp bends, connectors lying on the ground, trip hazards and routes where doors or windows can crush the cable. Neat routing reduces wear and makes faults easier to spot.
|
Check |
Why it matters |
Where to confirm it |
|
Maximum PV voltage |
Prevents inverter damage |
Battery specification |
|
Maximum input current |
Prevents overload |
MPPT specification |
|
Panel polarity |
Prevents faults |
Panel labels and approved test process |
|
Connector compatibility |
Prevents poor contact and heating |
Manufacturer documentation |
|
Cable rating |
Prevents overheating and excessive loss |
Approved accessory specification |
|
MPPT grouping |
Improves safe, stable output |
System design guidance |
Connecting the Battery to an Existing Solar PV System
Many UK homeowners already have rooftop solar and want to add storage later. The battery does not always need to replace the existing solar system, but the retrofit route depends on inverter compatibility, metering, DNO requirements and how the battery will control charging and discharging.
AC-Coupled Connection
With an AC-coupled battery, the existing solar panels and original solar inverter usually remain in place. The solar inverter continues converting panel output into AC electricity for the home.
The energy flow is typically:
- Existing solar panels → existing PV inverter → household AC system → battery inverter → battery
A compatible meter or current transformer detects whether the home is importing from the grid or exporting surplus solar. When export is detected, the battery can charge. When the home needs power later, the battery can discharge towards household demand, depending on the approved configuration.
This route can be attractive for retrofit projects because it may avoid replacing a working PV inverter. It still needs careful setup, especially around meter direction, export limits and whether the battery is allowed to discharge to the grid.

DC-Coupled Connection
With a DC-coupled system, solar panels and the battery share a compatible hybrid inverter or charge controller. Solar energy can charge the battery before being converted into AC electricity for household use.
This can reduce conversion stages, but retrofitting may require replacing existing equipment. If the original PV system was not designed for DC battery storage, the installer may need to change the inverter, adjust strings or redesign part of the system. For that reason, DC coupling is less likely to be a simple homeowner connection.
Questions to Ask Before Retrofitting
Before adding a plug-and-play solar battery to an existing PV system, ask:
- Is the existing inverter compatible with the battery?
- Is there already an export-limitation system?
- Will two inverters operate in parallel?
- Does the total generation remain within G98 limits?
- Is prior DNO approval required under G99 or another route?
- Will the existing solar warranty be affected?
- Can the monitoring platforms exchange data?
- Where will the meter or CT clamp be installed?
- Will the battery charge only from solar, or also from the grid?
- How will backup power work during an outage?
A retrofit battery should be treated as a system change, not just an accessory.
How the Smart Meter and Energy Meter Fit In
Smart meters and battery energy meters are often confused, but they do different jobs. A smart electricity meter is mainly for billing and grid measurement. A battery energy meter is mainly for real-time control of the battery system.
Smart Electricity Meter vs Battery Energy Meter
A utility smart meter records electricity imported from and exported to the grid. It helps suppliers calculate bills, export payments and time-of-use tariff data where supported.
A battery energy meter gives the battery controller faster local measurements. It helps the battery decide when to charge, when to discharge and how much power to supply. This meter may sit near the consumer unit and may work with current transformers, a dedicated energy meter or a manufacturer-approved metering device.
The two are not necessarily interchangeable. A home may already have a smart meter for billing, but the battery may still need its own compatible meter or CT clamps to monitor household demand accurately.
Why Meter Direction Matters?
Meter direction is critical. If the measuring device is installed or configured the wrong way round, the battery may make the opposite decision from the one intended.
Incorrect meter direction can mean:
- Import appears as export;
- Export appears as import;
- The battery charges when it should discharge;
- The battery discharges into the grid unintentionally;
- Household consumption readings become inaccurate;
- Export limitation may not work correctly.
This is especially important where the battery is designed to avoid exporting power, follow a tariff schedule or store only surplus solar energy.
Wired vs Wireless Metering
Different systems use different communication methods. These may include:
|
Metering method |
Typical role |
Main consideration |
|
Ethernet or data cable |
Stable communication between meter and controller |
Requires suitable cable route |
|
RS485 or manufacturer-specific communication |
Common for energy meters and inverters |
Must use approved devices and settings |
|
Wi-Fi |
App and cloud monitoring |
Signal strength and reliability matter |
|
Current-transformer clamps |
Measures current flow without cutting the main cable |
Direction and placement are critical |
|
Third-party compatible energy meters |
May integrate with selected systems |
Compatibility must be confirmed before purchase |
Meter wiring should follow the product documentation and electrical design. Terminal-level wiring, CT placement around live conductors and fixed meter installation may require a competent electrician.
Connecting the Solar Battery to Wi-Fi and the App
The digital setup is usually the safest part for a homeowner to complete, provided it follows the product manual. For a system such as the Jackery SolarVault 3 Pro Max, monitoring and control may use the Jackery App through Bluetooth, Wi-Fi or Ethernet, depending on the configuration. App listings describe features such as real-time energy flow, battery status, input and output power, device control and firmware updates.

A Typical Setup Process Is Like This:
1. Download the official app.
2. Create an account where required.
3. Power on the battery or communication module.
4. Pair the system by Bluetooth or local Wi-Fi.
5. Enter the home Wi-Fi details.
6. Update firmware if prompted.
7. Confirm the correct country, time zone and grid profile.
8. Check the system diagram in the app.
9. Confirm that solar generation, household demand, grid import and battery flow move in the expected directions.
This final check matters. If the app shows the battery charging from the grid when it should be storing surplus solar, the issue may be meter direction, tariff settings, operating mode or communication between devices. A digital error does not always mean an electrical fault, but it should be investigated before relying on automated charging and discharging.
Common Network Problems
Several simple network issues can stop the app from showing correct live data:
- The battery is too far from the router;
- The pairing process does not support a 5GHz-only Wi-Fi setup;
- External walls weaken the signal;
- The home Wi-Fi password has changed;
- Router isolation settings block local device communication;
- Firmware has not been updated;
- The meter and inverter are on separate networks;
- The app account has not been granted access to the device.
Loss of internet should not make the battery electrically unsafe. Core electrical protection should not depend on cloud access. However, poor connectivity can affect remote monitoring, tariff optimisation, firmware updates, alerts and detailed energy reports. For a home battery that uses smart charging, dynamic tariffs or export control, a stable network connection can make the system easier to manage and troubleshoot.
Jackery SolarVault 3 Pro Max: Example Connection Architecture
The Jackery SolarVault 3 Pro Max is a useful example of a modular home solar battery, because it combines direct solar input, battery storage, AC coupling, monitoring and backup-related functions in one architecture. Current product information lists 2.52kWh starting capacity, expansion to 15.12kWh in one tower, up to 4,000W PV input, four MPPT trackers and up to 2,500W output for the Pro Max configuration.
It should not be treated as a basic plug-in panel kit. Its connection architecture can involve solar panels, battery modules, smart metering, AC coupling, grid interaction, app control and backup output. Each function has a separate purpose.
Direct Solar Connection
The SolarVault 3 Pro Max supports up to 4,000W of PV input across four independent MPPT trackers. This can help where panels face different directions, such as east and west, or where panels sit on separate balconies, roof sections, garden frames or walls.
Separate MPPT channels can also help when some panels experience morning shade while others perform better in the afternoon. Panels must still remain within each input’s voltage and current limits. Different orientations are easier to manage when the system is designed around separate trackers rather than forcing all panels into one electrical group.
AC Coupling with Existing PV
For homes that already have rooftop solar, AC coupling can be relevant. The existing PV inverter continues converting panel output into AC electricity. The battery then charges from surplus AC solar through a compatible metering arrangement.
This route may suit households that do not want to replace a working PV inverter. It still needs proper assessment because the system must distinguish surplus solar from normal grid import and follow the correct export, grid and safety settings.
Modular Battery Connection
The system can start at 2.52kWh and expand to 15.12kWh per tower. This suits households that want to begin with modest storage and add compatible expansion modules as consumption changes. Expansion should follow the approved battery-module and firmware procedure rather than mixing third-party batteries.
Grid and Backup Connections
Normal household output, bypass operation, AC-coupled charging and backup output are different functions. One socket or cable does not perform all four roles. Backup-mode switching can support selected loads, but the final capability depends on the approved configuration and connection route.
|
SolarVault function |
Specific connection involved |
Main purpose |
|
PV input |
Up to 4,000W solar panels to 4 MPPT inputs |
Direct solar charging from multiple panel groups |
|
AC coupling |
Up to 2,500W AC-coupled route with existing PV and household AC system |
Store surplus from an existing PV inverter |
|
Smart metering |
Compatible energy meter or CT-based measurement to controller |
Match charge/discharge to household demand |
|
Grid connection |
Approved AC route, configuration-dependent |
Charge or supply household demand within system limits |
|
Backup output |
Dedicated backup interface, up to supported output rating |
Power selected loads during outage |
|
App connection |
Wi-Fi, Ethernet or Bluetooth depending on setup |
Monitoring, settings and control |
|
Expansion battery |
Approved battery and communication connectors |
Expand storage from 2.52kWh to 15.12kWh per tower |
When Must a Qualified Electrician Be Involved?
A qualified electrician should assess or complete the work whenever the solar battery connection moves beyond labelled, user-connectable parts. This includes opening or altering the consumer unit, installing a new circuit, replacing protective devices, fixed AC wiring, export limitation, current-transformer or meter wiring inside electrical equipment, AC coupling with an existing PV inverter, backup changeover equipment, essential-load circuits, earthing changes, older or damaged wiring, outdoor fixed wiring, unclear socket or circuit suitability, or any system operating in parallel with the public grid.
This is not only about avoiding mistakes. Domestic electrical work must be designed and installed to protect people from fire and electric shock. In England and Wales, Part P applies to electrical safety in dwellings; Scotland uses Building Standards, and Northern Ireland has its own building-control framework, so the article should not present Part P as one single UK-wide rule. Electrical Safety First also notes that electricians in England and Wales must comply with Part P, while Scotland follows the Building Standards system.
New circuits, consumer-unit work and certain electrical work in dwellings may be notifiable under the relevant building regulations. GOV.UK’s Approved Document P explains when notification is required for electrical work in homes in England, while Welsh Government guidance says registered electricians can arrange a building regulations compliance certificate after completing qualifying work in Wales.
What Documentation Should You Receive?
Depending on the work, the homeowner should receive clear records, such as:
- Electrical Installation Certificate;
- Minor Electrical Installation Works Certificate;
- Building-regulations compliance certificate, where applicable;
- Commissioning record;
- DNO notification or approval;
- Inverter type-test evidence;
- System diagram;
- Shutdown instructions;
- Warranty registration.
Keep these documents with the property file. They may be needed for warranty claims, future electrical work, insurance queries, property sale checks or troubleshooting if the battery, inverter or metering system later behaves unexpectedly.
Troubleshooting Common Connection Problems
Connection problems are often caused by settings, metering direction, low solar input or incompatible wiring rather than the battery itself. Start with the app, visible indicators and the normal shutdown procedure. Do not open electrical equipment or disconnect live solar connectors.
|
Problem |
Possible cause |
Safe first check |
|
Battery is not charging from solar |
Low light, isolation, input limit or connector issue |
Check app status and approved visible connections |
|
Battery charges from grid but not solar |
PV configuration or MPPT issue |
Compare panel readings with the manual |
|
Home still imports while battery is full |
Output setting, meter issue or load above inverter limit |
Check app power-flow diagram |
|
Battery exports unexpectedly |
Meter direction or export setting |
Stop automatic discharge and contact installer |
|
App shows negative household use |
Meter orientation or configuration error |
Ask installer to verify meter direction |
|
Backup outlet does not work |
Backup disabled, reserve too low or overload |
Check approved backup settings and connected load |
|
RCD repeatedly trips |
Fault, incompatible protection or wiring problem |
Disconnect using the normal shutdown procedure and call an electrician |
|
Battery goes offline |
Wi-Fi, Ethernet or firmware issue |
Check router and local connection |
|
Panel input repeatedly drops |
Shade, loose connector or electrical mismatch |
Visually inspect only; do not disconnect live connectors |
If the same fault returns after a reset or normal restart, stop using automatic modes and contact the installer or manufacturer support. Repeated tripping, heat, burning smells, damaged cables, water exposure or unexpected export should be treated as safety issues, not minor app errors.
FAQs
The following are the frequently asked questions about connecting the plug-and-play solar battery to home:
1. Can I connect a plug-and-play solar battery myself?
You may be able to connect user-approved parts yourself, such as labelled solar connectors, compatible expansion modules, an approved plug, Wi-Fi or the app setup. Anything involving fixed wiring, the consumer unit, a new circuit, protective devices, AC coupling, export limitation or backup circuits should be assessed or completed by a competent electrician.
2. Can I plug a solar battery into a normal UK socket?
Do not assume so. The UK government’s June 2026 plug-in solar consultation focuses on solar systems without batteries connecting to a standard mains socket under defined safety requirements. A battery that charges from or supplies power towards household circuits may have different technical and regulatory requirements.
3. Can a solar battery connect to an existing solar system?
Yes, some batteries can be retrofitted to an existing solar PV system, often through AC coupling. Compatibility with the existing inverter, metering, export settings and DNO requirements must be checked before installation.
4. What is AC coupling?
AC coupling means the existing PV inverter converts solar panel output into AC electricity first. The battery inverter then charges the battery from surplus AC power on the household side. This can allow a battery to be added without replacing the original PV inverter.
5. Does the battery need its own smart meter?
Not always, but many systems need a compatible energy meter or current transformers near the consumer unit. The utility smart meter is for billing and grid import/export records. The battery meter gives faster local data so the battery knows when to charge or discharge.
6. Do I need to notify my DNO?
Possibly. Battery storage can count as generation when it operates in parallel with the public network, and ENA guidance treats electricity storage as non-intermittent generation. G98 may apply to qualifying type-tested microgeneration and storage; systems outside the limits may require G99 approval before connection.
7. What cable should I use for a solar battery?
Use only the cables and connectors approved by the manufacturer for that specific battery, panel and connection method. Cable rating must match voltage, current, outdoor exposure, heat, connector type and installation route. Do not substitute cables just because the connector appears to fit.
8. Can I use an extension lead with a plug-and-play battery?
Only if the manufacturer explicitly permits it for that use. High-current charging or discharging through unsuitable extension leads can cause overheating, voltage drop or nuisance tripping. For fixed use, outdoor routing, backup supply or bidirectional power flow, ask the manufacturer or a qualified electrician before using any extension cable.
Final Thoughts
Connecting a plug-and-play solar battery safely starts with choosing the correct connection route, not with finding a cable that fits. Solar panels, AC input, existing PV, backup output, smart metering and Wi-Fi each serve different roles.
Homeowners can usually handle app setup, approved modular connectors and labelled user-accessible ports, but fixed electrical work belongs with a competent electrician. The safest approach is to check the product configuration, confirm the home’s circuit suitability, follow the manufacturer’s limits and keep DNO or building-regulation requirements in view.


