


Knowing how to wire a plug is still a useful practical skill in the UK. It helps with simple repairs, replacing damaged plugs, and understanding how everyday electrical items work more safely. At the same time, it is not just about matching colours to terminals.
Good plug wiring also means using the right fuse, securing the cable properly, and knowing when a job is no longer suitable for DIY. This guide explains UK plug wiring colours, the difference between wiring a plug and wiring a socket, when you may need to wire or rewire a plug, and the safest way to do it step by step.
We also highly recommend the Jackery Portable Power Station, which can be a practical choice when you need safe, flexible power indoors or outdoors.
|
Key Takeaways: |
|
UK Plug Wiring Colours Explained
If you open a standard UK plug, you will usually see three core wiring colours: brown, blue, and green and yellow. Each one has a specific job, and getting them right matters for both safety and proper appliance use. In the UK, plugs follow a standard layout, so once you understand what each colour means, the system is quite straightforward.
- Brown = Live
- Blue = Neutral
- Green and Yellow = Earth
Brown Wire: Live
The brown wire is the live wire. This is the wire that carries electrical current from the mains supply into the appliance. In simple terms, it delivers the power that makes the device work. Inside a UK plug, the brown wire connects to the live terminal, which is marked with the letter L.
This terminal is usually found on the right-hand side of the plug when looking at the pins with the earth pin at the top. The live side is also the part connected to the fuse, which is an important safety feature in UK plugs.
Blue Wire: Neutral
The blue wire is the neutral wire. Its job is to carry electricity back out of the appliance and return it to the power supply, completing the circuit.
In a UK plug, the blue wire connects to the neutral terminal, marked with the letter N. This terminal is normally located on the left-hand side of the plug. While the neutral wire is less dangerous than the live wire under normal conditions, it still plays a critical role in safe operation.
Green and Yellow Wire: Earth
The green and yellow wire is the earth wire. This wire is a safety wire rather than a working power wire. Its main purpose is to protect users if something goes wrong inside the appliance.
The earth wire connects to the earth terminal, marked with the letter E, and this is usually the top terminal in a UK plug. If a fault develops and electricity escapes onto the metal body of an appliance, the earth wire provides a safe path for that current to flow into the ground.
How the Wiring Works Together?
The three wires in a UK plug each have their own role, but they work as one system. The brown live wire brings power in, the blue neutral wire carries it back, and the green and yellow earth wire stands by as protection if a fault occurs.
When wiring a plug, the cable should also be secured under the cable grip. This grip holds the outer insulation in place so that pulling on the cord does not loosen the internal wires.

Wiring a Plug vs Wiring a Socket
Although both jobs involve connecting electrical conductors safely, wiring a plug and wiring a socket are not the same task. A plug is the removable connector attached to the end of an appliance cable, while a socket is the fixed outlet installed on the wall and connected to the building’s electrical circuit.
In everyday terms, wiring a plug is usually simpler. You are working with a flexible cable from one appliance, and the main goal is to connect the live, neutral, and earth wires to the correct terminals inside the plug, then secure the cable properly. Wiring a socket is more involved because the socket is part of the home’s fixed wiring system.
What Wiring a Plug Involves
When wiring a UK plug, you are normally dealing with one appliance lead. The three wires are connected in a standard arrangement:
- Brown to Live (L)
- Blue to Neutral (N)
- Green and Yellow to Earth (E)
A UK plug also includes a fuse, which is one of its most important safety features. The live wire passes through the fuse, helping protect the appliance if a fault or overload occurs. There is also a cable grip, which clamps the outer sheath of the cable so the individual wires are not pulled loose.
What Wiring a Socket Involves
Wiring a socket is different because the socket is connected to the fixed electrical installation of the property. Instead of one flexible appliance cord, you may be handling cables that are part of a ring circuit or radial circuit. That means there can be more than one set of live, neutral, and earth wires entering the back box.
The terminals still follow the same principle:
- L for live
- N for neutral
- E for earth
However, the job is usually more demanding because the socket must be mounted securely, the wires must be arranged neatly inside the back box, and the circuit itself must remain electrically sound.
Safety Considerations
Both tasks require care, but wiring a socket generally involves a higher level of risk because it is part of the mains wiring in the building. Before working on a socket, the circuit must be isolated properly. In many cases, fixed wiring work should be handled by a qualified electrician, especially where local regulations apply.
With a plug, the main risks are incorrect terminal connections, loose wires, the wrong fuse rating, or poor cable grip. With a socket, the risks can include incorrect circuit connections, loose terminals, damaged insulation, overloaded circuits, or unsafe mounting.
|
Aspect |
Wiring a Plug |
Wiring a Socket |
|
What it is |
Connecting an appliance cable to a removable plug |
Connecting fixed building wires to a wall outlet |
|
Main purpose |
Lets one appliance connect to the mains supply |
Provides a permanent outlet for plugs and appliances |
|
Type of wiring |
Flexible appliance cord |
Fixed household electrical wiring |
|
Number of cables involved |
Usually one cable |
Often one or more circuit cables |
|
Terminals used |
Live (L), Neutral (N), Earth (E) |
Live (L), Neutral (N), Earth (E) |
|
Fuse included |
Yes, UK plugs normally include a fuse |
No fuse inside the socket itself |
|
Cable grip |
Yes, secures the appliance cord |
No cable grip in the same way as a plug |
|
Complexity |
Usually simpler |
Usually more complex |
|
Typical use |
Replacing or fitting a plug on an appliance |
Installing, replacing, or reconnecting a wall socket |
|
Portability |
Portable and removable |
Fixed in place |
|
Risk level |
Lower, but still requires care |
Higher, because it affects fixed wiring |
|
Who usually handles it |
Home users may do basic replacements if competent |
More often handled by a qualified electrician |
Which One Is Easier?
For most people, wiring a plug is easier than wiring a socket. The layout is more straightforward, the number of wires is usually smaller, and the task is limited to one appliance. Wiring a socket demands more understanding of how household circuits work, especially if multiple cables are present.
(Video Source: eFIXX)
Why Do You Need to Wire a Plug?
In daily life, most people do not think much about plug wiring until something stops working properly. Still, there are several common situations where you may need to wire a plug or rewire an existing one. Sometimes it is simply part of basic maintenance. In other cases, it is about making an appliance safe to use again.
Replacing a Damaged Plug
One of the most common reasons to wire a plug is that the old one has become damaged. This could mean the casing is cracked, the pins are bent, or the plug has signs of overheating such as burn marks or a melted smell.
Repairing a Cut or Damaged Cable End
Sometimes the plug itself is fine, but the cable near the plug becomes worn, frayed, or cut. This often happens when cords are bent repeatedly, trapped under furniture, or pulled too hard.
Fitting a Plug to a New Appliance Lead
Some appliances, electrical accessories, or replacement cords may be sold without a fitted plug. In that situation, you need to wire the plug before the item can be used safely with a UK socket.
Replacing an Incorrectly Wired Plug
A plug may need rewiring if the internal wires have been connected to the wrong terminals. For example, the live and neutral wires may have been reversed, or the earth wire may not be connected properly.
Changing a Plug After Overheating or Blowing a Fuse Repeatedly
If a plug becomes unusually hot during use, or if the fuse blows again and again, the issue may be linked to faulty wiring inside the plug. Loose terminals, exposed copper, or the wrong fuse rating can all cause trouble.
Converting an Appliance for UK Use
People often need to wire a UK plug when bringing in an appliance from another country or when using equipment supplied with a different type of connector. If the appliance is suitable for UK voltage and safe to use, fitting a proper UK plug may be necessary.
Replacing an Old Plug on a Frequently Used Appliance
Appliances that are used often, such as kettles, vacuum cleaners, lamps, or power tools, can put more strain on plugs and cables over time. Repeated plugging in and unplugging may loosen parts or wear out the cable grip.
How to Wire a Plug: Step-by-Step Guide
Wiring a plug is one of the simpler electrical tasks many people can handle, but it still needs care. UK safety guidance warns that incorrectly wiring a plug can lead to shocks or fire, so the job should only be done when the appliance is unplugged and you are confident you can identify the terminals and wire colours correctly.
Materials and Tools You Need
Before you begin, gather everything first so the process is neat and controlled. In most cases, you will need:
- A UK plug
- The appliance cable or flex
- A small screwdriver
- Wire cutters/strippers
- The correct BS 1362 fuse for the appliance
- A clean, well-lit workspace
Know the UK Plug Wire Colours
A modern UK plug uses three standard wire colours:
- Brown = Live
- Blue = Neutral
- Green and Yellow = Earth
These are the standard UK wire colours used today, while some older appliances may still use older colours such as red and black.

Step 1: Remove the Plug Cover
Start by unscrewing the plug and lifting off the cover. Place the screw somewhere safe so it does not roll away. Once the cover is off, you will see the three terminals marked L, N, and E, along with the fuse and the cord clamp.
Step 2: Feed the Cable into the Plug
Pass the cable into the plug body before connecting any wires. This sounds obvious, but it is a common mistake to wire everything first and then realise the cable was not positioned properly. Make sure the outer sheath of the cable reaches far enough into the plug so the cord clamp can grip the cable firmly later.
Step 3: Strip Back the Outer Insulation
Carefully remove a short section of the outer insulation from the cable so the three inner wires are exposed. Take care not to cut too deeply into the coloured insulation of the inner wires. Then strip a small amount from the end of each individual wire so the copper conductor can be connected to the terminals.
The aim is to expose enough copper to make a secure connection, but not so much that bare wire is left visible outside the terminal. This is part of keeping the plug safe and tidy.
Step 4: Connect the Brown Wire to Live (L)
Attach the brown wire to the terminal marked L. In a standard UK plug, this is the live terminal. Tighten the terminal screw firmly so the wire is secure, but do not over-tighten to the point of damaging the copper. The live connection matters especially because UK plugs route the live side through the fuse for protection.
Step 5: Connect the Blue Wire to Neutral (N)
Next, connect the blue wire to the terminal marked N. This is the neutral wire, which completes the circuit by carrying current back from the appliance. As with the live terminal, the wire should sit neatly inside the terminal with no loose copper strands escaping.
Step 6: Connect the Green-and-Yellow Wire to Earth (E)
Now connect the green-and-yellow wire to the earth terminal, marked E. The earth wire is a safety connection that helps protect the user if the appliance develops a fault. On appliances that require an earth, this wire must be connected correctly and securely.
Step 7: Check the Fuse
Make sure the plug contains the correct BS 1362 fuse for the appliance. Electrical Safety First advises checking the manufacturer’s instructions if you are unsure which fuse size is needed. Using the right fuse is important because it helps protect the appliance and cable if a fault occurs.
Step 8: Tighten the Cord Clamp
Once the wires are in place, tighten the cord clamp so it grips the outer insulation of the cable, not the individual inner wires. This is a key part of plug safety. If someone pulls the cable, the clamp should absorb the strain rather than allowing the wires to come loose from their terminals.
Step 9: Double-Check Everything
Before closing the plug, stop and inspect the wiring carefully. Check that:
- Brown is in L
- Blue is in N
- Green and yellow is in E
- The terminal screws are tight
- No bare copper is sticking out
- The fuse is fitted correctly
- The cord clamp is gripping the outer sheath
These checks reflect the main plug-safety points
Step 10: Refit the Cover
Place the cover back on the plug and tighten the screw. Once the plug is closed, give the cable a light tug to make sure it feels secure. The plug should close neatly without trapping or crushing any of the internal wires. If it does not fit properly, open it again and adjust the cable position. Good plug assembly is not just about making it work, but about making it safe over time.
|
*Common Mistakes to Avoid |
|
A few small mistakes can make a plug unsafe. The most common ones include:
|
How to Rewire a Plug Properly?
Rewiring a plug is usually needed when the old plug is damaged, the cable end has worn out, or the internal connections are no longer secure. The job itself is not complicated, but it should be done carefully.
Step 1: Make Sure the Appliance Is Unplugged
Before you touch the plug, disconnect the appliance fully from the socket. Never try to rewire a plug while it is connected to the mains. This is the first and most important safety step, because live electrical parts can cause serious injury. HSE stresses that electrical work, even on small items, can be dangerous if basic precautions are ignored.
Step 2: Check Whether the Plug Should Be Replaced
Open the plug and inspect it closely. If the casing is cracked, the pins are bent, there are signs of overheating, or parts feel loose, it is usually better to fit a new plug rather than reuse the old one.
Step 3: Use a Proper UK Replacement Plug
If you need a new one, choose a replacement plug that meets British standards. A compliant replacement plug should be marked BS 1363 and carry an approval mark such as the BSI Kitemark, ASTA Diamond, or Nemko N mark.
Step 4: Remove the Old Connections
Unscrew the plug cover and loosen the terminal screws. Carefully remove the brown, blue, and green-and-yellow wires from their terminals. If the copper ends are worn, twisted badly, or damaged, trim them back slightly so you can work with clean wire. At the same time, check the cable sheath for cuts or abrasion near the plug end.
Step 5: Strip the Cable Neatly
If needed, strip back a short section of the outer sheath so the inner wires are exposed cleanly. Then strip a small amount of insulation from each inner wire. The copper should be long enough to sit firmly inside the terminal, but not so long that bare wire remains visible once the screw is tightened. The goal is a neat, secure connection with no loose strands.
Step 6: Connect Each Wire to the Correct Terminal
Reconnect the wires to the correct terminals inside the plug:
- Brown to Live (L)
- Blue to Neutral (N)
- Green and Yellow to Earth (E)
This colour coding is the standard for modern UK plugs, and getting it right matters.
Step 7: Tighten the Terminal Screws Firmly
Once each wire is in place, tighten the terminal screws so the conductors are held securely. The wires should not slip out if gently tugged. At the same time, make sure there are no loose copper strands escaping from the terminal, because even a small exposed strand can create a fault risk.
Step 8: Check the Fuse
Make sure the plug contains the correct fuse for the appliance. In the UK, plugs normally use a BS 1362 fuse, and checking the manufacturer’s instructions if you are unsure about the correct rating.
Tighten the cord grip so it clamps the outer cable sheath, not the coloured inner wires. This is a crucial point when rewiring a plug.
Step 9: Refit the Cover and Test Carefully
Replace the plug cover and tighten the screw. Once the plug is closed, give the cable a light pull to check that it feels secure. If the plug does not close neatly, or if the cable looks pinched, reopen it and correct the layout. After that, the appliance can be tested in normal use.

Safety Considerations When Wiring a Plug
Wiring a plug may look like a small job, but in the UK it still needs to be treated seriously.
Always Unplug the Appliance First
Before doing anything, make sure the appliance is completely disconnected from the mains. Never open, rewire, or inspect a plug while it is still connected to a socket. This is the most basic safety step, but it is also the one that prevents the most obvious risk.
Use a Proper UK Plug
If the old plug is damaged, replace it with a plug that meets British standards. Choosing a replacement marked BS 1363 and carrying an approval mark such as the BSI Kitemark, ASTA Diamond, or Nemko N.
Check the Plug for Damage Before Rewiring
Do not rewire a plug that is already unsafe. The plug casing should not be cracked, the pins should not be bent, and there should be no loose parts, visible burning, or signs of overheating.
Make Sure No Bare Copper Is Left Exposed
When the wires are stripped and connected, the copper should sit neatly inside the terminals. There should not be loose strands or exposed bare wire outside the terminal screws. A tidy internal layout is not only neater, but also much safer because it reduces the chance of short circuits and poor connections.
Secure the Outer Cable with the Cord Grip
One of the most important UK plug safety checks is the cord grip. The outer covering of the cable should be held by the cord grip so that no coloured cores are visible from outside the plug. A plug should not be wired and then used with equipment that already shows signs of burning, heat damage, or worn cable insulation.
Good plug wiring is easier and safer when you can clearly see what you are doing. Assessing the environment, the equipment being used, and the precautions needed to control risk.
For situations where you need portable electricity without rewiring anything, a Jackery Portable Power Station can be a practical option for both indoor backup use and outdoor activities.
Jackery Portable Power Stations Explained
A Jackery Portable Power Station is a practical choice when you need a socket indoors or outdoors without relying on fixed mains access. For many people, that means backup power at home during an outage, extra sockets in the garden, reliable charging in a camper, or portable electricity at a campsite.
Rather than depending on worn extension leads, uncertain outdoor sockets, or makeshift charging arrangements, a portable power station gives you a dedicated power source designed for portable use. It uses pure sine wave inverter technology, which is designed to provide smooth and stable AC output similar to a standard wall outlet.
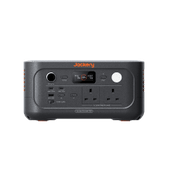
Jackery Explorer 3000 v2
The Jackery Explorer 3000 v2 is uniquely suited for the UK market because it functions as a "bridge" between a portable outdoor power station and a fixed indoor backup system.

Safe Indoor Use: The No-Fume Alternative
Unlike traditional petrol or diesel generators commonly used in the UK for backup, the 3000 v2 is 100% emission-free. It can be operated inside a kitchen, living room, or even a bedroom without any risk of toxic fumes.
Whisper-Quiet (27dB): In the UK’s often terrace or semi-detached housing where noise travels, the "Silent Mode" ensures you aren't disturbing neighbors while running a fridge or boiler during an outage.
The "UPS" Indoor Wiring Advantage
The 3000 v2 features a <20ms UPS (Uninterruptible Power Supply) function. You plug the Jackery into a UK wall socket (AC Input) and then plug your critical appliances (fridge, Wi-Fi router, or boiler control) into the Jackery.
If the National Grid goes down, the 3000 v2 switches to battery power so fast that your devices won't even "blink" or restart. This makes it a safer, simpler alternative to complex permanent battery installs for protecting electronics.
Outdoor Safety & Durability
While it is an indoor-safe "silent generator," it is built with the ruggedness required for the UK's unpredictable weather. The unit is rated to handle dust and light water splashes, making it safe for use on a damp patio or while gardening in typical British "mizzle."
CTB (Cell-to-Body) Structure: This EV-grade manufacturing makes the unit more shock-resistant. If you're moving it from the lounge to the garden or into a caravan, the internal battery cells are protected from the vibrations of travel.
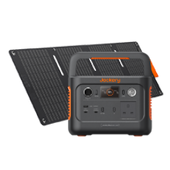
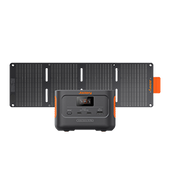
Jackery Explorer 2000 v2
The Jackery Explorer 2000 v2 is often chosen over its larger sibling specifically when flexibility and ease of movement are higher priorities than total raw capacity. It is designed to be a "dual-purpose" unit that transitions seamlessly between being a fixed indoor backup and a highly portable outdoor companion.

"Grab-and-Go" Portability
The 2000 v2 is approximately 35% lighter than most 2kWh stations on the market. At 17.5 kg, it is roughly 10 kg lighter than the 3000 v2.
While the 3000 v2 is often treated as a "semi-permanent" fixture once placed, the 2000 v2 is easy enough to carry from the upstairs office (to protect a PC) down to the garden for some DIY power tool work or into a caravan for a weekend trip.
Seamless Indoor Safety (UPS Function)
Like the 3000 v2, the 2000 v2 is fully certified for indoor use in the UK (CE and UKCA). You can safely keep it "wired" between your wall outlet and critical electronics like a Wi-Fi router, a fridge-freezer, or a CPAP machine. If the grid fails, it takes over in less than 20 milliseconds, ensuring your devices don't restart.
Via the app, you can enable "Silent Mode" (≤30dB), making it quiet enough to keep in a bedroom or home office without the fan noise becoming a distraction.
Fast Recovery Times
The 2000 v2 is built for rapid turnaround, which is essential during winter months in the UK when power cuts might be frequent or sunlight is limited.
AC Wall Charging: It can charge from 0 to 100% in about 1.7 hours from a standard UK plug.
Emergency Super Charge: Through the Jackery App, you can activate a "Flash Charge" mode that hits 80% in just 52 minutes—perfect if you hear a storm warning and need to top up quickly.
FAQs
The following are frequently asked questions about wiring a plug in the UK.
1. Single- or three-phase wiring?
Most standard UK household plugs are used with a single-phase supply, not three-phase. Three-phase wiring is more common in industrial, commercial, or high-load settings where equipment is connected across L1, L2, and L3 rather than a normal domestic plug. In a typical UK 3-pin plug, you are dealing with live, neutral, and earth, not a three-phase arrangement.
2. Can you wire a plug with two wires?
Yes, some plugs can be wired with two wires if the appliance is double insulated and does not require an earth connection. In that case, the two wires are usually brown to Live (L) and blue to Neutral (N). However, if the appliance is designed to use an earth, you should not leave that connection out.
3. Which wires go to L1 and L2?
L1 and L2 are usually labels used in multi-phase or other non-standard wiring contexts, not in an ordinary UK 3-pin household plug.
In a normal UK plug, the terminals are marked L, N, and E. In three-phase systems, labels such as L1, L2, and L3 refer to separate live phases, and those systems should not be confused with standard plug wiring.
4. Which wire goes in a 3 pin plug?
In a standard UK 3-pin plug, the wiring is:
Brown: Live (L)
Blue: Neutral (N)
Green and Yellow: Earth (E)
This is the standard UK colour code for modern plugs, and the fuse should also be the correct BS 1362 size for the appliance.
Final Thoughts
Wiring a plug properly is one of those small skills that can make a real difference at home. It helps you deal with damaged plugs, understand appliance safety more clearly, and use UK electrical equipment with more confidence. Once you know the wire colours, terminal layout, fuse role, and basic safety rules, the process becomes much easier to follow.
For times when you simply need dependable power in a safer and more convenient way, whether indoors during an outage or outdoors on the move, a Jackery Portable Power Station is a practical solution worth considering.


